When we ran the story of Battlezone played on tube displays earlier this week there were immediately questions about recreating the hack. At the time the software wasn’t available, and there is also a bit of hardware hacking necessary to get the audio working. You asked and [Eric] from Tubetime delivered. He’s posted a pair of articles that show how to get an STM32F4 Discovery board to play the classic game, along with instructions to build the firmware.
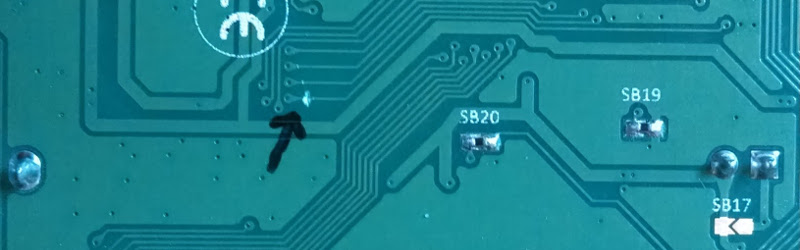
The hardware hack in this case is untangling the pinout used on the discovery board. It seems that one of the lines needed to get sound working for this hack is tied to one of the two DACs. If you read the original coverage you’ll remember that both of the DACs are used to drive X and Y on the vector display. The image above shows a cut trace on the bottom of the board. You’ll then need to route that signal to an alternate pin by soldering a jumper wire from the chip to a resistor on the board.
This (as well as one other alteration that bridges two of the chip pins) is a great example of work you should be unafraid to do on your own dev boards. We’ve had to do it with the Launchpad boards to get at the functionality we needed. We’d like to hear your own epic stories of abusing dev boards to do your bidding. Let us know in the comments.


Does anyone have a main.axf file for battle zone already compiled?
main.axf cannot be provided as it contains copyrighted Atari binary code. But, you can build main,axf, the ruby script make calls will look for the rom code and bind it accordingly.
These people’s work is so astounding we are all left speechless..
Highly recommended reading – their blog!