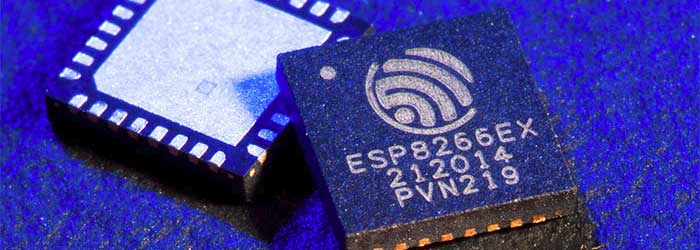
In August of 2014, something new started showing up in the markets of Shenzhen, the hi-tech area of China where the majority of the world’s electronics components are made. This is the ESP8266, a WiFi SoC (System on a Chip) that can connect to 802.11b/g/n networks on the 2.4GHz band. It can be addressed with SPI or a serial connection, and has an AT command set that makes it behave rather like an old-style modem. Basically, it has everything you would need to connect a device to a WiFi network, with the ESP8266 chip itself handling the complicated business of finding, joining and transmitting/receiving over a WiFi network.
That’s nothing particularly new in itself: WiFi connection devices like the TI CC3000 have been around for longer, and do much the same thing. The difference was the price. While the TI solution costs about $10 if you buy several thousand of them, the ESP8266 costs less than $7 for an individual board that can plug straight into an Arduino or similar. Buy the chip in bulk, and you can get it for less than $2.
The ESP8266 is more than just a WiFi dongle, though: it is a fully fledged computer in itself, with a megabyte of flash memory and a 32-bit processor that uses a RISC architecture. This can run applications, turning the ESP8266 into a standalone module that can collect and send data over the Internet. And it can do this while drawing a reasonably low amount of power: while receiving data, it typically uses just 60mA, and sending data over an 802.11n connection uses just 145mA. That means you can drive it from a small battery or other small power source, and it will keep running for a long time.
It wasn’t an easy ship to write applications for in the early days, though: it was poorly documented and required a dedicated toolchain to work with. This made it more of a challenge than many hackers were comfortable with. That changed earlier this year, though, when the Arduino IDE (Integrated Development Environment) was ported to the chip. This meant that you could use the much easier to write Arduino functions and libraries to write code for the chip, bringing it within reach of even the most casual hacker.
Why Is the ESP8266 Important?
The ESP8266 almost achieves the holy trifecta of electronics: cheap, powerful and easy to work with. Before this, if you wanted to add a wireless connection to a project, you had to use more power-hungry devices like USB WiFi dongles, or squish everything into a serial connection and use a wireless serial link. Either way added to the complexity of the project: you either needed a system that supported USB and had WiFI OS support, or you had to put up with the limitations of wireless serial links, which typically offer very limited bandwidth.
The advent of WiFi SoCs removed these limitations because the SoC did the heavy lifting, and WiFi offered much more bandwidth. And the ESP8266 did this all at a very low cost: do some digging on eBay and you can get an ESP8266 board for less than $2. So, it is no surprise that we are starting to see the ESP8266 showing up in commercial products.
How Can I Use the ESP8266?
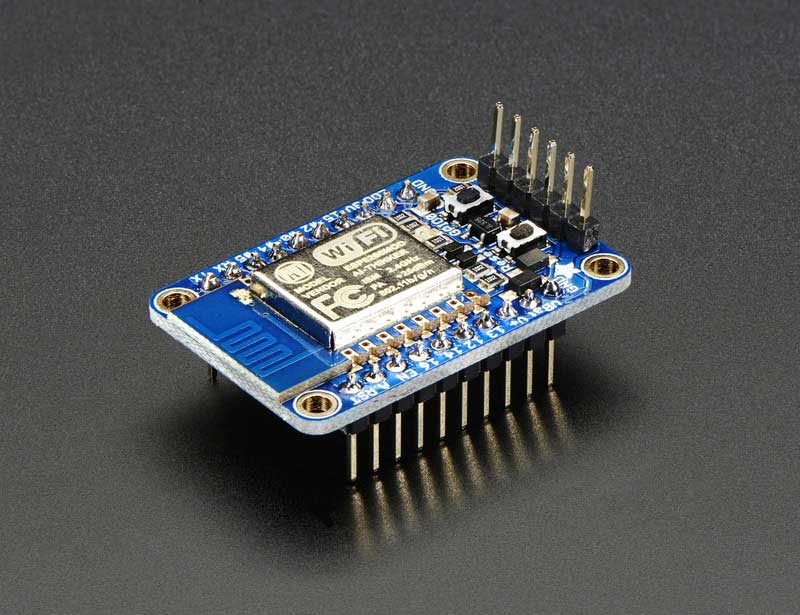
With the popularity of the ESP8266 for adding WiFi to projects, it is no surprise that there are a lot of options for trying it out. On the hardware side, ESP8266 development boards are available from a number of places, including Seeedstudio, Sparkfun and Olimex. Adafruit also has a nice ESP8266 board that breaks out all of the signals for easy breadboard use, and adds a 3.3V output, so it can drive an external device. It is also FCC approved, which is important if you are looking to sell or use the devices you build commercially. Some users have also been building their own development boards, which add features such as LCD displays and buttons.
On the software side, the easiest way to get into the ESP8266 is to use the Arduino compatible mode. This involves loading custom firmware that turns the chip into a mid-range Arduino board, which makes for much easier programming. The people behind this project have produced a list of supported ESP8266 boards: buying one of these will make the installation process easier, as they have noted which data lines in the Arduino SDK correspond to the physical pins on the board. These boards also provide easy access to the reset lines that you have to use to install the Arduino compatible firmware.
This does include some limitations, though: it is rather complicated to upload new sketches over WiFi, and you can’t produce multiple PWM signals, which would make controlling multiple devices difficult. To get access to the full capabilities of the ESP8266, you’ll need to go to the source, and use the SDK that the manufacturers offer. [cnlohr] published an in-depth guide here on Hackaday for bare-metal programming the ESP8266 which was mentioned earlier. Espressif also offer a pretty good getting started guide that covers creating a virtual Linux machine and connecting this to their chips.
The third option is to flash NodeMCU to the ESP8266 module. This turns it into a Lua interpreter. Scripting can be done in real-time to prototype your program, then flashed to the EEPROM to make your program persistent and remove the need for a serial connection.
Beginners will be comfortable with both the Arduino and NodeMCU approaches, but experienced users should be able to wade straight in and start writing code for this cheap, powerful and fairly easy to use chip.


ESP8266 is a great module.
I suggest you this also great application: Fishino.
Fishino is an Arduino compatible platform with WiFi, RTC and SD card, ALL in ONE.
But Fishino uses a modified version of ESP8266 module. The firmware inside the wifi module is modified to comunicate with ATmega328 using SPI. This guarantees a communication speed higher than the native serial communication.
More info about this project are available on
http://www.open-electronics.org/fishino-arduino-become-wireless/
http://fishino.it/en/
For the price of Fishino (29,99EUR) one can get Teensy 3.2 and 1-2 ESP8266s. Or few Arduino clones with ESP8266s to match. 7 such sets in my country for the price of one Fishino..,
Yes, but you forgot to consider the embedded SD card and RTC, and the performance of SPI interface on ESP module.
And that on this board you can put any Arduino shield without problems. I doubt you can do the same on a Teensy :
http://fishino.it/en/documentazione/pighixxxs-pinouts/
You can also buy a Banana PI for 13$, if you need a nice media player :-)
They’re simply different products.
If you get the Teensy 3.1 and a normal 32kHz watch crystal you can use the Teensy’s built-in RTC function.
As for the SD card interface: does it use the ATmega328’s SPI bus? If so, then you would be sharing that bandwidth with between the SD card and the ESP8266. The Teensy 3.1 has multiple hardware SPI busses, so it would actually offer better speed, not to mention its faster clock frequency, which also results in faster SPI communication.
I’m not sure what an SD card interface would cost or how that would compare with the Fishino, though.
Well, in a non-multitasking environment, sharing an SPI bus is not a concern, IMHO. Atmega328’s SPI bus has an 8 MHz speed, which is not enormous but some 80x the speed of normal ESP8266 using serial port.
Even considering the overhead of SPI procotol you’ve a great speed enhancement.
Of course, we’re speaking about an arduino-like board, not a linux one.
IMHO it should be compared to Arduino + WiFi shield + RTC module + an external 3.3v regulator. Which are together by far more expensive. Of course, if you get a 4$ UNO clone + 3$ ESP module + 2$ SD card module + 2$ RTC module + 1-2$ 3.3v regulator you spend some 13$, but then you’ve to add level shifters, wiring and you get low WiFi performances over serial interface. I see the price quite fair for an all-in board.
My fav website for the ESP8266 is http://www.esp8266.com, its crazy good and has tons of info, I first saw fishino on there and saw the high price already.
Unfortunately (as far as I know) ESP8266 does not support Ad-Hoc networks withch makes it next to useless in building mesh networks. Am I wrong?
Originally that was the case but in newer versions of the SDK this became supported.
You are right – it does not support ad-hoc. But it’s not useless for mash as it supports a mode when it runs as AP and client at the same time – prividing much better mash capabilities than ad-hoc.
Is that so? Can one MCU connect to many others (all working in AP+client mode)?
Take for example B.A.T.M.A.N. routing protocol. It works in a ad-hoc networks and relays on limited range of each node broadcasting its presence. In case of AP+client mode you need to constantly scan and maintain connections. It does not seem very efficient at first glance.
No, but it works in SUPERMAN configuration without any modification.
I can confirm it can run as AP+STA mode, but it’s not really stable in that mode. The best use is station mode, with AP mode as an emergency mode if no other accessible AP is available
Oh, and MicroPython! BTW, somebody had a chance to work with it?
Yea. building and uploading the source is really easy with the latest SDK.
But the Python interpreter is accessible through the UART link. What I wanted was to telnet into the interpreter. Would be cool to see that functionality.
Yes. It doesn’t support much in the WiFi area yet.
The ESP8266 implementation of Micropython is basically not much more than a proof of concept, and there doesn’t seem to be much interest in continuing its development (especially since one of the contributors to Micorpython has a product on kickstarter that directly competes with thsi). At the moment you have the basic GPIO and ADC working, together with the basic network sockets (in station mode, but there is a trick to get it into AP mode too). There is no timer support, and no way to have your program run its main loop while still having all the wifi stuff working (you have to return to the prompt to have all the events processed). Also the size of the python program you can run is severely limited. I wouldn’t count on Micropython as the main development option for this platform.
HackaDay Dictionary?
HackaDay Encyclopedia?
Hactionary?
Encyclopediack? Hacklopedia?
Hah, my original title was “Hackaday explains” but Mike suggested “Hackaday Dictionary”. My other alternative was “Encyclopaedia Hackadayica”
I think your other alternative is better than “printerer”
There is a new ESP-12 module out calling itself the ESP-12F. Any word yet on if it is really any better than previous ESP-12s?
http://www.esp8266.com/viewtopic.php?f=5&t=5520
the link they post to the product says “authenticity guaranteed”….. does that mean there are already ESP chip clones?
No but fake may exist(just the metal case with nothing inside).
http://www.esp8266.com/wiki/doku.php?id=esp8266-module-family also shows you how to know if the ESP12 is 1M,2M,4M types these 12’s are getting confusing
@Nathan , I didn’t find any indication of flash size on the provided link. :-(
Read the third paragraph of that page.
Anyone found a simple fail proof method to get theses things working in osx?
Nothing is ever “fail-proof”, especially on a website called Hack-A-Day. It’s part of the experience!
I thought that was reserved for the “Fail of the week” posts
I think they have a way, way too weak CPU on board to run OSX. Your best bet is with the firmware written specially for them.
https://www.youtube.com/watch?v=bcYppAs6ZdI
Don’t give up your day job, because as a support assistance “Your Fired!”
[img] https://siliconbeach-media.s3.amazonaws.com/legacy/blog/uploads/2012/10/alan-sugar-youre-fired.jpg [/img]
/\ Fail of the week /\
I’m not sure what method is failproof, but i ordered a handful from ali express, used a $9 serial converter from amazon, installed cp2101 driver, flashed with esptool and programmed with esplorer and it has never failed to work. That is until I shorted 120v to the 3.3v bus. esp-12 survived, mac survived, but i needed to order another serial converter…apparently not totally failproof.
I am using the ESP8266 with nodeMCU. This uses the Lua language. I like the fact that they support MQTT and COAP protocols and have some JSON support which is great for small IOT projects. Unfortunately the COAP implementation is not yet ready for primetime but when it is, it will be a great platform for simple objects such as temperature sensors, power switches etc. I would love to have node.js support, though!
I got one of those for my daughter, along with the other parts for this, http://www.instructables.com/id/A-very-cheap-ESP8266-WiFi-smart-car-controlled-by-/ except we already had a different type of motor driver board.
It was a case of “Dad can I have a dog”, no, “Awww, can I have a robot then?” OK but only if you make it yourself, “Sweet!”
Parenting done right!
As this seems to be a bit of a point-of-reference for ESP8266 newbs, a quick implementation/conceptual question:
For the various firmware reprogramming methods (including everything from arduino to bare-metal) there’s still a need to access the various protocols… wifi, TCP/IP, whatnot… So, when reflashing this chip, does that code come as a library, or is it hard-coded? What does the “user”/firmware-code-level interface to these things look like, once the AT commands are removed?
I’d prefer the EMW3162-P myself, which is the ARM alternative http://www.amazon.com/EMW3162-P-Module-Broadcom-STM32F205-Antenna/dp/B00OUIER98
For those who can wait
http://www.aliexpress.com/item/EMW3165-Cortex-M4-based-WiFi-SoC-Module-can-used-for-WIFIMCU-DIY-toy-metal-aluminium-alloy/32449975568.html?spm=2114.01020208.3.2.lKUgRW&ws_ab_test=201556_7,201527_3_71_72_73_74_75,201409_2
http://www.seeedstudio.com/depot/EMW3165-CortexM4-based-WiFi-SoC-Module-p-2488.html
In stack and a little cheaper.