Modern DSLR cameras are amazing devices. Mechanics, electronics, and optics, all rolled up in a single package. All that technology is great, but it can make for a frustrating experience when attempting any sort of repair. Lenses can be especially difficult to work on. One misalignment of a lens group or element can lead to a fuzzy image.
[Kratz] knew all this, but it didn’t stop him from looking for a cheap lens deal over on eBay. He found a broken Nikon DSLR 55-200mm 1:4-5.6 AF-S VR camera lens for $30. This particular lens is relatively cheap – you can pick up a new one for around $150 online. Spending $30 to save $120 is a bit of a gamble, but [Kratz] went for it.
The lens he bought mostly worked – the auto-focus and vibration reduction system seemed to be fine. The aperture blades however, were stuck closed. Aperture blades form the iris of a lens. With the blades closed down, the lens was severely limited to brightly lit situations. All was not lost though, as the aperture is a relatively simple mechanical system, which hopefully would be easy to repair.
 Keeping screws and various parts in order is key when taking apart a lens. [Kratz] used a tip he learned right here on Hackaday: He drew a diagram of the screw positions on a thick piece of paper. He then stuck each screw right into the paper in its proper position.
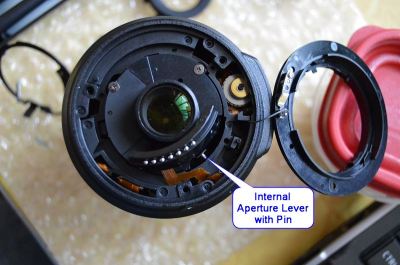
Carefully removing each part, [Kratz] found a pin had slipped out of the rod that connects the lens’ internal parts with the external aperture control arm. Fixing the pin was simple. Getting the lens back together was quite a bit harder. Several parts have to be aligned blindly. [Kratz] persevered and eventually everything slipped into alignment. The finished lens works fine, albeit for a slightly noisy auto-focus.
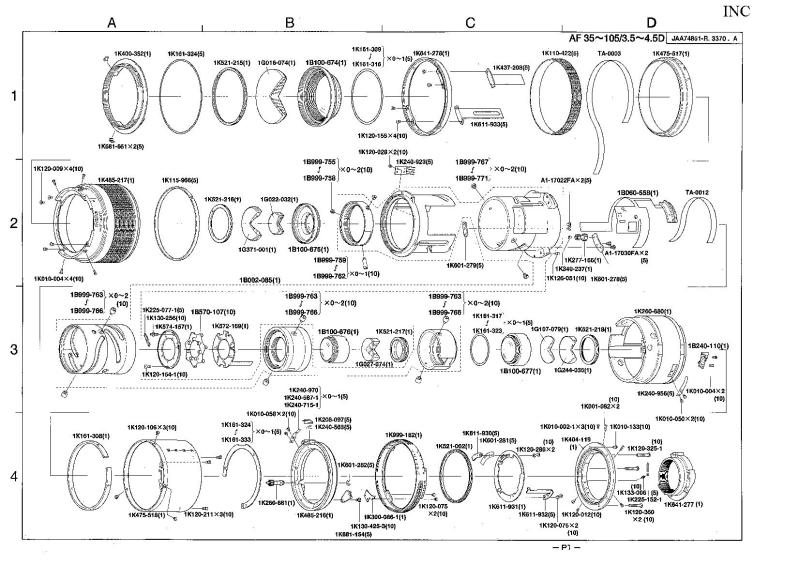
It’s worth noting that there are service and repair manuals for many cameras and lenses out there in the dark corners of the internet, including [Kratz]’s 55-200 lens. Reading the repair procedures Nikon techs use shows just how many tools, fixtures, and custom bits of software go into making one of these lenses work.


Is there a link to the guys teardown or is this it?
I know there are various youtubes on modifying lenses like this, it’s interesting to see how they crammed all that stuff into the lens and the solutions the manufacturers thought up which can differ quite a bit among who made the lens.
http://burnt-traces.com/?p=460
I didn’t go much farther than removing the back to repair the aperture arm sonce i waneed to use this one. I am working on a more complete teardown of a different lens. But that said there are probably much better ones on youtube.
I have done this before for my nikon. It is some what of a gamble buying one online broken and crossing fingers to see if it can be fixed. The one i bought for 10 bucks was dropped and couldn’t adjust the lens length but the auto focus, VR-II, and iris was all fine. Opened it up and found that when it was dropped a pin broke from the housing and a little super glue fixed it. Now it is one of the lenses I use a lot and for a few dollars, some time and a lot of patience, I saved some money and kept something from ending up in the land fill. FYI, Anyone out there looking to do this, there are some sites that have some of the parts to fix these lens to and at not to bad of a price.
Has that Super-Glue fix held up well for you? I would be concerned about out-gasssing from the glue fogging the lens. (After all, all the CSI TV shows use super-glue vapor to uncover latent fingerprints.) Years ago on a project I was on, the optics guy was downright paranoid about us using only low-out-gassing adhesives in the box, and that mostly nixed cyanoacrylates (super-glue) and silicone RTV.
To those who will see this: Is there a fix or abatement to moisture-damaged coated lenses? I was given a Minolta SRT MC last year, complete with standard and zoom lenses, which had been stored in a high moisture environment. The shutter mechanism is *not* frozen, and doesn’t appear to be dragging (without running film through it of course, it’s anyone’s guess). Of Course the light meter is long deceased, but there is also streaks and runnels of what looks like mildew along the glass, inside and out, of all the lenses :-( If I could so disassemble these lenses, is there some solution that would completely remove the coating, to achieve a “fair” if damaged lens? Or is the consensus that the moisture would have eaten into the optics itself as well, or that these lenses are useless without their coatings intact? I assume these are so prolific they are currently considered nearly worthless now in damaged condition, so there would be no harm in attempting a fix.
The coating is µm thick, usually having many layer. I would imagine that is beyond economical repair (at least if you want it near mint condition). Removing the coating entirely may be achieved, but I really don’t see any way to do it without damaging the lens further. Coating is usually used to reduce chromatic aberration, having an uneven coating will disturb the final picture.
Usually lens elements are dielectric coated for anti-reflection properties, with chromatic aberration issues addressed by judicious choice of glass types for their wavelength dependent index-of-refraction properties. I’d like to learn more about how they use coatings to correct chromatic aberration.
Sorry I can’t help with the lenses but the light meter might just be stuck. I got an SRT-102 a few years ago that hadn’t been used since the 80s, The light meter “didn’t work” but I opened it up and found that the needle had just stuck to the rubber bumper on which it rests while switched off. I gave it a nudge and it was back to working fine, the mercury batter even still worked. Just be careful of all the thread inside, the meter is operated by some seriously cool string/spring/cam mechanisms.
Generally no. Google “lens fungus”. The fungi that grow on the lens will excrete various substances, as do all living creatures, and some portion of these will cut the coatings and the glass itself. It is a well known and very real problem in optics, in particular camera lenses and microscopes for field use. Once damaged, there is no fix, as the lens itself is etched,
I have taken apart and been doing cleaning on older lenses a few times. Mostly older non-zoom lenses that are easier to work on. If it looks like mildew, it is probably is. As long as it has not eaten into the lens coating, it might be possible to salvage by taking it apart and clean all lens elements and internals thoroughly with diluted acetic acid which will kill the mold. You could also try to kill it with UV light, such as a lamp used for exposing PCB’s. Left alone, the mold will eat into the lens coatings and into the glass and destroy it completely. The coating is actually fused with the glass; there is no sharp boundary where the coating stops and the glass begins. Thus it is not possible to remove lens coating without severely damaging the lens elements. Even if there is minor damage from mold on the coatings it is probably better to just clean lens elements and leave them as they are rather than to try and polish off the lens coatings.
+1 to that… Furthermore there is an art to cleaning optical glass wear, and lots of good information is available on the web to help you.
It requires a lot of patience to get a really perfect result. Having said that, it is very satisfying to get perfect, sharp results from something that initially appeared to be beyond repair.
I have a couple of dumpster dived microscopes that are every bit as good as my expensive (2nd hand) Olympus. See here for a little more about them https://hackaday.io/project/2222-adding-a-light-touch-to-a-classic-microscope
Cleaning the prisms to optical perfection probably took a couple of hours. Therefore it probably wouldn’t make commercial sense to fix some of these things, but from a personal satisfaction perspective they are well worth it.
Thanks! I also happen to have a small B&L student microscope that a cousin of mine had in college in the late ’20s. I’ve never known how to start on cleaning that one, but the “lint-free cloth and bamboo skewer” part of your microscope overview gives me a good bearing on which direction to go. I have that same clip-on cree as a work-issued flashlight. The “not worth commercial sense” thing goes double for the old camera I have, but yes, ‘personal satisfaction’.. Thanks to all who replied to my divergent-but-related camera inquiry–I *knew* you all would have good info!
It’s worth mentioning that many lens assemblies contain injection molded parts as opposed to housing/spacers/lens/retainers. If the injection molded subassembly fails the inert gas or vacuum will instantly take in moisture and fog up. So you want to make sure that mold is on a element thats accessible when you disassemble the lens.
Making a paperweight weight work again is an awesome feeling.
Side note. The right tools help:
Optiwipes
Optical grade acitone
Gloves
Good light