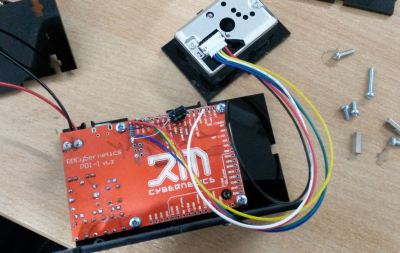
Handheld measuring devices make great DIY projects. One can learn a lot about a sensor or sensor technology by just strapping it onto a spare development board together with an LCD for displaying the sensor output. [Richard’s] DIY air quality meter and emissions tester is such a project, except with the custom laser-cut enclosure and the large graphic LCD, his meter appears already quite professional.
For his build, [Richard] used a Sharp GP2Y1010AU0F dust sensor. This $11 device has a little hole, through which airborne dust particles can pass. On the inside, an infrared LED and a photodiode are arranged in a way that allows no direct light, but only light reflected by the passing by dust particles, to reach the photodiode. An accurately trimmed amplifier within the sensor package translates the diode’s photocurrent into an analog output voltage proportional to the dust density. With a bit of software wizardry, it’s even possible to differentiate between house dust and smoke by analyzing the pulse pattern of the output voltage.
 The development board used in this project, a PDI-1 (which stands for Programmable Device Interface) is [Richard’s] own design. Manufactured in the UK, it isn’t the cheapest, but it’s the part that makes this build a breeze. It’s basically an Arduino Nano with a lot of onboard peripherals, including a large graphic LCD, some buttons, a speaker, plenty of H-bridges, and a few more.
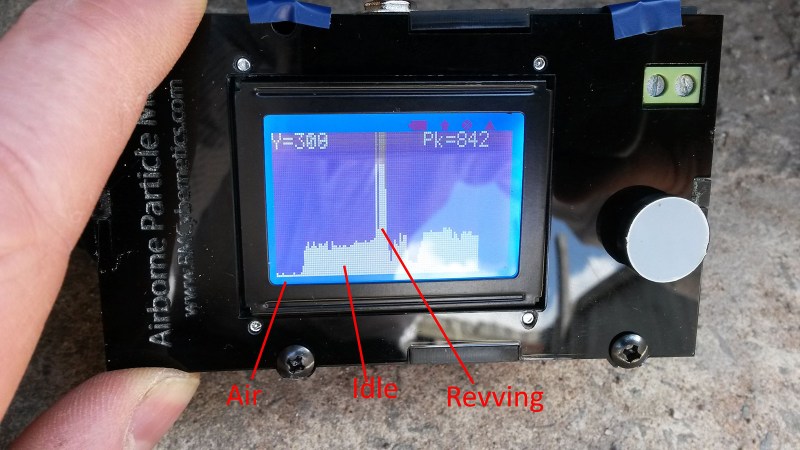
After bodge-wiring the dust sensor to the board and taking the enclosure out of the laser cutter, the hardware side of this project was almost done. A little fan was added to ensure airflow through the sensor. Eventually [Richard] wrote a basic firmware to display a graph of sensor readings on the LCD. A first test in the exhaust stream of his car, cycling through idling and revving as shown in the title image, suggests that the meter works as intended. Of course, air quality and emission testing depend on more parameters than just dust density, but if you want to replicate and extend this build, [Richard] provides you with all the Arduino compatible source files.


Fun project, thanks for sharing. The sensor specs are a vague regarding the minimum particle size but it does reference cigarette smoke.
The great thing about cigarette smoke (from a sensor stand point) is smoke density is relatively consistent with cigarette type and over the full smoke particle size distribution [1]. But the same isn’t true for automotive exhaust (see Figure 1)[2]. Smaller particle sizes are more hazardous from a health standpoint.
[1] http://www.bat-science.com/groupms/sites/BAT_9GVJXS.nsf/vwPagesWebLive/DOA29D5Z/$FILE/EAC_JMcA_2015_(2).pdf?openelement
[2]https://www.dieselnet.com/tech/dpm_size.php
They are using infrared light so as particle size gets to the order of magnitude of the wavelength the probability of scattering declines. There is no “minimum” particle size as such, just decreasing sensitivity.
Great job! I have a bunch of 6+ years old ionization type smoke detectors I just replaced. The alarm section is for one project, I think I could use the sensors for this.
Could make some wireless sensors around the fire pit.
I am concerned about the suitability of the sensor for automobile exhaust testing. Automobile exhaust is hot but the spec sheet doesn’t mention the upper temperature limit of the sensor. The spec sheet does mention that oil may condense on the sensor after which it must be cleaned.
Great tutorial Moritz/Richard. Including in our monthly newsletter going out today!