A few months ago, a very inexpensive 3D printer appeared on Monoprice. My curiosity for this printer was worth more than $200, so I picked one of these machines up. The Monoprice MP Select Mini is an awesome 3D printer. It’s the perfect printer to buy for a 13-year-old who might be going through a ‘3D printing phase’. It’s a great printer to print a better printer on. This printer is a sign the 3D printing industry is not collapsing, despite Makerbot, and foreshadows the coming age of consumer 3D printers.
The MP Select Mini isn’t Monoprice’s only 3D printer; the printer I bought was merely the ‘good’ printer in the good-better-best lineup. Since my review of the MP Select Mini, Monoprice has introduced their top of the line, the Maker Ultimate 3D printer. Monoprice asked if I would like to take a look at this offering, and I’m more than happy to oblige.
After a week of burn-in, I can safely say you’re not wasting your money on this $700 3D printer. It’s not a starter printer — it’s one that will last you a long time. 2016 is the beginning of the age of consumer 3D printers, and the Monoprice Maker Ultimate is more than proof of this.
Yes, It’s A Rebadge
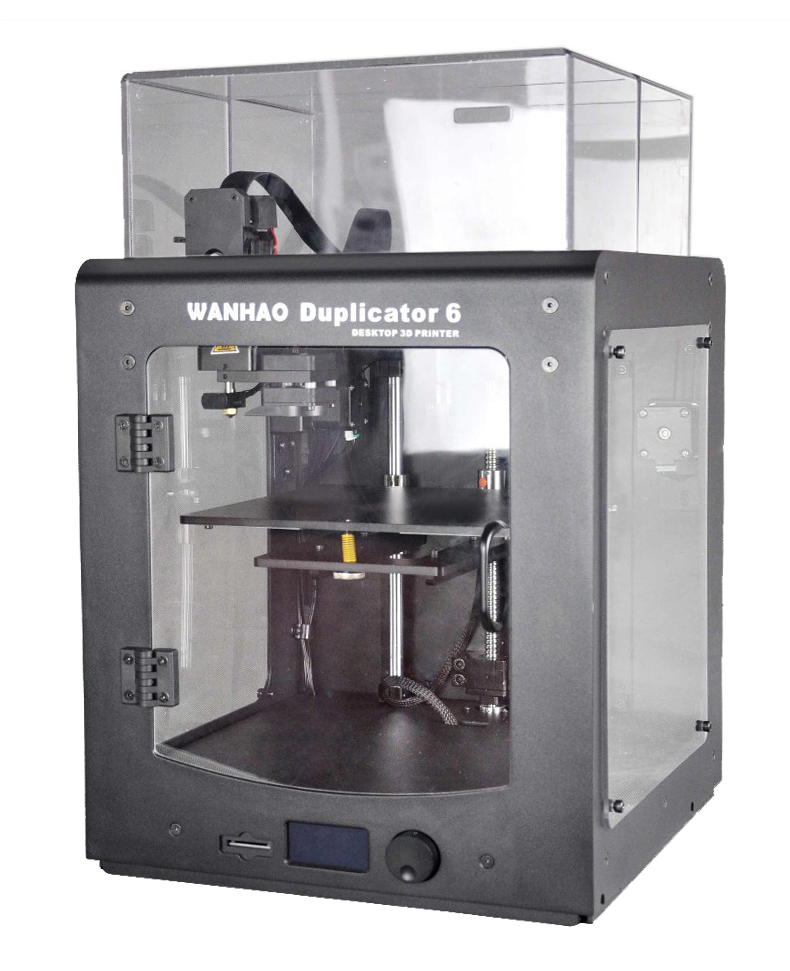
The Monoprice Maker Ultimate is a rebadge of the Wanhao Duplicator 6, and should be regarded as the same exact printer. The Monoprice sells for $700, whereas the Wanhao sells for $800, but the Monoprice does not come with acrylic panels for the sides and top of the printer. Other than that small difference, you’re looking at the same printer. Whether the addition of acrylic enclosure panels is worth the $100 markup depends on the user. Anyone with access to a laser cutter could easily make a replacement for these panels, and I eagerly look forward to those .DXF files appearing online shortly.
The fact that this is a rebadge of a Wanhao printer is a selling point. Wanhao has a rather large following because of their version of the i3, and with that following comes the availability of spare parts. My review of the low-end Monoprice printer, the MP Select Mini, lamented the fact that no spare parts were sold by Monoprice, and no distributor for the original manufacturer could be found in the US. At the very least, you can get parts for the Monoprice Maker Ultimate from the US distributor of Wanhao printers. This printer is also slightly more standardized than the built-to-a-price MP Select Mini, and replacement nozzles and hotends are available through the usual online retailers.
Specs, Construction, and Impressions
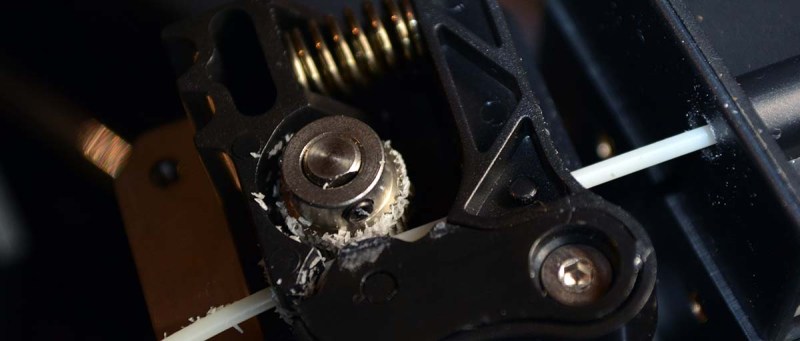
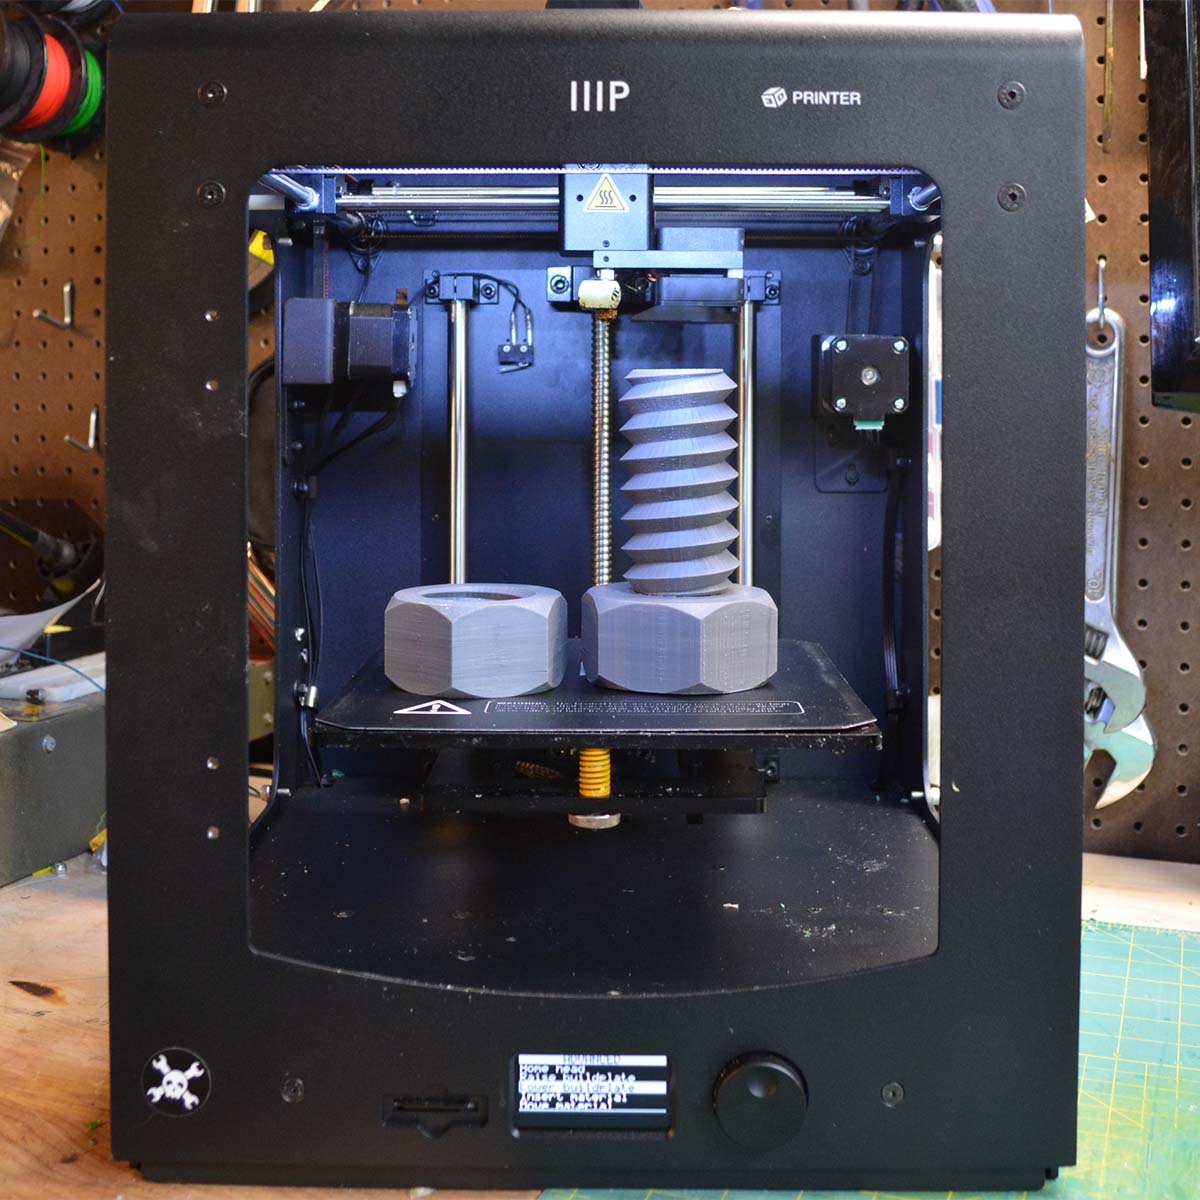 Let’s get one thing out of the way right now. This is an Ultimaker clone. The software menus for the OLED control panel are exactly what you would find on an Ultimaker. The mechanical setup for the X and Y axes are almost Ultimaker, except there are two cross-bars on the carriage instead of one. The Z axis is exactly the same, except the two ‘corner’ bed adjustment points are in the back, not the front. The only significant difference between the Monoprice Maker Ultimate and an Ultimaker is the extruder on the XY carriage. The Ultimaker uses a Bowden setup, whereas the Monoprice stacks a stepper and a direct drive extruder on the carriage. That’s it. That’s the only difference. With the extruder on the carriage, the top speed of this printer is theoretically lower than the Ultimaker, but I haven’t noticed any issues.
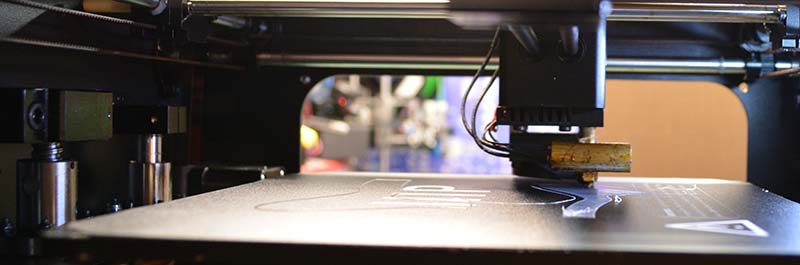
The enclosure for this printer is exceptionally solid. The front, top, and side of the printer are a single sheet of aluminum. The sides are welded on to this sheet, and all the components are attached to this very strong, very robust frame. The powder coat finish will hold up reasonably well. This printer is all about mass, and this design choice continues to the 1/4″ thick aluminum build plate. This aluminum build plate heats up fast compared to my 6″ square Printrbot Metal Simple, and all the electrical connections are solidly crimped and covered with heat shrink.
While I’ve only used this printer for about 130 hours in the week or so I’ve been using it, that is much more time per 3D printer review than I’ve seen at other usual outlets. It’s not accurate to say a week or so or run time is enough to properly assess a printer. For that, I would need months of print time, I’d need the nozzle to clog, and with any luck a few bearings would give out. I pushed this thing hard, though, grinded some ABS in the extruder, and put a few nice, deep marks in the replaceable build surface. I have come away with the impression this is a very robust 3D printer. It can handle daily use in a workshop and daily abuse in a classroom. It’s built to last, and I don’t see this printer going out of commission anytime soon.
The specs — as given in the manual, not the online spec sheet — list the build volume as 200 x 200 x 175mm. The position precision in the X and Y axes are 12.5 micron, in the Z is 5 micron. This is a printer built for 1.75mm filament, and comes equipped with a 0.4mm nozzle. Print speed is listed as 1- 300 mm/s, travel speed is 1-350mm/s. The printer weighs thirty pounds.
Sample Prints, Print Quality, and Capabilities
During testing, I only used the stock settings on the printer (changeable through the OLED display), and the suggested settings for Cura. These settings are more than sufficient to produce excellent quality prints, although I did have issues with stringing on retraction. That issue is easily cured with a bit of fiddling with the retraction settings in the slicer and by setting the temperature a bit lower.
For years now, the highest quality prints have always seemed to come out of an Ultimaker, and since this printer is effectively a clone of the Ultimaker, there’s a certain expectation I had in testing. I was not disappointed.
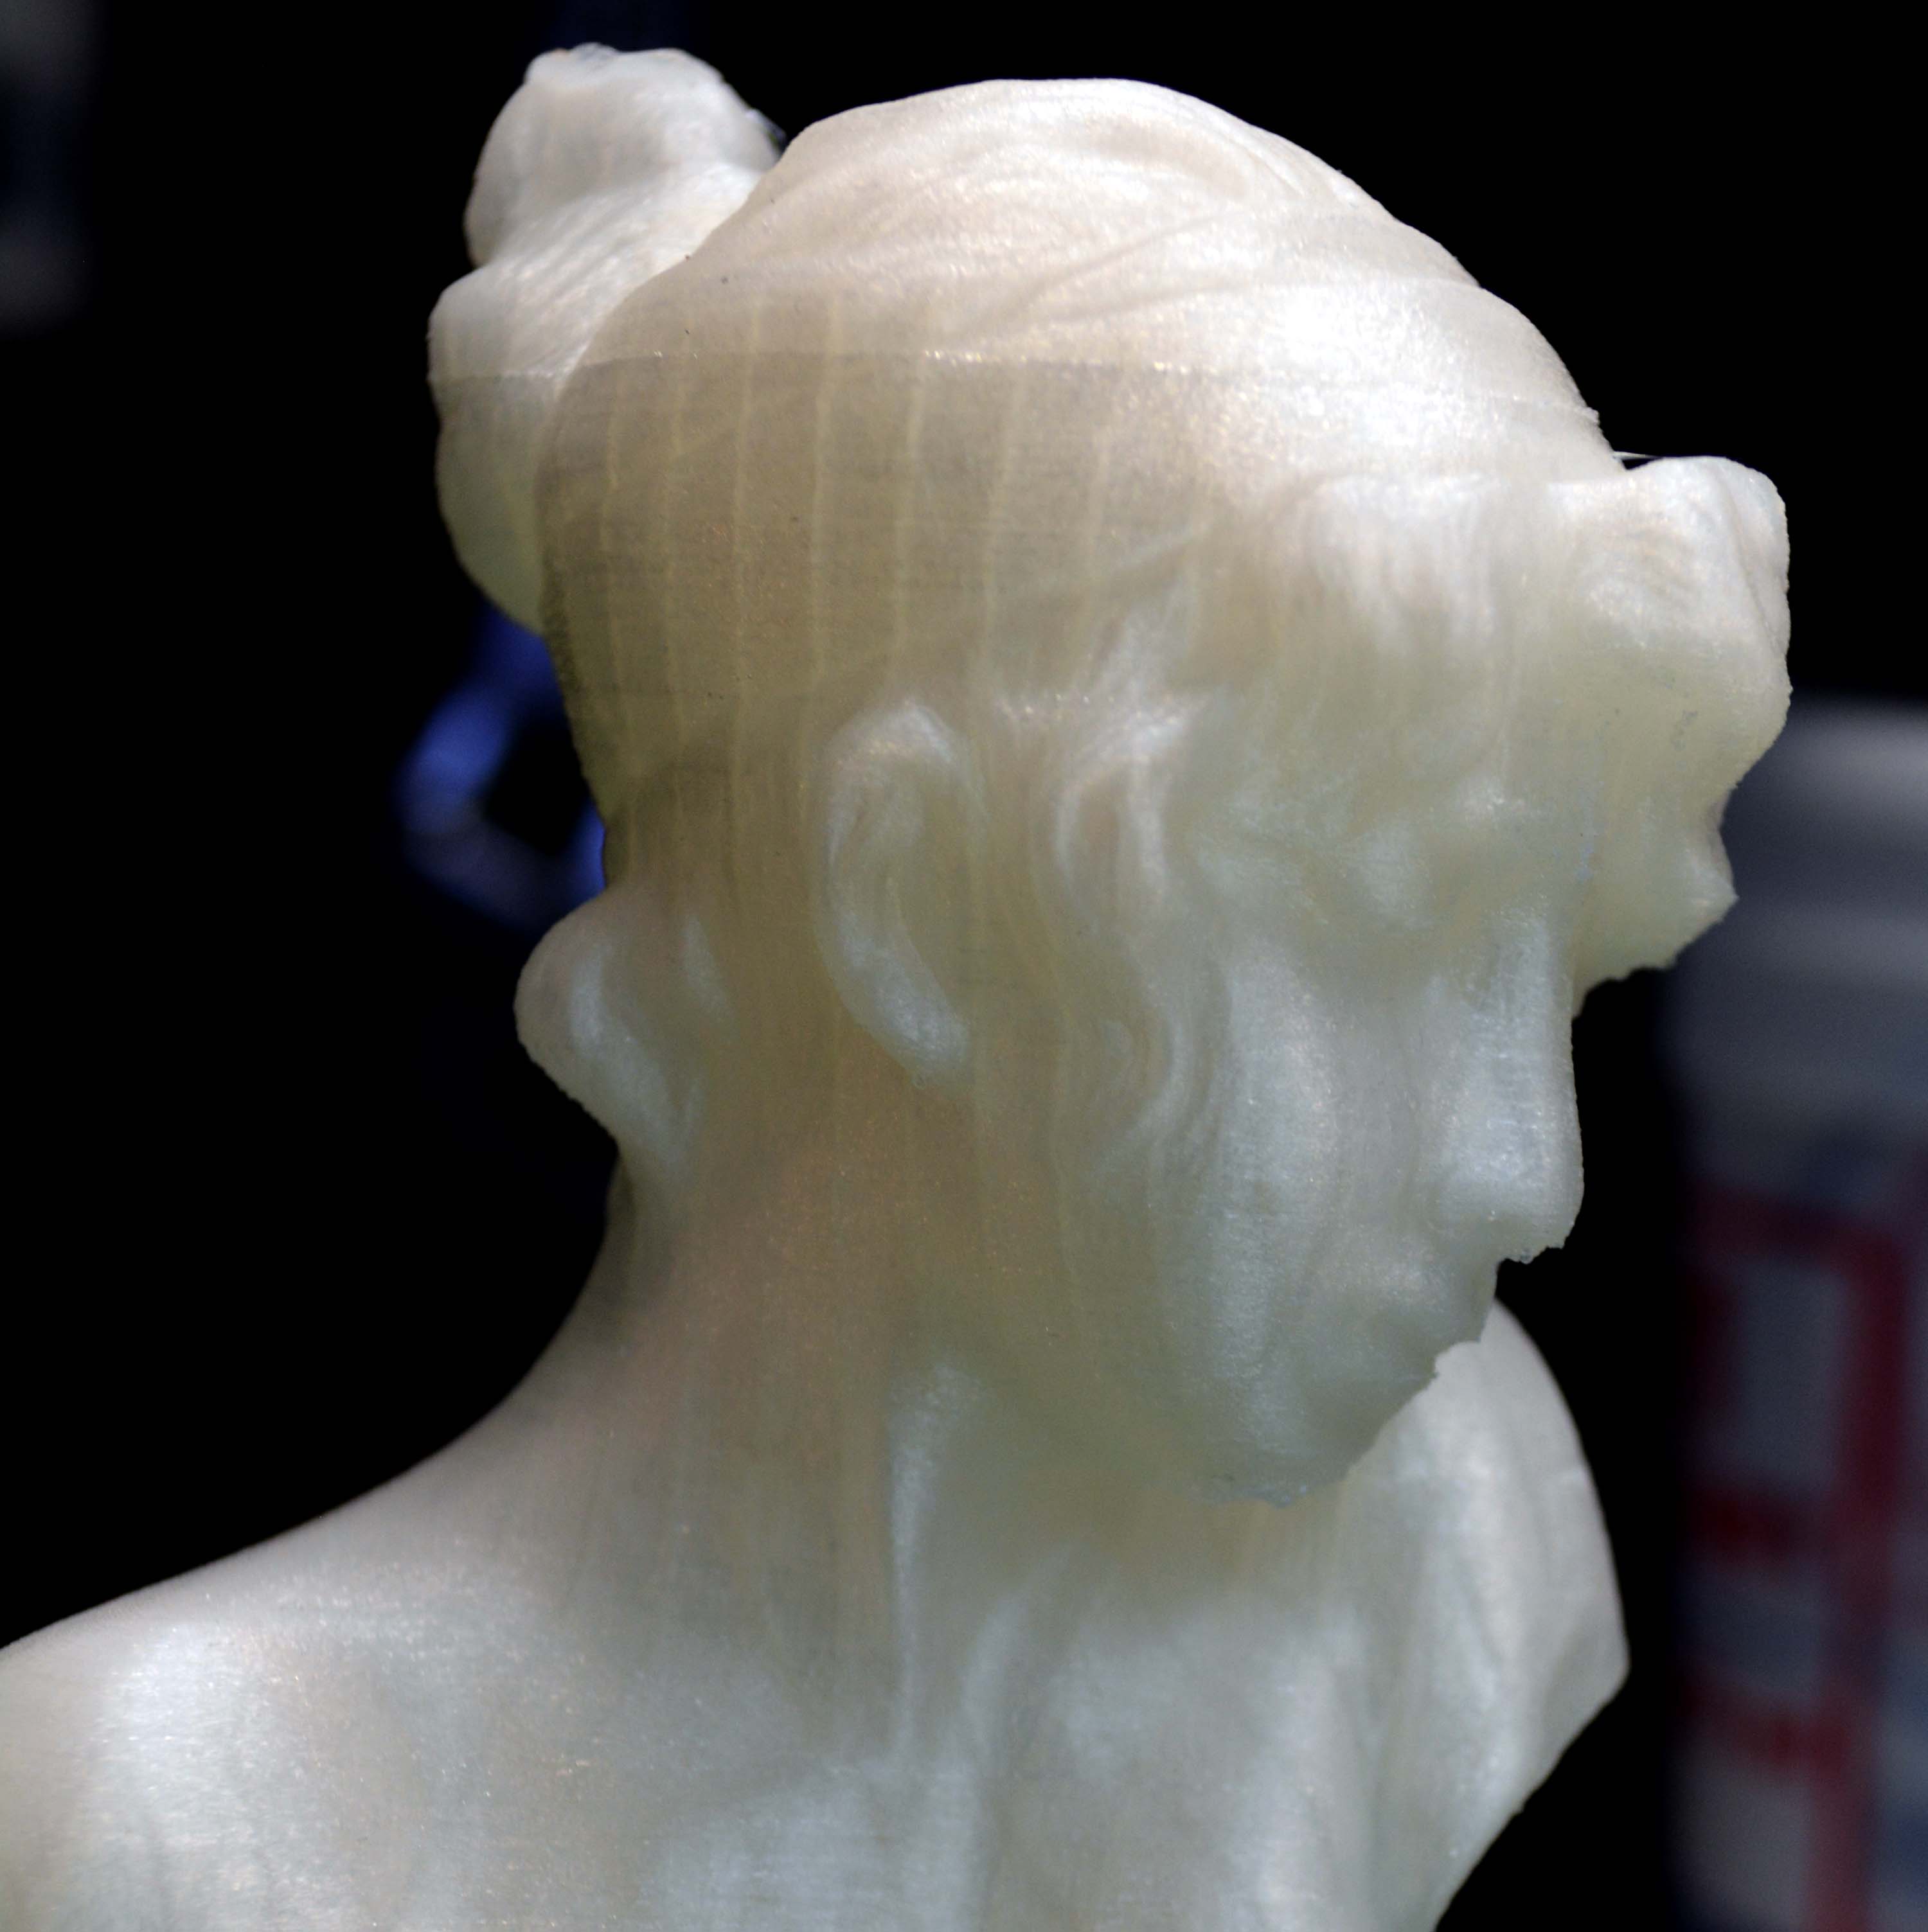
I believe machines that only move the bed in the Z direction invariably produce higher quality prints. Extremely well-tuned i3-style printers are the exception to this rule, but the Monoprice Maker Ultimate is what I would expect in this regard: very high-quality when printing at very small layer height.
Unlike the $200 Monoprice MP Select Mini, there was no Z-banding to speak of. The trapezoidal Z axis leadscrew was more than capable of moving the bed down to exactly where it needed to be, and the Ultimaker-style cartesian arrangement had very little slop in it.
This does not mean the printer is without its faults, though. One glaring oversight can be found in the fan used to blow air onto the freshly extruded plastic. There’s one problem with this fan: it doesn’t blow air onto freshly extruded plastic. Instead, it blows air a few centimeters to the right of the print.
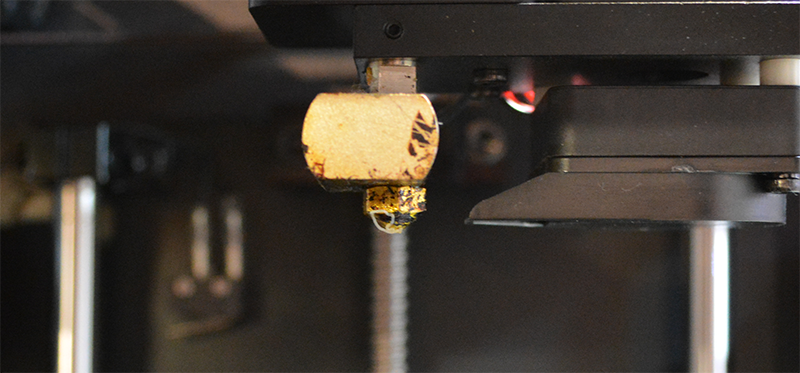
The best example I can come up with to demonstrate this filament-cooling problem is an overhang, and the Benchy tugboat I printed provides more than enough evidence that overhangs will be a problem with this printer. The duct for the part cooling fan can be taken off easily, and once I tear down this machine a bit more, I’ll start work on designing a better low-profile duct that blows air a little closer to the nozzle.
Aside from a problem with overhangs, this really is a printer with remarkable build quality. All sample prints were dimensionally accurate, the bow of the 3D Benchy was one of the best I’ve ever seen, and even the name on the back of this little tugboat was readable. Apart from an issue with retraction — a function of tuning, and one that is fixable with the right settings — I can easily see the potential for this printer to produce Ultimaker-quality prints.


As far as the bed is concerned, it’s acceptable, despite the limited information available on the build surface. The bed is aluminum, heated by a 24V PCB. It comes up to temperature quickly. This printer ships with an ‘adhesive sheet’, and the only data on what this build surface actually is comes from the Wanhao product description: it’s a “Wanhao Adhesive Sheet”. That’s not a lot of information, but it seems to be a perfectly acceptable build surface. ABS, PLA, PETG, and Ninjaflex sticks to the bed and the prints are easy to remove.
I’m a believer in a PEI build surface. It’s the build surface of the future, and the build surface I’ll eventually slap on this printer. That’s not to knock the ‘adhesive sheet’ that ships with this printer — it’s acceptable, even if it is a pain to remove. My advice, though, would be to ignore the spare build sheet included with this printer and spend $16 on a PEI sheet.
A Word On Speed And Acceleration
In the review for the Monoprice MP Select Mini, I called out Monoprice for not knowing what they were selling. In that particular case, it wasn’t a bad thing — the printer was better than what their spec sheet said. It could print at a much lower layer height than the stated 100 microns, and the product copy makes no mention of the ARM controller board. The MP Select Mini was undersold, which can only be the result of two mutually exclusive truths. Either Monoprice wants to undersell their cheapest printer to bump potential buyers up to the next best printer in their lineup, or Monoprice doesn’t have the institutional knowledge needed to properly assess or write copy for 3D printers.
Now, with two data points, it’s a little more clear which truth is more likely.
The online spec sheet for this printer says the printing speed of Monoprice Maker Ultimate printer is 150 mm/sec. This is fast, but comparable to a very well-tuned Ultimaker. The specs for this printer found in the product manual, however, list the top print speed as 300 mm/sec and the top travel speed of 350 mm/sec. This is a bit high.
Just to test things, I tried printing at 300 mm/sec. At this speed, and at a 0.1mm layer height, the nozzle is squirting plastic out at a rate of 12mm³/sec. This volume of plastic per second would be too much for a 12V heater, but the 24V hotend performed admirably — until the extruder started stripping filament, of course. You simply can’t push plastic out of a nozzle that fast, no matter what a spec sheet says. It may have worked at a lower layer height, but that brings us to another problem of high print and travel speeds: acceleration.

With the top speed of the print and travel moves set to 300mm/sec, and the acceleration set to 800mm/sec², the printer might never even reach those speeds. At these travel settings, the print head will only reach a speed of 300mm/sec after about 50mm. Fast travel and print speeds are great if you’re building a printer with a meter long build plate (more on that later), but if you plug a few numbers into [Prusa]’s handy acceleration calculator, you’ll find you need acceleration to hit those travel speeds, anyway.
I don’t know why this machine shipped with a default acceleration of 800mm/sec². The default acceleration for the Marlin Firmware is 3000mm/sec², and every RepRap I’ve seen seems to do alright with that. The default acceleration can be changed through the on-screen menu, though, and after changing it, the printer performed very well.
Fast travel and low acceleration mean the specs are overly ambitious at best, and slightly deceptive at worst. Of course ambition or deception doesn’t matter, as all of this can be fixed with a few changes in the settings. I’d recommend setting the acceleration at 2000-3000mm/sec² (configurable through the OLED menu), and setting the slicer to around 100mm/sec. That’s a good ballpark for this printer.
The Guts
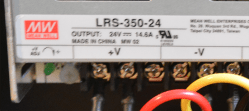 Twenty four Volts. Finally. Since the early days of RepRap, printers have been built with twelve volts in mind. Hotends were designed for 12V. Heated build plates were designed for 12V. Slowly, this has been changing, and I would suggest to anyone who wants to build their own printer to choose 24V. V=IR, and higher voltage means the hotend comes up to temperature quicker. You can push filament through a nozzle faster. Commercial printers have been slow to catch on. Not this printer, it’s 24V. The heated bed comes up to temperature quickly, and is almost impressive in that it’s heating a quarter-inch aluminum plate.
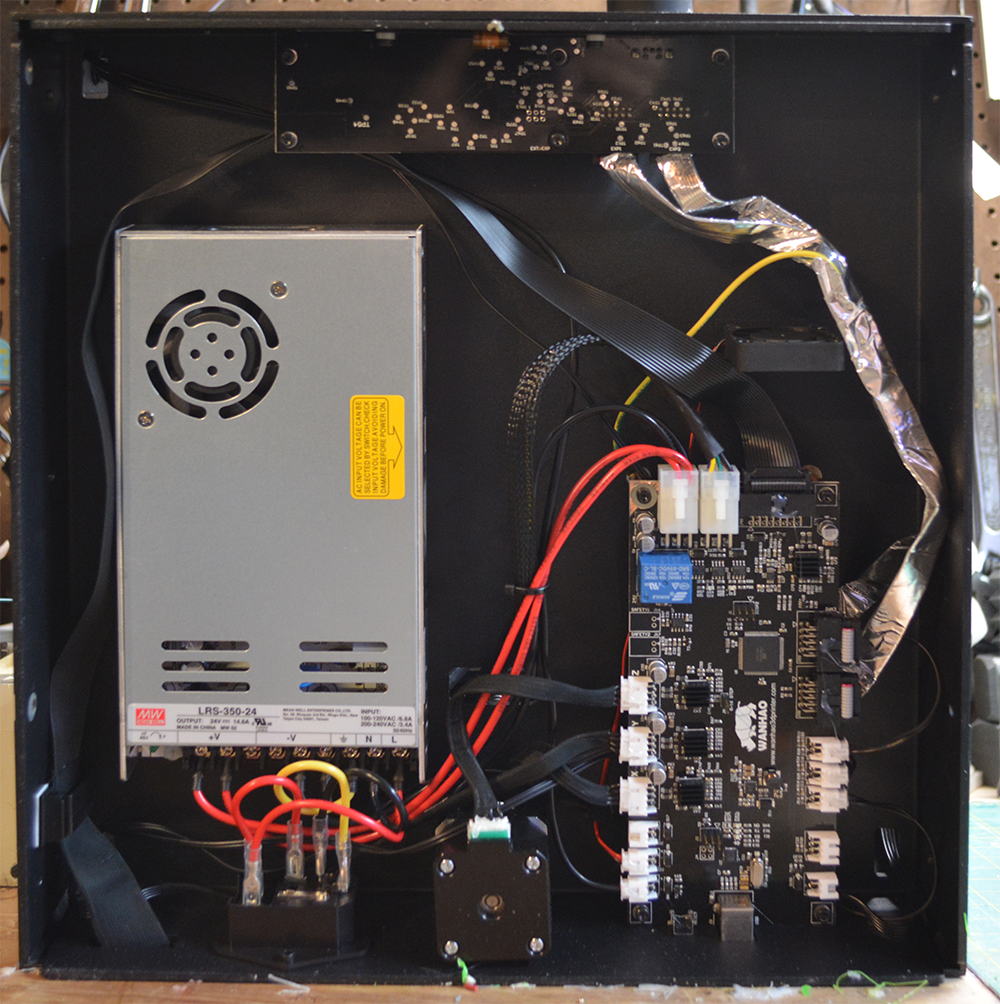 Unscrew four screws on the bottom of the machine, and the guts are revealed. Underneath the printer you’ll find the power supply, the controller board, and the OLED/knob/SD card board.
The controller board is based on the ATmega2560, but is not based on any board I can readily identify. It does use integrated stepper drivers, and there do seem to be a few spare connections available should I ever want to dig into this board to add an enclosure heater. No, it’s not an ARM board with fancy acceleration, but that’s the future and this is a 3D printer from the present.
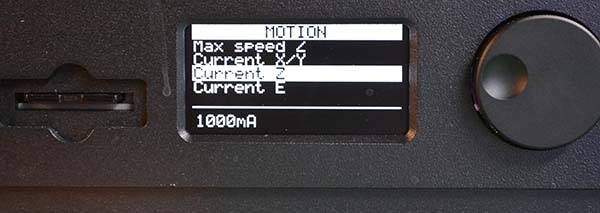
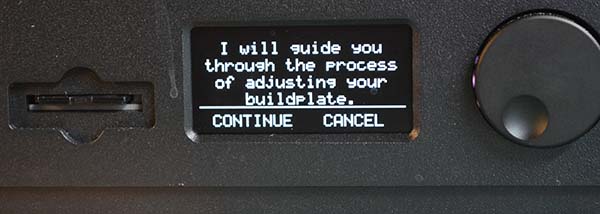
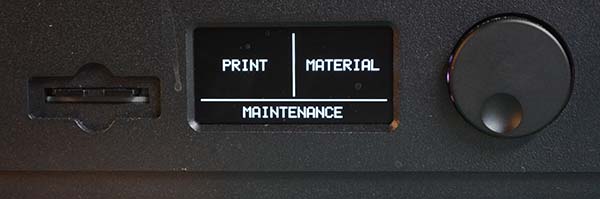
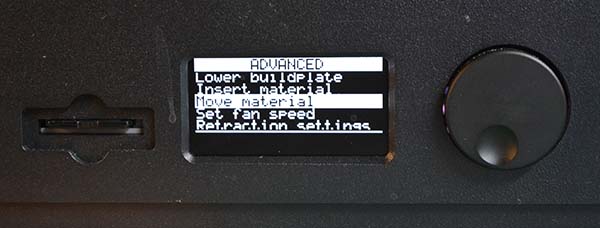
The OLED display/interface is, as far as I can tell, exactly the same as a Ultimaker. There are options to set the motor current, and the bed leveling wizard is exactly the same. For anyone who has ever used a Ultimaker, the interface for this printer will be very familiar.
Contextualizing
Deep in my email inbox, dated almost exactly five years ago today, I hold an invoice for Lulzbot order #000032. Take this as proof I have seen this industry grow before my eyes, and I’m a big believer in what Open Hardware can do.
Today, Lulzbot is going gangbusters, the TAZ 6 is still completely open source, and Lulzbot is the perfect example of what you can do with Open Hardware. The RepRap project and Lulzbot in particular have upended an entire industry, forced innovation, greatly expanded the mind share of a technology. 3D printers can print Pokemon. It doesn’t get more revolutionary than that.
The $200 MP Select Mini is the antithesis of Open Hardware. It is not built for modification. You can’t get spare parts. It is a black box, and when it breaks, you’ll just buy another. You don’t own that printer, it owns you. I can accept the low-end Monoprice printer, though. It’s just enough to get someone interested in 3D printing, it can print parts for a better 3D printer.
I don’t know if you can print a better 3D printer with the Monoprice Maker Ultimate. This $700 machine is capable of nearly everything you could ever want from a 3D printer. The quality of the prints coming out of this printer are really, really good. The potential for a (passively) heated enclosure is simply awesome. No, you’re not going to do dual extrusion, and the PTFE tube in the extruder won’t let you print really exotic plastics, but most people aren’t printing with those, anyway.
Compared to any printer you can build yourself, the Monoprice Maker Ultimate wins. It’s everything you need, and with a bit of tuning, know-how, and maybe an adapter to fix the fan issue, there’s nothing you can’t do with this printer. My poor Prusa Mendel weeps. The Open Hardware community should be philosophically opposed to this printer. It’s a true consumer 3D printer. Plug it in, turn it on, and in an hour or so you have some plastic trinkets in your hand. Learn how 3D printing works, and you can produce some really fantastic prints with this printer.
It’s a good printer, and I don’t think you’ll be disappointed.
In Conclusion…
Should you buy this printer? If you’re one of those people who would use GIMP instead of pirating Photoshop, no, this is not the printer for you.
For normal people, at $700, this printer is hard to beat. Software-wise, the stock firmware could use a bit of help, but everything that’s wrong with it can be fixed via the OLED control panel. Whoever is writing up the Monoprice manual and product copy needs to spend a few weeks cruising the RepRap forums.
This is a very good printer, and it’s very likely you won’t outgrow it. If you’re looking for your first 3D printer, you could do much worse and spend much more money in the process. It’s a bit higher quality than the innumerable $500 i3 clones I’ve seen (and at that price you should give Prusa a ring, anyway). The Monoprice Maker Ultimate is a solid printer. Even though Monoprice won’t sell as many of these compared to their $200 MP Select Mini, they’ve done their job. The Monoprice Maker Ultimate is one of the best values in 3D printing I’ve seen, and should be on the short list for anyone planning to buy a printer for under $1000.
Concerning the question over the $700 Monoprice Maker Ultimate and the $800 Wanhao Duplicator 6, that’s an issue that could go either way. Judging from the availability of the MP Select Mini on Monoprice, I expect their Maker Ultimate to be out of stock often. For people whose patience is worth less than $100, this will tip the balance to Wanhao. That $100 impatience fee also gets you acrylic side panels and top. That isn’t a terrible deal, although I do desperately wish the US distributor would put a ‘Duplicator 6’ category in their online store.
Our Review Policy
It’s this. For this review, Monoprice provided me with this printer. Negative disclosure, or stating how this review was not influenced by a vendor or company, is an illegitimate concept and incompatible with civilized discourse.


Fortunately, a comments section is not always incompatible with civilized discourse.
B^)
HUGE LIE! All that printer does is printer jams and sucks up your money, your time, your patience etc., as a matter of fact it’s WAY overpriced when you consider all the suggested improvements, modifications and upgrades which is really masked for what in reality is called mechanical defects. NEWS FLASH none of those are needed if it WORKED! 3D printing is definitely NOT market ready. And for anyone who tells you that it is maybe they have a fetish for PRINTER JAMS.
Your comment is about 5 weeks old, I just got this printer, partially based on this review. I’ve used it for about 50 hours, and it’s been flawless. I’m a beginner at this and have had no trouble other than the filament breaking once. That’s it. No jams yet.
Forgive me ignorance but I don’t quite understand the following: “If you’re one of those people who would use GIMP instead of pirating Photoshop, no, this is not the printer for you.”
GIMP is open-source and free, you are getting something good at a cheap price because of a great community that creates their own software for no monetary gain.
Pirating photoshop is also free, but you are getting something good at a cheap price because you are stealing someone else’s work.
the comparison I guess is that the monoprice printer is essentially a clone, so you are getting it for cheap because monoprice didn’t need to pay anyone to design it, they just “stole” the design.\
The GIMP alternative would be building a reprap
Thank you!
This reads as “this is a printer for those who pirates Photoshop”
Pirating Photoshop and buying a $700 printer built based on open source designs are two completely different things.
This is just a badly worded sentence.
GIMP is open source, free software, so if you like open source stuff, you will want an open source printer, which this isn’t.
Thank you!
It is Zortax M200 mixed with Ultimaker.
It looks like a cross between the original ultimaker and the ultimaker 2, as well. Somewhere in the middle, not quite either.
It would be good to say that this printer is almost exact copy of Zortrax M200, not Ultimaker clone.
The firmware is a straight copy of the Ultimaker2 firmware. I should know, I programmed those menus, not seeing anything new there. Turn on the machine, wait till the main menu is up, hold the button pressed (making sure none of the options get selected). And you’ll get an “breakout” clone. Pretty sure nobody bothered to remove that easter egg when copying over the firmware.
(It’s hidden in the code)
The electronics look a lot like the Ultimaker2 one as well, just re-routed and optimized to use less components.
So it’s just copy&paste. Nothing original really.
I’ll test this on Friday…
Post a picture! I would love to know if it’s in there. @daid303 Are you going to announce the Ultimaker 3 anytime soon? I think I read somewhere that there were plans to release the next generation later in the year. Hopefully it will have auto leveling ????
I would be breaking my contract if I would tell anything. Sorry.
I can tell you it has been a bumpy and high speed ride ever sinds we release the Ultimaker2. Plans where made, changed, changed one more, and changed again. Company grew from 20 people to 200. R&D grew from 6 people to well over 40. I almost had a burnout trying to keep Cura and firmware development going.
We’ve made mistakes, tried a lot of things that didn’t pan out in the end. But we always kept 1 goal for ourselves clear. We won’t release something unless it’s actually good.
I do know, whatever we release, people will complain about 2 things:
a) The price.
b) It will not have the feature they hoped for.
As this is always the case :-)
That’s what I thought as well. Between an original and a 2. There’s a lot of those floating around, but that’s the beauty of open source. From the lame attempts at copying, we all still learn a little.
It becomes really really difficult to keep the idea of opens source floating with these things.
On the firmware side, there is a whole 1 actual contributor. https://github.com/tinkergnome
Who made his own hacker-friendly version of the UM2 firmware as well, which I can recommend for anyone that reads this.
Everyone else is just leeching of it. At which point the money people within Ultimaker start asking questions. In case of the firmware it is easy, we cannot change the license, as we don’t hold copyright. But this question might hop over from firmware to Cura, where the copyright holder is Ultimaker.
Wel… there’s mine if anyone’s interested. https://github.com/norpchen/Ultimaker2Marlin
I’ve made more extensive changes, enhancements and experimental features than tinkergnome…. but I have not initiated any pulls requests because a) I deviated from the original code base pretty wildly from the start and b) most of the features I’ve added would be only of use to advanced users and likely be a nightmare for ultimaker to support if they integrated them. They want a simple, easy to use printer interface that just gives good prints without a lot of confusing options.
My firmware is made with me in mind–I tweak and fiddle and experiment with settings and hardware mods constantly. Which I suspect is why there has been zero interest from anyone else in my firmware since I announced it and put it out there. Binary hexfiles are available, but I don’t think it’s been installed on a single machine beyond my own ( a fact that makes me less inclined to release public updates*) Which I’m OK with: I made it because I wanted more from my machine. That said, my GitHub is available free for cherry picking features and ideas and code from. I believe Tinkergnome has said he picked one or two ideas for his.
Installing an experimental firms firmware on a $2500+ UM2 might make some people uncomfortable but maybe someone with a less expensive clone would be more interested? ( It works, and works quite well; I’ve been running it for years. and it is completely reversible, of course)
Here is a video of the firmware doing experimental high speed moves & printing: https://youtube.com/watch?v=-L8scUiasVg (it also shows the ‘expert’ ui)
*Just writing this post makes me feel like making an update today….
Not 2 sound too much of an idiot here but what exactly does “And you’ll get an “breakout” clone.” mean here? I own a Monoprice Maker Ultimate & would very much like to change the firmware to add such goodies as self-levelling bed, etc but know this would void existing factory warranty. Could this ‘breakout clone’ be a possible go-around for this? Is it reversible once done?
Again, sorry if these questions seem off topic or beneath this thread but was just curious if there was another way to get firmware update without having to buy a separate board to flash it to.
Thx.
Check the posts at the end of this page by “random-builder” and “Dilbert” for upgrade options.
I don’t know anything about Monoprice’s firmware policy. That should be in the paperwork you received.
“Maker Ultimate 3D printer” what a extremely original name…
SIGH.
Nice summary Brian.
Yeah.
Was 0.02mm height really one of the default settings? Or is that a typo that should have read 0.2mm. Seems very, very small (and typically fiddly) to be a default.
A completely wobbly repstrap can do .1mm layer heights, so .02 for a “nice” printer sounds reasonable.
As an option, yes it’s a worthy option. As a default, that’s a bit much.
It’s not worth it, there is no quality increase after 0.04, 0.02 is just marketing. (Sorry for that. We did this…)
Hah, OK, makes sense. I generally don’t dip below 0.2mm because I don’t like the time trade-off. I don’t have the patience to even try 0.02 anyway.
From Monoprice web site:
“Ultra High Precision: This 3D printer supports layer resolutions as fine as 20 microns (0.02 mm), allowing you to make high-quality prints with smooth surfaces and ultra-fine details.”
700 is a bit high for a noob printer. for 400 you can get a printrbot play, throw on another 75 bucks, and extend the y axis with a heated bed. it doesnt have the same build area, but you really dont need it unless you are doing large prints. but if you are a noob, you probibly shouldnt be doing that.
Any chance of posting your tuned Cura config file? I’m a few months in and am stepping up from the MP Mini but found the wait time + varying challenges of builds a very time consuming way to learn what values to tweak (and sometimes which way to go). It’s particularly interesting to see you were able to ramp the speeds so high (on both this and the mini).
I see that the printer has an ‘OLED control panel’. I think you should have iterated over that a little more in your review.
“if you’re building a printer with a meter long build plate (more on that later)”
Later meaning a future article? Or did I miss something in this one?
this. Updates incoming.
That looks awesome!
Great analysis and write up! I was looking at picking up a second printer. This provides anyone interested with some pretty good insight :). Thanks!
I was somewhat dismayed at the tone of this article regarding the Monoprice Select Mini. The review on HaD of the Mini was all about how good it was for the price, and how it could be modded inexpensively, and this review is all about ignoring the Mini because it’s a toy and you can’t hack it because it’s closed and you should therefore spend 4 times as much money on a clunkier looking printer with a print volume that’s really not that much bigger, with a CPU from the dark ages, no WiFi, and a Monochrome screen. As for the Ultimate being “Open”, it looks to use similar mechanicals as the Mini, and there’s really nothing proprietary about either one (you can put a Bondtech or Flexystruder and an E3Dv6 on either of them easily, swap the motors to your liking, replace the linear bearings or rods, whatever you like. The only real difference is the Ultimate can run open source firmware? According to Malyan (who make the Mini) they will be opening the Mini firmware in the near future, so there’s that.
Besides, this is Hack-a-Day. To say that one printer is more suitable for this audience because it’s open source and the other is less suitable because it’s more proprietary sort of flies in the face of what “Hacking” is about. IMHO, improving a proprietary device is more of a hack than making changes to an open source design.
Why can’t both of the printers be good without belittling one for no reason?
This.
Also why belittle the capitalists who have figured out a way to make an arguably better in some regards printer (aluminum frame vs. acrylic frame, 1.75mm filament that almost every other printer uses, and a direct extruder that should make it easier to print NinjaFlex etc. out of (Yes I know 3mm filament and bowden extruders could in theory make for a faster print speed but that is why I said arguably)) for a cheaper price. Is it not good to advance the hobby and reset baseline for quality by asking the industry that serve this hobby to keep on advancing in not only technology but also by reducing the price for quality?
Also I believe that the firmware for the Wanhao Duplicator 6 is already up at: https://github.com/garychen99/Duplicator-6-firmware-version-3.1
I agree with this sentiment. I bought one of the early Up! printers a few years back, then the MakerGear came out, and the Up! community cried “copy!!”. But, the MakerGear had done some innovation, and today their M2 stands as a great quality printer on its own.
It looks like this printer has some innovations (including price) vs the Ultimaker. ditching the bowden alone is an innovation. I’d just give them credit and wait for the next innovation. It’s also great they could do it with ancient CPU. Why increase cost for no reason? That’s truly innovative.
There is ZERO innovation here. ZERO. A clone of a clone, that is all.
For a testprint to really see the quality of the mechanics, the Sappho-Head and Benchy might not be ideal. I would try to print something very simple with long edges along the X and Y axis, maybe just a hollow square close to the size of the print bed. This usually shows ringing artifacts and oscillations in the mechanics much better. You have a long travel along the axis giving it a chance to get up to full speed, and it makes it easyer to see faults in the corners (ringing/overshoot) and along a long straight edge you can see if the extruder actually can keep up pushing enough plastic out at the maximum print speeds.
If you only print “organic” shapes with no infill, you may not even see these problems lurking in your printer at all, but if you do more “engineering parts” with straight edges, you’ll start to see a different print quality depending on the printer.
Seems like for $700 you would better off going with the Prusa MK2.
but those cost 900 bucks, now…
600 bucks for the kit. With only an 8 hour build time, give or take, it’s worth it to learn the printer and what all the parts do. After my third return of the monopruce, I went with the press snd couldn’t be happier.
> The $200 MP Select Mini is the antithesis of Open Hardware. It is not built for modification. You can’t get spare parts.
You can replace any stepper, the extruder, the hot end, or the controller without too much of an issue. The only closed thing is the controller source code and flashing toolchain, and we should all band together in shaming malywan and monoprice into making their possibly illegal bootleg of smoothieware available to the public. I wouldn’t even be mad if they included travel limits in firmware, but they don’t since the same controller is used on multiple printers with different physical characteristics.
Is it possible to increase the bed size on the MP Select Mini, at least in the Y axis?
I haven’t seen it done yet, but I think it’s possible since the controller will just keep moving forever in any direction. You would need to design and assemble a new bed carrier, probably with longer 8mm rods and longer belt, and you would also need to extend and/or re-route the heat bed wiring unless you ditched the heated bed feature.
Umm, this isn’t a review of the MP Select Mini, it’s a review of the Maker Ultimate…
I was weighing my options because I felt it was time to go from the Di3 v2.1 to the PLUS and this article made me aware that Monoprice does not offer spare parts like Wanhao USA does…so I went over to Wanhao USA’s website and they are having an awesome sale! I just got my Di3 PLUS and figured I would share this in case anyone else was on the fence about buying one.
Here is the link to the sale:
http://wanhaousa.com/pages/2016-labor-day-sale
They pretty much have a discount on all of the printers right now…worth checking out!
Comments TL;DR but you can at least buy the main board from Monoprice now. The heatsinks are changed and some other stuff. People in the FB group have. It’s $30 or $35 IIRC.
Ha…well I finally blew up my mini, going to get an open box of this on Ebay. I blew up the board so it’s not worth fixing IMHO.
I had a problem with the heater plate always heating – saw sparks in the springs that made the pressure. I took it apart and found the copper traces that formed the heating pattern were under the two rear screws. So I use a nylon washer to insulate, added some thermal paste for good measure between heater and build plate. Appears to work again. If the aluminum heater plate artwork is consistent I can’t be the first to have this problem. Burned my fingers a few times trying to figure it out.
This is now a known problem and there is a recall for it.
Just posted about the sparking issue on mine which shipped 9/9/2016 before seeing this. Never got a recall notice.
Otherwise the printer works great.
Apparently no one at monoprice nor wanhao support I can reach has heard of any recall in this regard. Where is your info from? Thanks
OK, I might have confused this with the i3-derived machine they sold. Monoprice sold their own rebranded version of the same machine.
I apologize. However, I would suggest inspecting the bed springs and inserting insulating washers.
http://hackaday.com/2016/09/17/possible-fire-hazard-wanhao-recalls-duplicator-i3-3d-printer/
Thanks, the problem on the I3 is similar but the construction of the mononprice/duplicator 6 is different. The springs can’t touch the heat plate. In this case the screws that hold the heat plate can short the heat plate copper leads directly to the aluminum build plate and thus the entire printer frame. The bore holes for the back screws are erroneously close to the current carrying leads so the that the screw heads overlap and are just separated by a thin paint layer. Creates impressive sparks with 24V……. Problem with monoprice is that they do not ship replacement parts. One has to return the entire printer for a replacement. That policy will cost them on something that may run nonstop for days or weeks.
Anyway otherwise I like the printer and the excellent quality prints it creates.
One point that has been left out is that Monoprice charges shipping for the select. When you factor in the shipping cost, the Original Wanhao Duplicator 6 with free shipping and the enclosure kit, Wanhao is only a $40 upcharge. I went with the Wanhao over the Monoprice for that very reason. Outstanding 3D printer.
I just read through this review and the comments. I’m just about to get my first 3D printer and am debating between the monoprice ultimate (this one) and the Qidi Tech I and I haven’t been able to find a comparison review between the two, and there are some differences in the specs… I want the printer as a tool with a minimum of fuss to fab parts for other projects as opposed to another project to deal with. Does anyone have any thoughts on which is a better buy?
Tom’s Hardware says the Qidi is the best printer under $1000, and it does look pretty great- dual extruder, auto-leveling build surface, fully enclosed, like the Wanhao, etc. and it’s the same price as the ultimate. But it’s also 100 Micron resolution and has a smaller print volume.
The Ultimate says it has a 20 micron resolution, but if it’s a direct copy of the Duplicator 6 why does Wanhao’s website claim 100 micron resolution instead of 20?
Thanks
It sounds like they mean Z resolution and it’s a pretty meaningless number. The problem with exploiting that resolution is you add 5x to the print time but you don’t necessarily get 5x the quality. Ultimaker used to show off and do 0.02mm (20 micron) layers but they do 0.04mm for their extreme quality parts because the time trade-off isn’t worth it.
Thanks for the info!
Have you tried any Taulman nylon with it? I’m very interested in the nylon aspect and pondering my first printer but have to have nylon. Thoughts? Will it do it ok?
Great article, thanks, I love the printer. Just to confirm, it’s OK to change the firmware on the Monoprice Duplicator 6 (I’m familiar with Arduino and how to do so).
So far this is what I’m seeing, as options:
https://github.com/tinkergnome
https://github.com/norpchen
https://github.com/garychen99/Duplicator-6-firmware-version-3.1 (via the FB Wanhoe group)
…or going with the native Marlin code: https://github.com/MarlinFirmware/Marlin
… or if you need to get back to factory install, go with Wanhao: http://www.printer3d.one/forums/topic/duplicator-6-d6-official-firmwares-list/
Just want to confirm that this is all a (highly probable) safe bet??? Thanks again!
I enjoy this printer quite a bit. Excellent results in PFA and ABS. PETG is a challenge. Temperature of the heat plate and nozzle seemed 3-5C lower than reported. A few loose screws when it arrived. One serious issue and warning: During heating up for a print I had sudden sparking from the right back corner of the heating plate below the build platform. The reason was that on my printer the back screws that hold the heating plate in place are too close to the copper leads in the heating plate. The screw heads reach over the cooper and one of them made contact as they are only separated by a thin paint layer. Easily fixed with some teflon washers and the heat plate still works. But check yours for this issue.
I’ve had mine for a couple of weeks now and have used it virtually continuously and it hasn’t blinked. Far better than the SolidDoodle POS I bought (and sold) last year.
The documentation provided left a great deal to be desired. It dictated to download the software off their website and they had removed it from their website. After e-mailing them and getting a response a couple of days later, they provided a link to the software.
When I plugged the included SD drive into my computer, the software was on that…. Doh.
The fan in the base has started making a lot of noise and I suspect at some point I’ll have to get them to replace it, but other than that, it’s been bullet proof.
I opened mine to investigate a randomly appearing fan noise. Easy to find the culprit as the fan at the end of the motherboard was not even plugged in. Thanks to the pictures in the review I could see where it is supposed to plug into the board. Leaving the fan in the power supply as the source of the noise problem. Check this printer thoroughly when you get it. The print head cooling fan is also vibrating and making noise randomly after 6 weeks of use. Got a whole bunch of replacement fans for a few bucks. Absolute max Temp shown in octoprint graph is 250 C. Bed is always 5 C lower than selected. Quality control is certainly problem with wanhao/monoprice. Prints fine though, so I see this more as great priced parts assembly as a starting point that I will modify.
Would you mind sharing your source of the fans? And what to get? Many thanks!!
I got the cheapest I found. eBay store yf-cn 24V 40mm x 40mm x 10mm 4010 DC Brushless Cooling Fan 2 pin 2.54 Connector New 4 for $10.36 $1.90 shipping. They are a little noisier than the original ones but solid thus far.
Hello,
Recently (this week) I picked up a Duplicator 6! So far so good – I haven’t used a 3d printer since school (engineering) and I was up and running in no time!
I have noticed that default print speeds & settings on wanhao/cura software seem slow/odd….I’ve used cura with windows and Linux and the settings seem much different depending on what OS I am using (also odd). I might report back with some of the bigger differences…
Anyway, what I’m attempting to get at here is that I believe this printer has much more potential than the slicer software settings would have you realize. (similar to the authors emphasis on acceleration of 800mm/s vs 3000mm/s)
Could someone (author?) recommend some basic/advanced cura settings for pla/abs/petg/nylon/etc with this printer to get headed in the right direction? (being a 3d printer noob)
Thank you,
Eric
The printer maybe able to move fast but that is not very relevant. Speed very much depends on the material you print. PLA with cooling can be done at higher speed compared to ABS. For PETG I have to slow things way down. In any case I would do test prints with each material around the recommended settings. Plenty of calibration files on thingiverse. Each printer is slightly different and the temperatures shown are rarely exact. Size of the print is important also, cooling time between layers, viscosity of the material, nozzle size etc.
DO NOT Dick around with ebay fans. Get a REAL Ball-bearing fan at Jameco P/N: 2167605 .. Just at 10 bucks…. (I had the same chatter noise that the cheap sleeve fans have)…
Sure I will try those next 0.09 A instead of 0.1A. But that is 40$ for 4 plus shipping that I need to replace using a double fan shroud..They also buy in Shenzhen I bet anyway.
Monoprice Ultimate is currently on sale at Monoprice.com (not Amazon or elsewhere I checked) for $600, down 100 from standard list. Get ’em while they’re hot…
Great review of this printer… mine arrived a few days ago and so far I am very happy.
For anyone who’s gotten this far in the comments, I would like to reiterate the importance of checking all the bolts and the height limiter screw as there were a lot that had become quite loose (including all 4 nuts/bolts on the z-axis bearings!). Failing to check these could [i suspect] lead to major issues with both print quality and possibly even do some serious damage if you’re not paying attention.
For the spool holder, as the reviewer noted, it is way to small. The MP reels of PLA I ordered with the printer are not even close to fitting. Here are two links to printable STL files for more appropriately sized versions (I went with the bearing free and it is working flawlessly) so far.
With Bearings: http://www.thingiverse.com/thing:1792043
W/O Bearings: http://www.thingiverse.com/thing:1533132
Also check for potential shorts on the screws holding the heat plate in place. The screws may overlap with the copper lanes. Mine had the internal cooling fan unplugged and also there were no heat sinks on the microchips that control the current to the extruder and other motors as shown in the picture of the controller in the review. They really get hot as there are 1.25A going out. Larger prints on PETG at 250 C always failed after some time due to under extrusion. I suspect that the current regulating resistors close to these chips got hot and as their resistance increases the current is down regulated. Keeping the bottom open and adding heat sinks improved this dramatically. I think this problem was nicely explained here: https://ultimaker.com/en/community/5542-comedoone-for-ultimaker2.
Anyone know how to connect the white filament guide tube that also came with 10 black clips? I’m assuming these were an addition that came later with the printer after the instructions were made before they started adding them
Can’t findo anything online for this printer or the duplicator 6. Thanks.
you need to print a guide like this http://www.thingiverse.com/thing:1645945
Nevermind, they’re rubber feet to prevent scratching your desk or table. I do want to say, now that I got that initial wasted post out of the way, after unmoving, but before printing with this, I am very impressed by the solid quality and readable instructions in unbroken English. This forum is what made my final decision in which printer to buy. I was able to get it for $600 on monoprice and waited only about a week for delivery. I hope my mind does not change after I start printing, but have high hopes. Thanks to everyone who included their input with experience and expertise
for helping me in, what I believe was a very good decision.
Have fun. Works great with ABS and PLA. For PETG I switched to the micro-swiss hotend and cooling block for duplicator 6 (https://store.micro-swiss.com). Finally I can print larger PETG objects. Out of the box the printer is fine for small PETG objects like PI cases but that was it. Also had to disassemble and clean everything before switching back to ABS or PLA. Also I can print Ninja flex now (slowly). Certainly something to consider.
Failed on larger ninjaflex prints miserably. Most flexible material I can print is NinjaTek Cheetah. Thought I add this.
Thank you for pointing out that those black “clips” are rubber feet! I was also thinking they were supposed to somehow attached the filament guide tube since they came in the same bag. There’s another short tube, similar to the filament guide tube but only about 2″ long – any idea what that is for? Some of the included accessories are not that obvious to a first time 3D printer owner.
Thanks Delbert for sharing both of those ideas. Well I’ve finished my 4th print, which was 2 Lego light switch plates for my kids. When finished, the screen said 37 hours left to print and was frozen. The dial did nothing, so I turned the switch off. When I turned the switch back on. The led lights flashed briefly and the fan turned on, but nothing on the screen. The dial will make beeps like something is wanting to work, but nothing on the screen. Kind of discouraged since I was very happy with the other 3 prints and the seemingly great quality of this printer. I have sent a support request to monoprice but am curious if this is a common problem and what might it be. Thank you to anyone that has any idea on this.
Mine also crashes often and the timer appears stuck but always finishes the print. I then switch it off and on to get it back. I first would check the cables I often knock the one loose that connects the print head and getting error messages and noises. Look beneath the printer (unplug first) and check cables. Annoyingly monoprice does’t send parts they only exchange entire printers. Eventually I will update/replace the firmware. They are just running the ultimaker firmware without changes except the start screen, so maybe those support forum can help or wanhao directly, they help me twice before to trouble shoot as monoprice has basically no support besides issuing RMAs.
I switched to Marlin for duplicator 6. No issues anymore.
Nice discussion here.
I received my unit yesterday, but couldn’t get the z axis to move. Tried the leveling routine, but when it asked me to move the bed up, it wouldn’t move.
I could feel the motor fighting me if I rotated the screw by hand, but nothing from the controller or knob.
Spent some time with customer support but no luck. Have an RMA to send it back.
Tried asking Wanhao, but they just referred me back to Monoprice.
Guess I’ll have to wait a while longer to play.
Thanks again Dilbert for your help. Everything appears to be connected snuggly and it still will not turn off. I even bought a new cord to see if that was it (since I saw others solved their problem.) Didn’t work. Next test is going to be to see how helpful monoprice is going to be. Thanks again.
The parts of these printer are really intricate!
Still using mine, but have destroyed both pieces of BuildTak they provided for the heat bed. Neither Wanhao or Monoprice sells the pad, so I’ll have to buy replacement off of Amazon and trim to fit.
Consider a sheet PEI (Polyetherimide) Sheet, Opaque Off-White, Standard Tolerance, ASTM D5205 PEI0113, 0.03″ Thickness.and 3M 468MP Adhesive Transfer Tape to stick it on. Performs very well. Prints pop right off when the heat plate is cooled down.
I am pretty sure the moonrise sheet is just rebranded BuildTak
My new printer came today and now I fear they have another issue. Every time I go to turn it off its making a clicking noise with a green light that flashes with any click. Any ideas?
Sorry but never noticed a green light on this printer?
It’s on the electronics under the printer. You can see it through the vent when it lights.
Mine is flashing red when printing but no green. Check also the ultimaker forum as the mainboard is very similar to that one minus a few parts that would be required to run dual extruders etc.
I’ve been printing with mine about a week, and now the built plate is stuck. The motor is moving but it is not turning to raise/lower the build plate. Any advice would be appreciated.
Check the connections also on the main board ( unplug before opening). Is the z axis moving? Maybe just a screw need tightening.
Granted I don’t expect you to respond to this comment Brian Benchoff, but I was wondering if in all this time of using the Maker Ultimate, have you found a extruder fan re-director that actually worked well?
Well, I am not Brian but trying to improve this also. Main issue with improving cooling of the printed filament is that increasing the airflow also decreases temperature of the nozzle resulting in heater error immediately. So first I added a silicon boot (I used moldmax 60 from smooth-on) for the heat block that stabilizes the temp nicely and protects from cooling by increased airflow. I can than increase airflow from a double fan shroud. I am trying more single blower fan designs but haven’t seen improvements thus far. Anyway the silicon insulation of the hotend alone is improving things dramatically already.
Ok, give this a try. All the airflow you ever need.
http://www.thingiverse.com/thing:2235389
One quetion I’d like answered is why this printer comes with an SD-only card reader – SD cards (not SDHC or SDXC) are incredibly hard to get in the SF Bar Area (which includes Silicon Valley…) in 2017. Why was such obsolete technology included with the printer, and how soon can that card reader be replaced by an SDHC (or XC)?
monoprice is getting desperate? (I ordered on 2017-05-19):
1) first, check the price: https://www.monoprice.com/product?p_id=15710 $699.99
2) now, register, place it into cart, and wait 3 days. “just for you” they will place it “on sale” at $549.99
3) finally, logout from monoprice, price is back to $699.99
I don’t know why they would be that desperate it’s a really good printer, especially for the price point. The only ive ssue I’ve seen with it really is that it doesn’t do bridging or over 25 degree overhangs with no support very well. But if you can find and print a new blower director(part of fan that cools print) and optionally make a silicone sock, it fixes those issues to some degree.
I spent 599 just in January, which was their standard price. After I had to send my third printer back to them, I got my money back and went with a prusa i3 mk2s. The problem is that to make this a good printer you have to upgrade all the parts, because all the Chinese parts are cheap.
Brock: do you mind sharing more? why three printers? which cheap parts? Thank you.
First one I got 4 prints out of it. After trying to turn it on for the fifth print, the led light flashed on the off and the LCD screen would not come on. Rma then got my second one.
Immediately when you would turn it on, there would be 6 clicks coming from underneath with a flashing green light. Printed 3 to four times, then it just wouldn’t turn on. I even bought a new power cord to see if that was it, to which it wasn’t. When I called about that one, I was told they never heard that problem before. Rma then got my third one.
Got less than 10 prints and the led would come on, but LCD screen dead again. Almost didn’t get a refund with monoprice trying to give me a store credit for other products since no more printers were available in March. I pitched a bitch about needing the money for a printer and got the refund.
Don’t get me wrong, when it works it prints great, but is far from reliable based on my experience. It’s not just monoprice’s version, the wanhao d6, (which I believe was what monoprice used as their “ultimake” since the underside of the hear plate still has their name and components on the motherboard also has there name) has the same issues.
Find wanhao d6 on facebook and read all of the problems there as well.
wow, that is some real bad printer karma :-) well, I ordered already, I will report back if my fate is any better.
I’ve turned mine on and off about 20 times, and I’ve gotten 7½ prints out of it, so far – with no problems of the type mentioned. (so far…) The only problem I had with it was the the nozzle clogged on the 8th print , running PETG from a never tried reel… (hence the “½” above…)
Bad luck. Well have mine almost 10 months, little issues. Upgraded to Micro swiss hot end, silicone boot, 50 cm blower cooling, drive block for flexible filaments and servo dampers. Most upgrades are on thingiverse. Still a steal after spending about $150 on the upgrades. Prints everything now perfectly and silently now PETG, ABS, PLA, Ninjaflex etc.
Forgot the proximity sensor and filament end switch enabled by Marlin for duplicator 6.
Hey, just FYI:
1) there is also a Marlin based firmware (not Ultimaker2Marlin based):
https://github.com/dot-bob/Marlin-Duplicator-6
2) and a RFE for Monoprice Ultimate / Wanhao Duplicator-6 support
by the original Marlin: https://github.com/MarlinFirmware/Marlin/issues/6818
please vote your “+1” comment on that github ticket in case you think this is a good idea
3) by the way, can someone well versed in history, please clarify:
what are the real important differences: Marlin vs Ultimaker2Marlin ?
beyond: 7,681 commits / 303 contributors 1,324 commits/85 contributors ?
I use Marlin for dupllcator 6 to enable proximity sensor auto bed leveling and an filament end switch that allows to change filament and to continue where it left off. The proximity sensor makes such a difference in usability and convenience.
I posted a write up of my one year upgrade history for everyone interested in getting this printer. http://www.thingiverse.com/groups/wanhao-d6-upgrades
Anyone want to comment on how this printer stacks up against what’s available now in 2019? I’m considering purchasing an open-box version for $300 (seems like a steal!).
I own two, and I’d brake my wrist buying a third one for only $300!