3D printing is a technique we’ve all been using for ages at home, or via Shapeways, but if you are designing a product, 3D printing will only get you so far. It’s crude, slow, expensive, and has lots of limitations. While it’s great for the prototyping stage, ultimately products manufactured in volume will be manufactured using another method, and most likely it will be injection molding. Knowing how to design a part for injection molding means you can start prototyping with 3D printing, confident that you’ll be able to move to a mold without major changes to the design.
The 2017 Hackaday Prize includes a $30,000 prize for Best Product as we seek products that not only show a great idea, but are designed for manufacturing and have thought through what it takes to get them into the hands of the users. Some of the entries seem to be keenly aware of the challenges associated with moving from prototyping to production. Here are some examples of best practices when prototyping with future injection molding in mind.
SnapBloks – Reusable molds
SnapBloks is building interactive modular blocks that each have different functions, from power to temperature monitoring, playing sound, turning on LEDs, and moving motors. The blocks snap together with magnets. Having a modular block-based system like this means many products to build and stock. This means a lot of inventory and parts to source. It could also mean many different injection molded pieces. One thing SnapBloks did well is to have the same top piece for each of their blocks, differentiated by color. Running the injection mold with one color, then switching to a different color gives the look of a different product without having to do additional expensive molds.
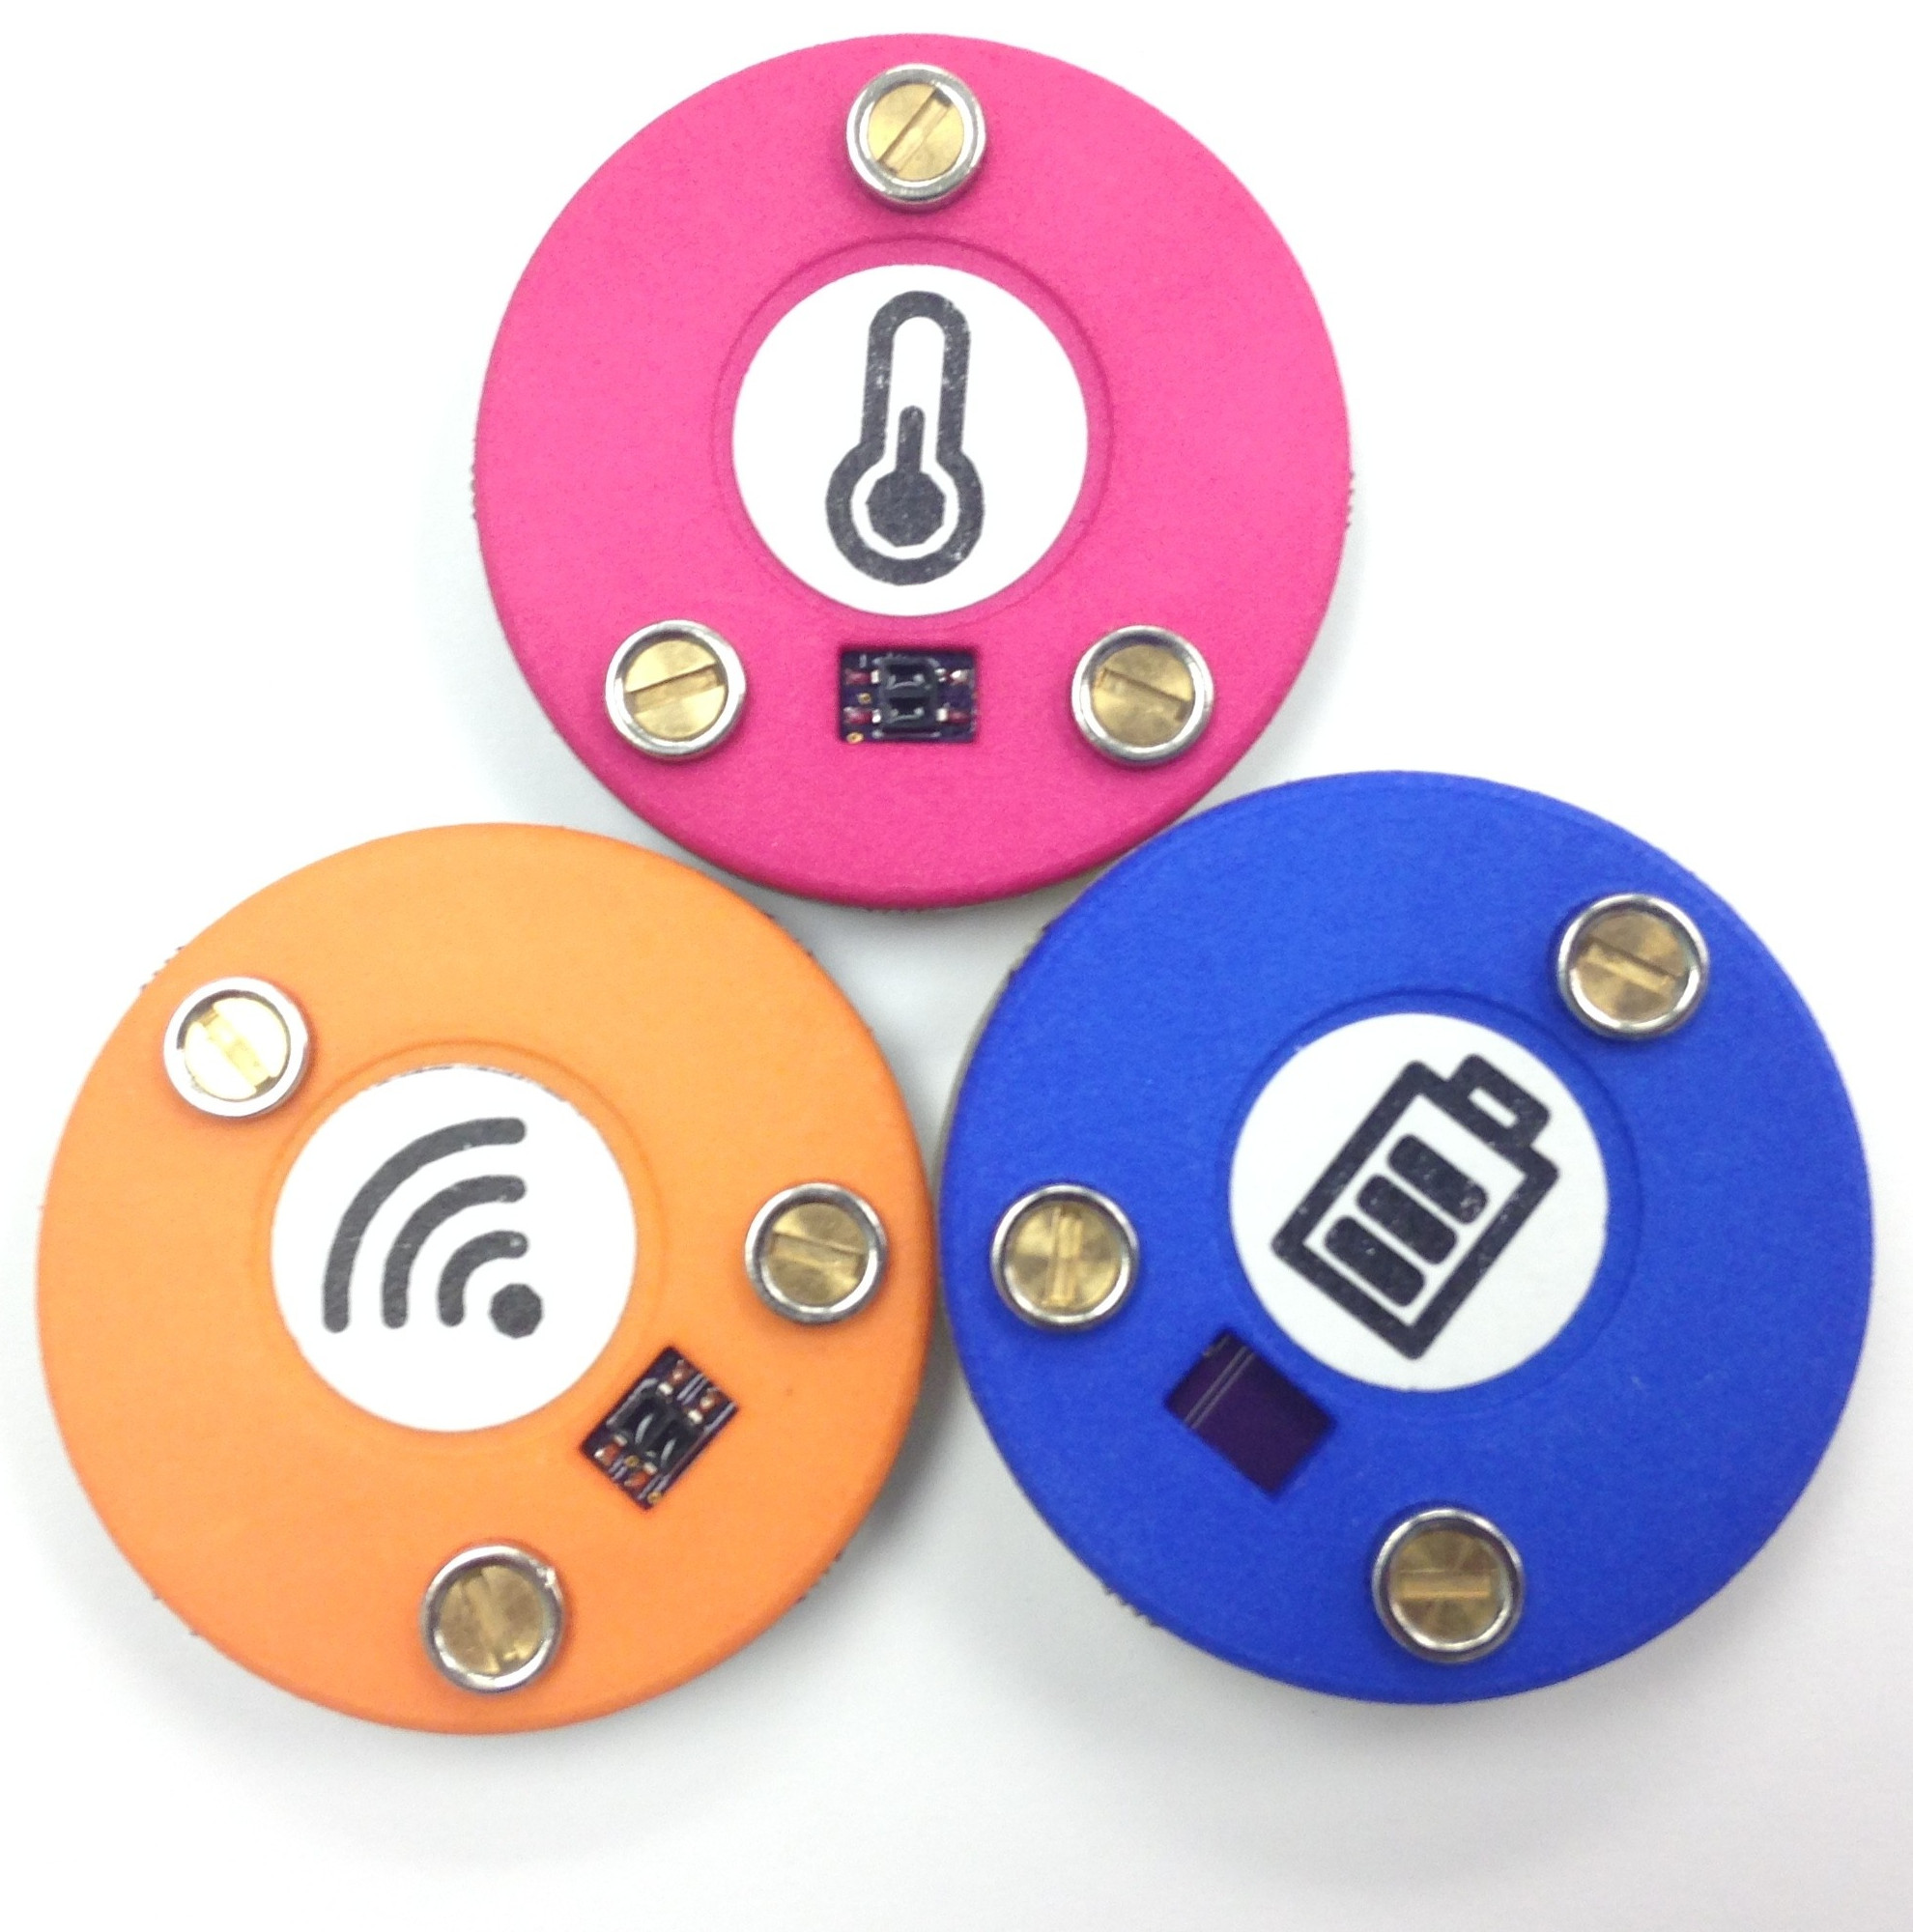
Wherever possible, try to reduce the number of molds you need. SnapBloks may still need a lot of molds for their bottom halves, but reusing the top is a good plan.
SnappCat – Simple molds
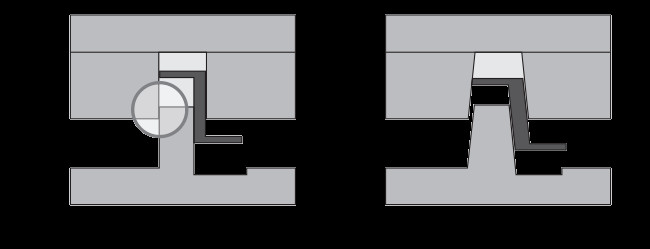
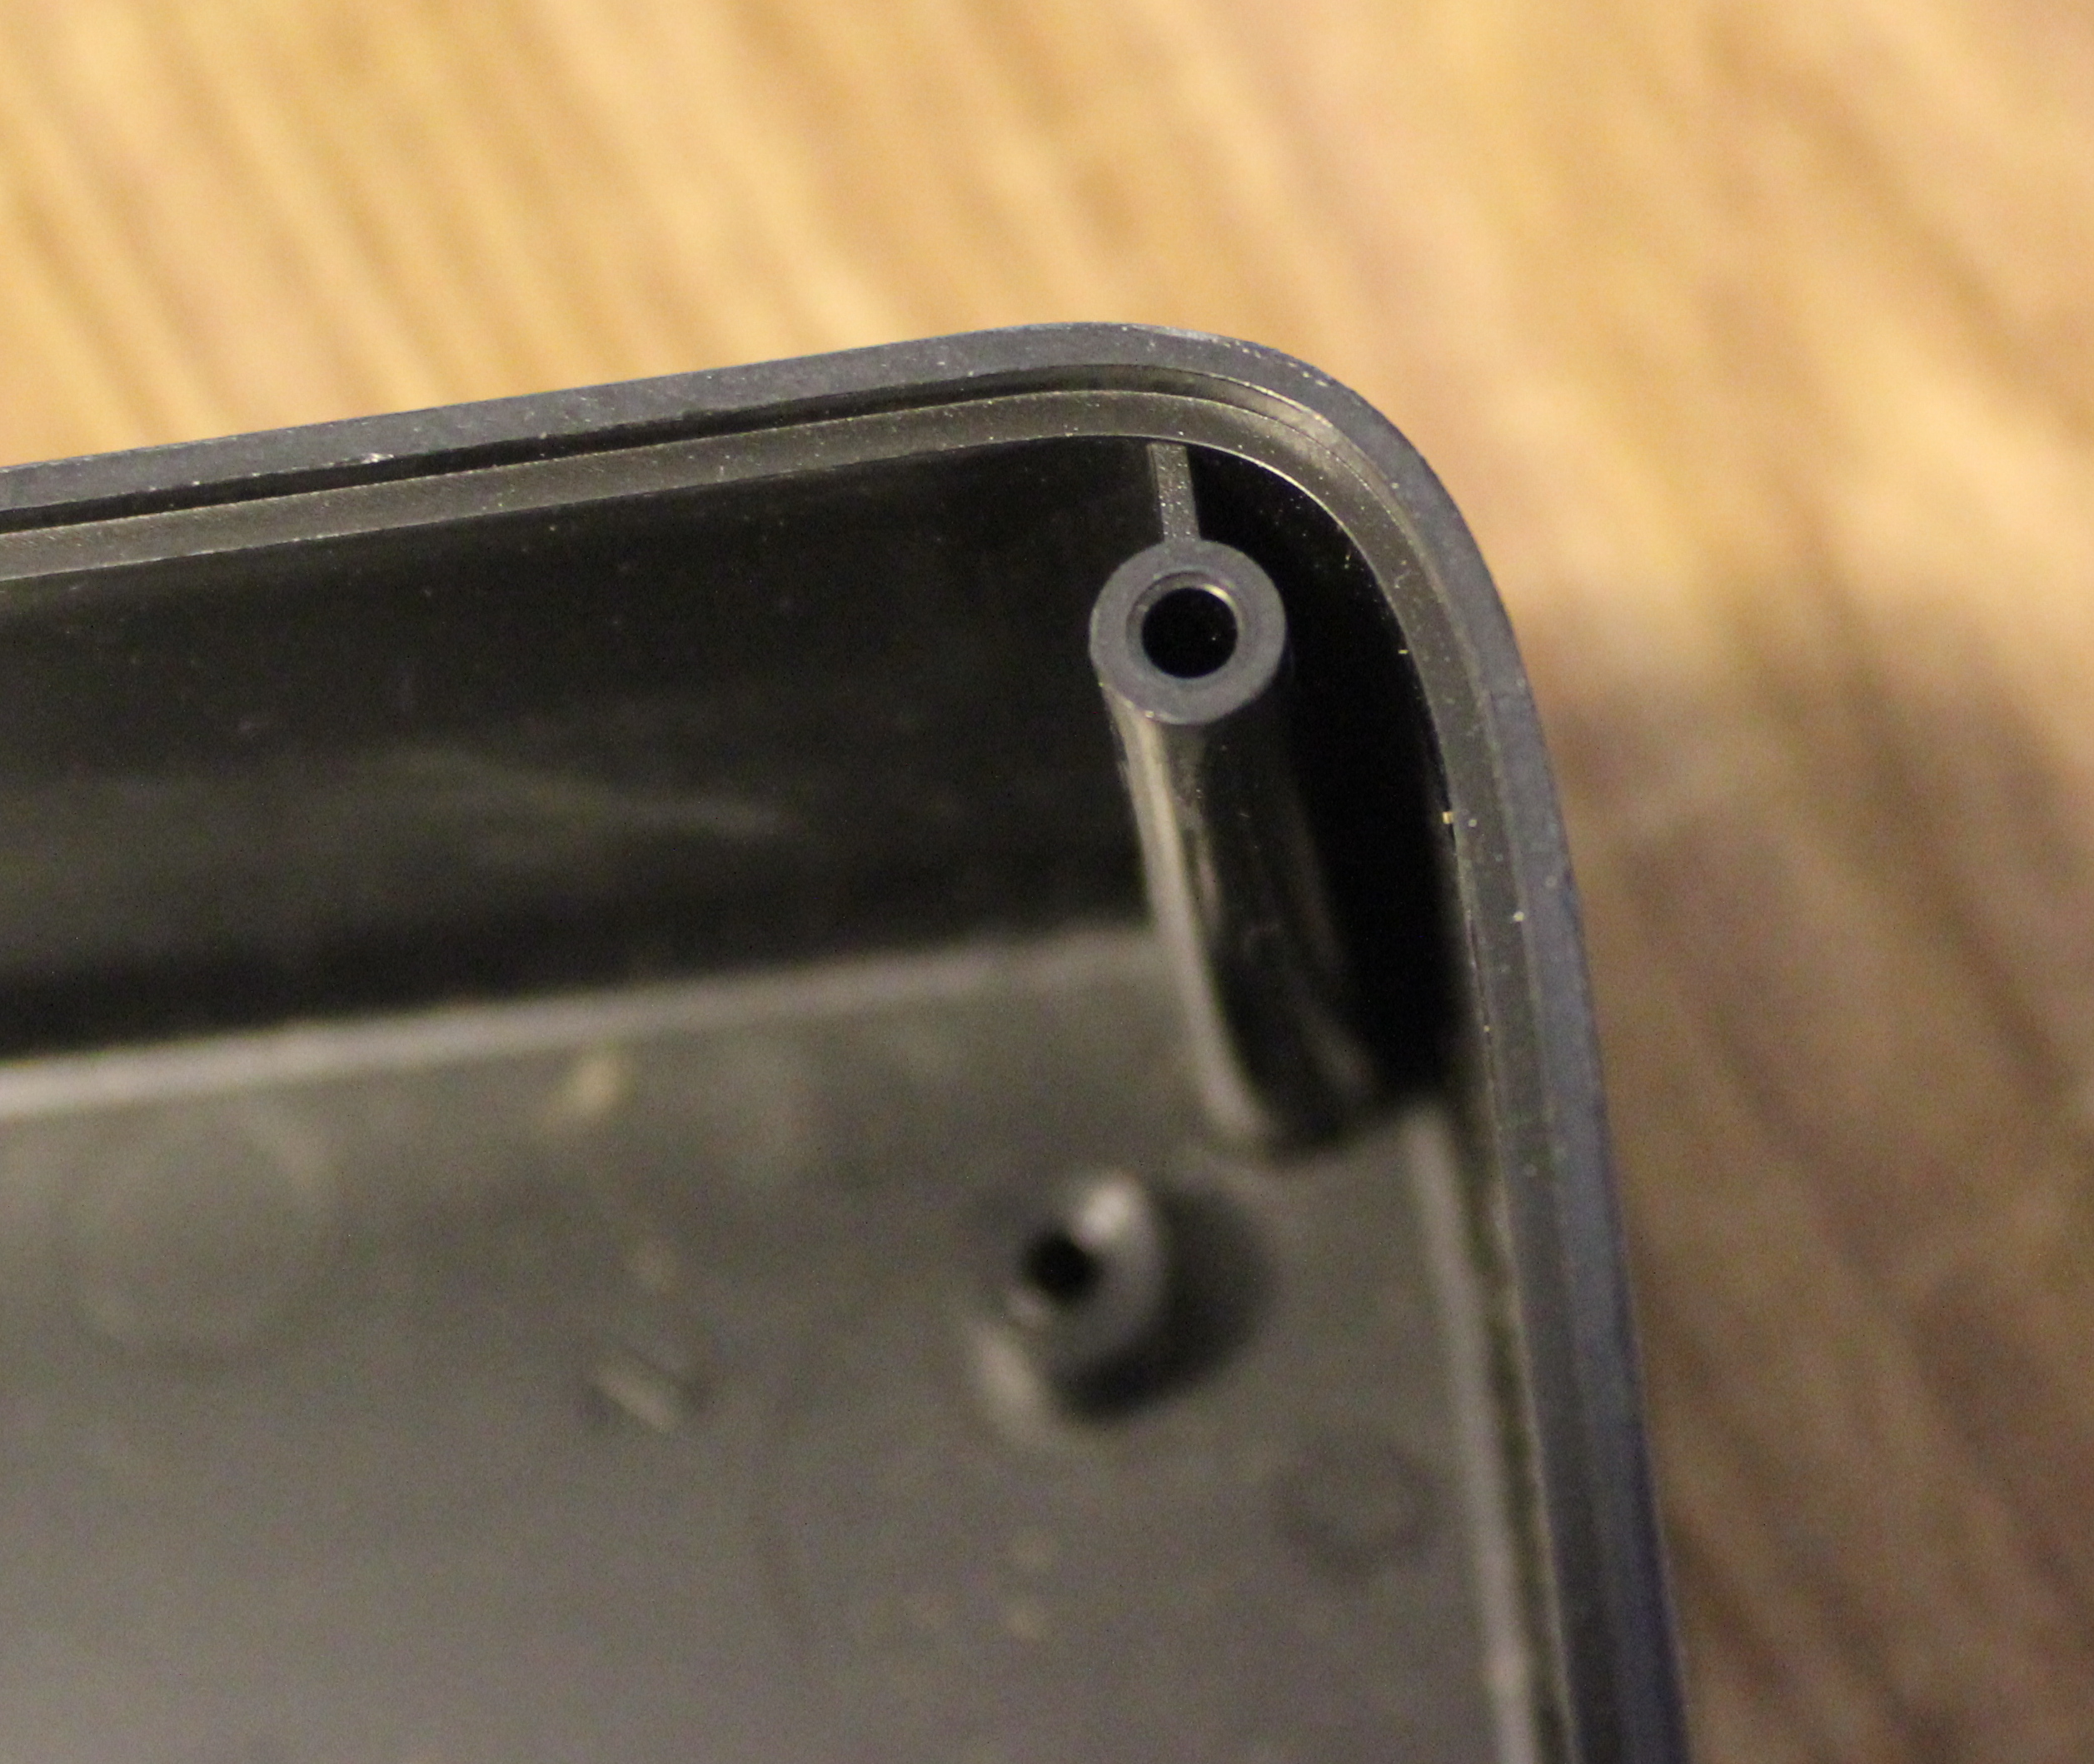
SnappCat is a device that takes pictures of your cat, a sorely needed product in an age where there are not enough cat pictures on the Internet. A simple mold will open and close and eject a part without resistance. This means the part can’t have any features that would “lock” the part into the mold, like a side hole or overhang.
If side features are required, this is accomplished in the mold with a slide, which is a third piece of the mold that slides in from the side and then comes out before the part is ejected. Slides can be expensive, but side holes are still a necessity in enclosures. The way to do that is to have your holes be at the union of the front and back of the enclosure, so that each side of the enclosure has 1 or more sides of the hole. SnappCat’s design has that built into their 3D printed mold. Notice that 3 sides of the hole are in the purple part, and the back part will cover up the final side, making a complete hole without a complicated mold.
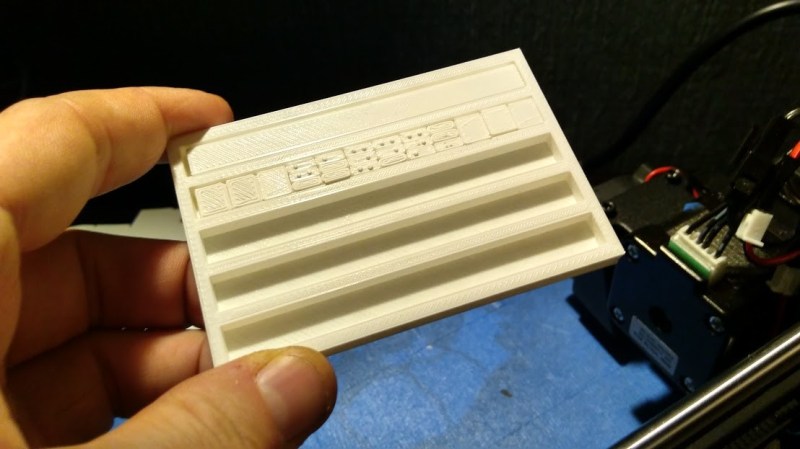
Braille Compact Printing Press – Use big tolerances
The title of this project is pretty descriptive; It’s a small printing press for Braille. One can put together a note in Braille, then rub paper over it to emboss the paper. It doesn’t have to be done in mirror, though, like a printing press would. What’s important to note is that the sloppier the tolerance in a part, the less warping matters, and the more success you’ll have.
[haydn jones] learned his lesson about this the hard way when he 3D printed with the tolerances too tight, and the pieces didn’t fit together well. If your part demands .001″ tolerance for the parts to assemble properly, then the factory is going to throw away a lot of failed parts (or regrind them) and you’ll have to pay for that effort.
If your parts allow for some variability, everybody is happier and the parts are cheaper. With the Braille compact printing press, they use simple parts, there are only 6 different designed parts, and the placement doesn’t need to be perfect, so the tolerances can be fairly large.
Other Design Considerations
In 3D printing, draft is not an important concept, but in a mold it is essential. This means that all walls will slope gently so that the part can be ejected from the mold easily. Parts should plan for at least 1 degree of draft, and you should make sure the draft goes in the correct direction so that the part isn’t locked into the mold.
Appropriate draft allows the part to come out of the mold easily.
Consistent wall thickness is another important design guideline. 3D printing will just fill in a large area with a pattern so that it retains shape and strength, but there is no such equivalent in injection molding, so a large cavity will end up with a lot of plastic. When it cools, this plastic shrinks, leaving a feature called a sink mark (and wasting plastic). It’s best to have all the walls of the plastic be the same thickness, and any features like bosses (for screws or holding a piece in place) should be away from the wall and connected with ribs.
Use different colors, or the same mold, for outside parts. Color matching is difficult, and between runs is almost impossible. You don’t want to have a white piece right next to a slightly-not-white piece because the molder made the two halves at different times on different machines. The way to solve this problem is to design it so that parts are intentionally very different colors, or do a family mold which contains both parts in the same mold, so that they both get the same color plastic at the same time.
The Hackaday Prize Best Product competition is heating up, and we’re excited to see which products will rise to the top. We want to see the design, manufacturing, and business decisions you’re working on that will take your project and make it a product! Enter your product now.


This is a cool piece of knowledge that is vitally important to many modern maufacturing processes. I’m guessing many of the skills developed in injection molding cross over into other kinds of mold fabrication.
Thanks for the advice Dan :) if anyone has any feedback for me it will be apreciated.
Have you guys done a writeup designing custom aluminum extrusions? I did some designs for a job and found out they are really affordable, and the up front cost is way cheaper.
If you can make a part that fits in a 3″ circle size a production run can be had for a few thousand dollars.
This. We had a product, and an aluminium extrusion made an excellent case, cheaply. It also looked more expensive than the plastic competitors.
As a mold maker by trade, I run into countless people who say, “how has 3d printing affected your job?”
It’s really funny, because:
1pc via RP is about $120usd in our shop.
100 pcs via IMM can yield a much stronger/smoother part for as low as $150
That doesn’t cover capital investment, but often that can be rolled in via a contract.
… For for thought
What are “RP” and “IMM” ?
rapid prototyping (RP) and injection molding machine (IMM)
I thought just getting an injection mold made cost over $10k? How can one get 100 parts for $150?
I’m interested, too
You can’t. That little afterthought that he said about capital? That was the mold. The cheapest molds I’ve ever seen quoted were about $2k from Protomold.
See: “doesn’t cover capital investment”. 100 parts for $150 is the end price, when the price of the molds is no longer relevant.
This is incredibly valuable. The next bit of information would be how to find resources for getting started with IM. I have need for a plastic case part that I have a solid design for in mind, and wouldn’t mind getting hundreds of them made. But 3D printing them would just be annoying and tedious.
Check Camndenn Boss – for FSPT(Flat sheet Plastic technology) have a look at their gallery or just put this to google images.
Basically they take a plastic sheet, route it with cnc and bend it. Even print it if you want it
In most cases you end up with 2 part screw-less enclosure that looks much better than printed one.
You pay for a prototype ~150€ if I recall correctly and after that you can get enclosures for under 5€/pcs at 100pcs
I work for a IoT company and our product have a quite complex 5 part multi color mould with some CNC work as post processing. it ends up at 7$/box at 5K quantity.
The damn designer did not leave a single flat surface…
The designer seem to be doing a good job. Flat surfaces are not aesthetically pleasing and products that don’t sell, don’t need to be produced.
We have been in the Injection Molding trade for about two decades now. We often have innovators at our door steps with their prototypes(by using 3D printers). When we tell them the changes needed in their design for injection molding, you can see them be upset. I’m sure this post will raises enough awareness about rightly using Injection Molding.
Thanks for the mention, and most importantly the advice! – From the Snappcat Team.
Thanks for the tip about making sure that all plastic parts should be made into a different color in order to easily identify them. If I were to make a plastic carrying case, I would first consult with a plastic molding company. Doing this will make sure that I am using the right color of plastic to hide its contents from view. Also, they can also help create a design that can absorb physical impact to keep its contents safe too.