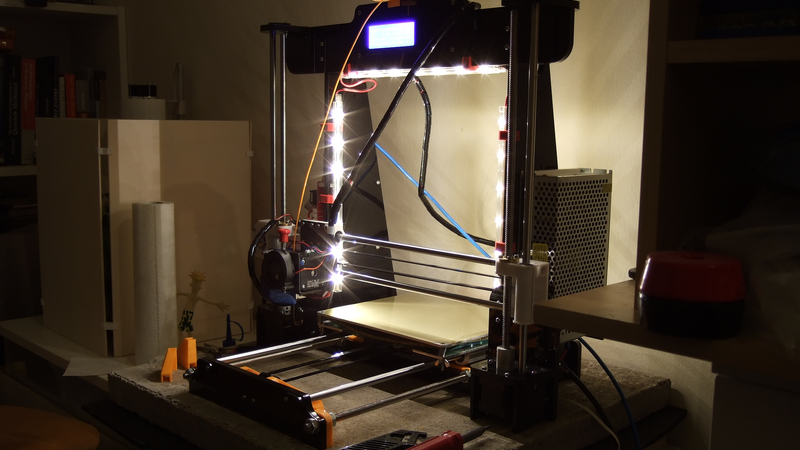
The short answer: something like $200, if your time is worth $0/hour. How is this possible? Cheap kit printers, with laser-cut acrylic frames, but otherwise reasonably solid components. In particular, for this review, an Anet A8. If you’re willing to add a little sweat equity and fix up some of the bugs, an A8 can be turned into a good 3D printer on a shoestring budget.
That said, the A8 is a printer kit, not a printer. You’re going to be responsible for assembly of every last M3 screw, and there are many. Building the thing took me eight or ten hours over three evenings. It’s not rocket surgery, though. There are very accessible videos available online, and a community of people dedicated to turning this box of parts into a great machine. You can do it if you want to.
This article is half how-to guide and half review, and while the fun of a how-to is in the details, the review part is easy enough to sum up: if you want the experience of building a 3D printer, and don’t mind tweaking to get things just right, you should absolutely look into the A8. If you want a backup printer that can print well enough right after assembly, the A8 is a good deal as well; most of the work I’ve put into mine is in chasing perfection. But there are a couple reasons that I’d hesitate to recommend it to a rank beginner, and one of them is fire.
Still, I’ve put 1,615 m (1.0035 miles) of filament through my A8 over 330 hours of run-time spread across the last three months — it’s been actively running for 15% of its lifetime! Some parts have broken, and some have “needed” improving, but basically, it’s been a very functional machine with only three or four hours of unintentional downtime. My expectations going in were naturally fairly low, but the A8 has turned out to be not just a workhorse but also a decent performer, with a little TLC. In short, it’s a hacker’s printer, and I love it.
$200 and Twelve Hours of Labor
The Anet A8 itself is a kit, and you’re looking at a few nights of assembly before it even resembles a 3D printer. Some of this is educational and fun, but other parts of the build are pure tedium. Just peeling the protective film off of the many, many laser-cut acrylic frame parts took me two and a half hours one evening. And if that doesn’t sound like fun, just wait until you start fiddling the myriad M3 nuts into those cursed acrylic T-shaped bolt slots. Ugh. But you grit your teeth, take your time, and you get through it. Do follow the excellent videos, especially the part near the end on bundling up the wiring harness. It’s worth it.
 Now you’ve got a half-decent 3D printer for $150; get ready to spend a little more. I wouldn’t consider the printer complete without a better build surface than the provided masking tape, which will only survive your first couple of prints. Add $15 for some PEI film to your budget. Toss in the price of a kilogram of cheap PLA filament as well, because you’re going to need to calibrate the printer and make parts to improve it before it’s “done”. I got orange on sale at $15.
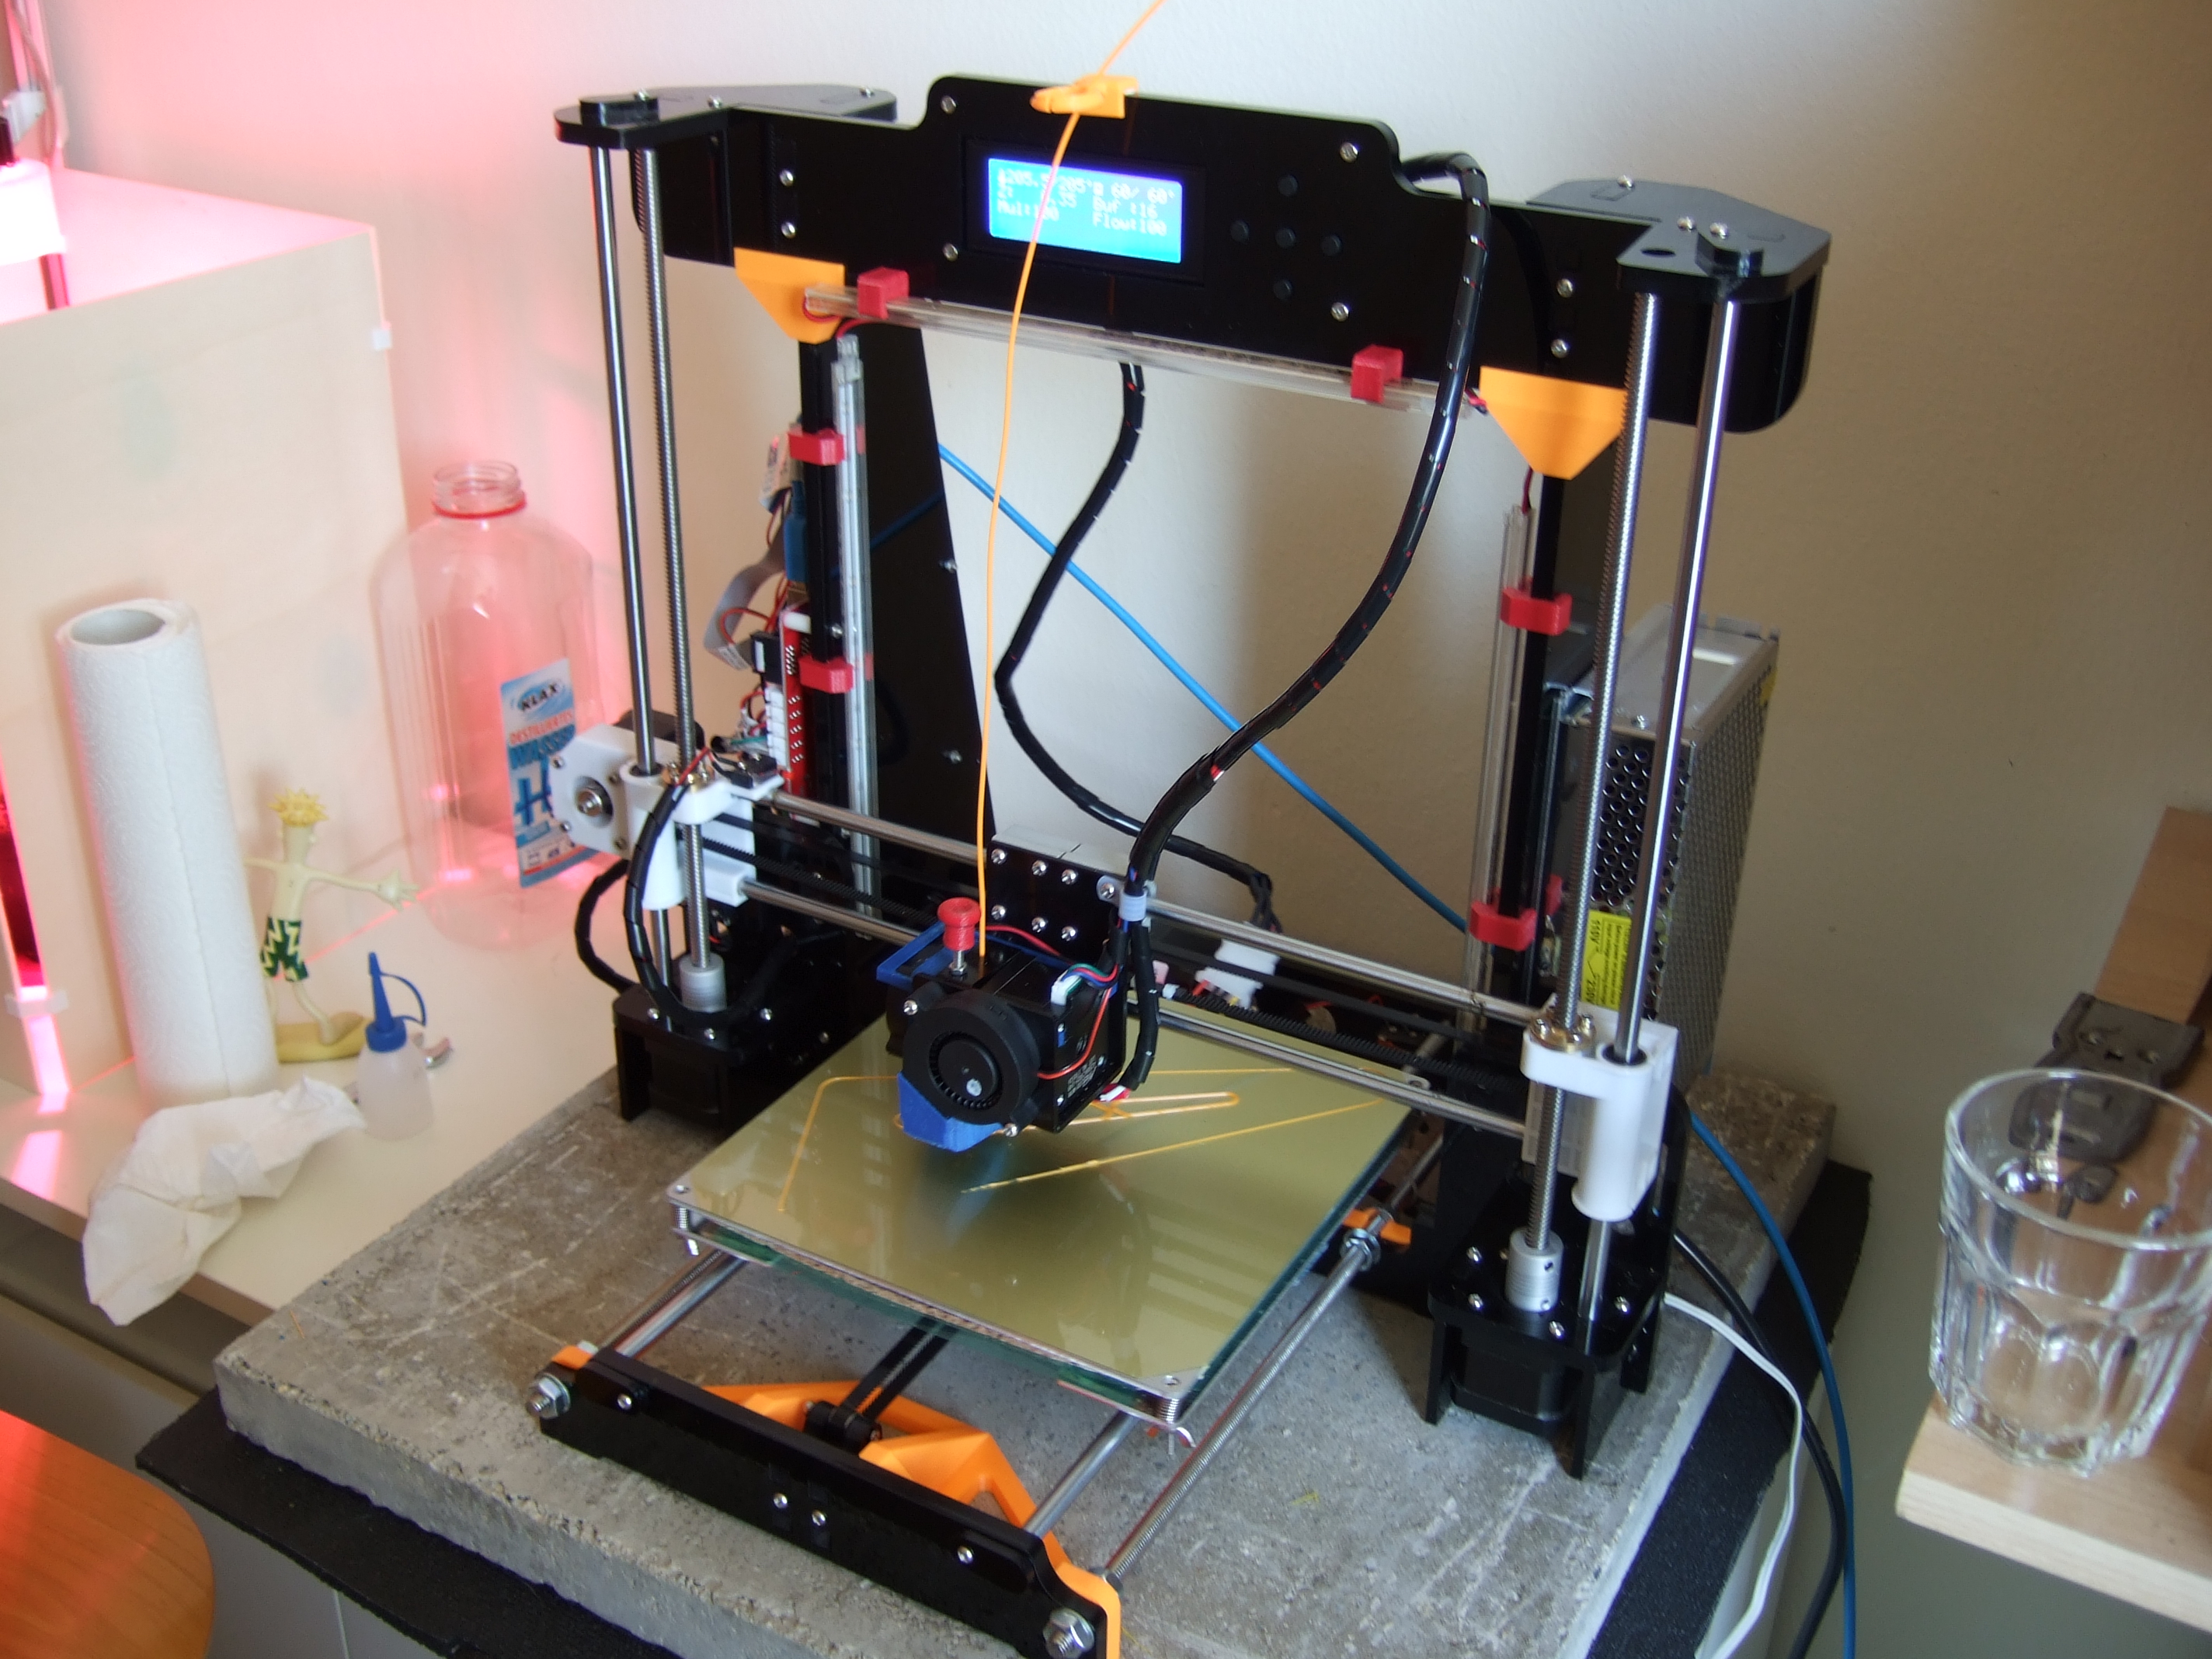
The A8 is noisy. I replaced the shipped LM8UU bearings with Igus Drylin bushings because the former rattled, so that’s another $10 I sunk into the printer that’s optional but pleasant. And then I bought a 50 cm square cement paving tile from the hardware store for $3 to use as a base. It’s rock solid and the mass helps stabilize the printer and absorb vibration. Putting this on top of a $10 rubber washer/dryer isolation mat keeps it from coupling into the table below. It’s not exactly quiet now either, but we can sleep at night with it running.
In the end, I also needed a Molex connector that I scrapped from an old PC, but you can imagine paying another $5 for the part. I turn the power on and off with a $1 switch from the hardware store. So in even the most complete accounting, the $150 printer cost me $200. That’s still a ridiculous bargain, or at least it will be after some tuning.
Printing Your Way to Nirvana
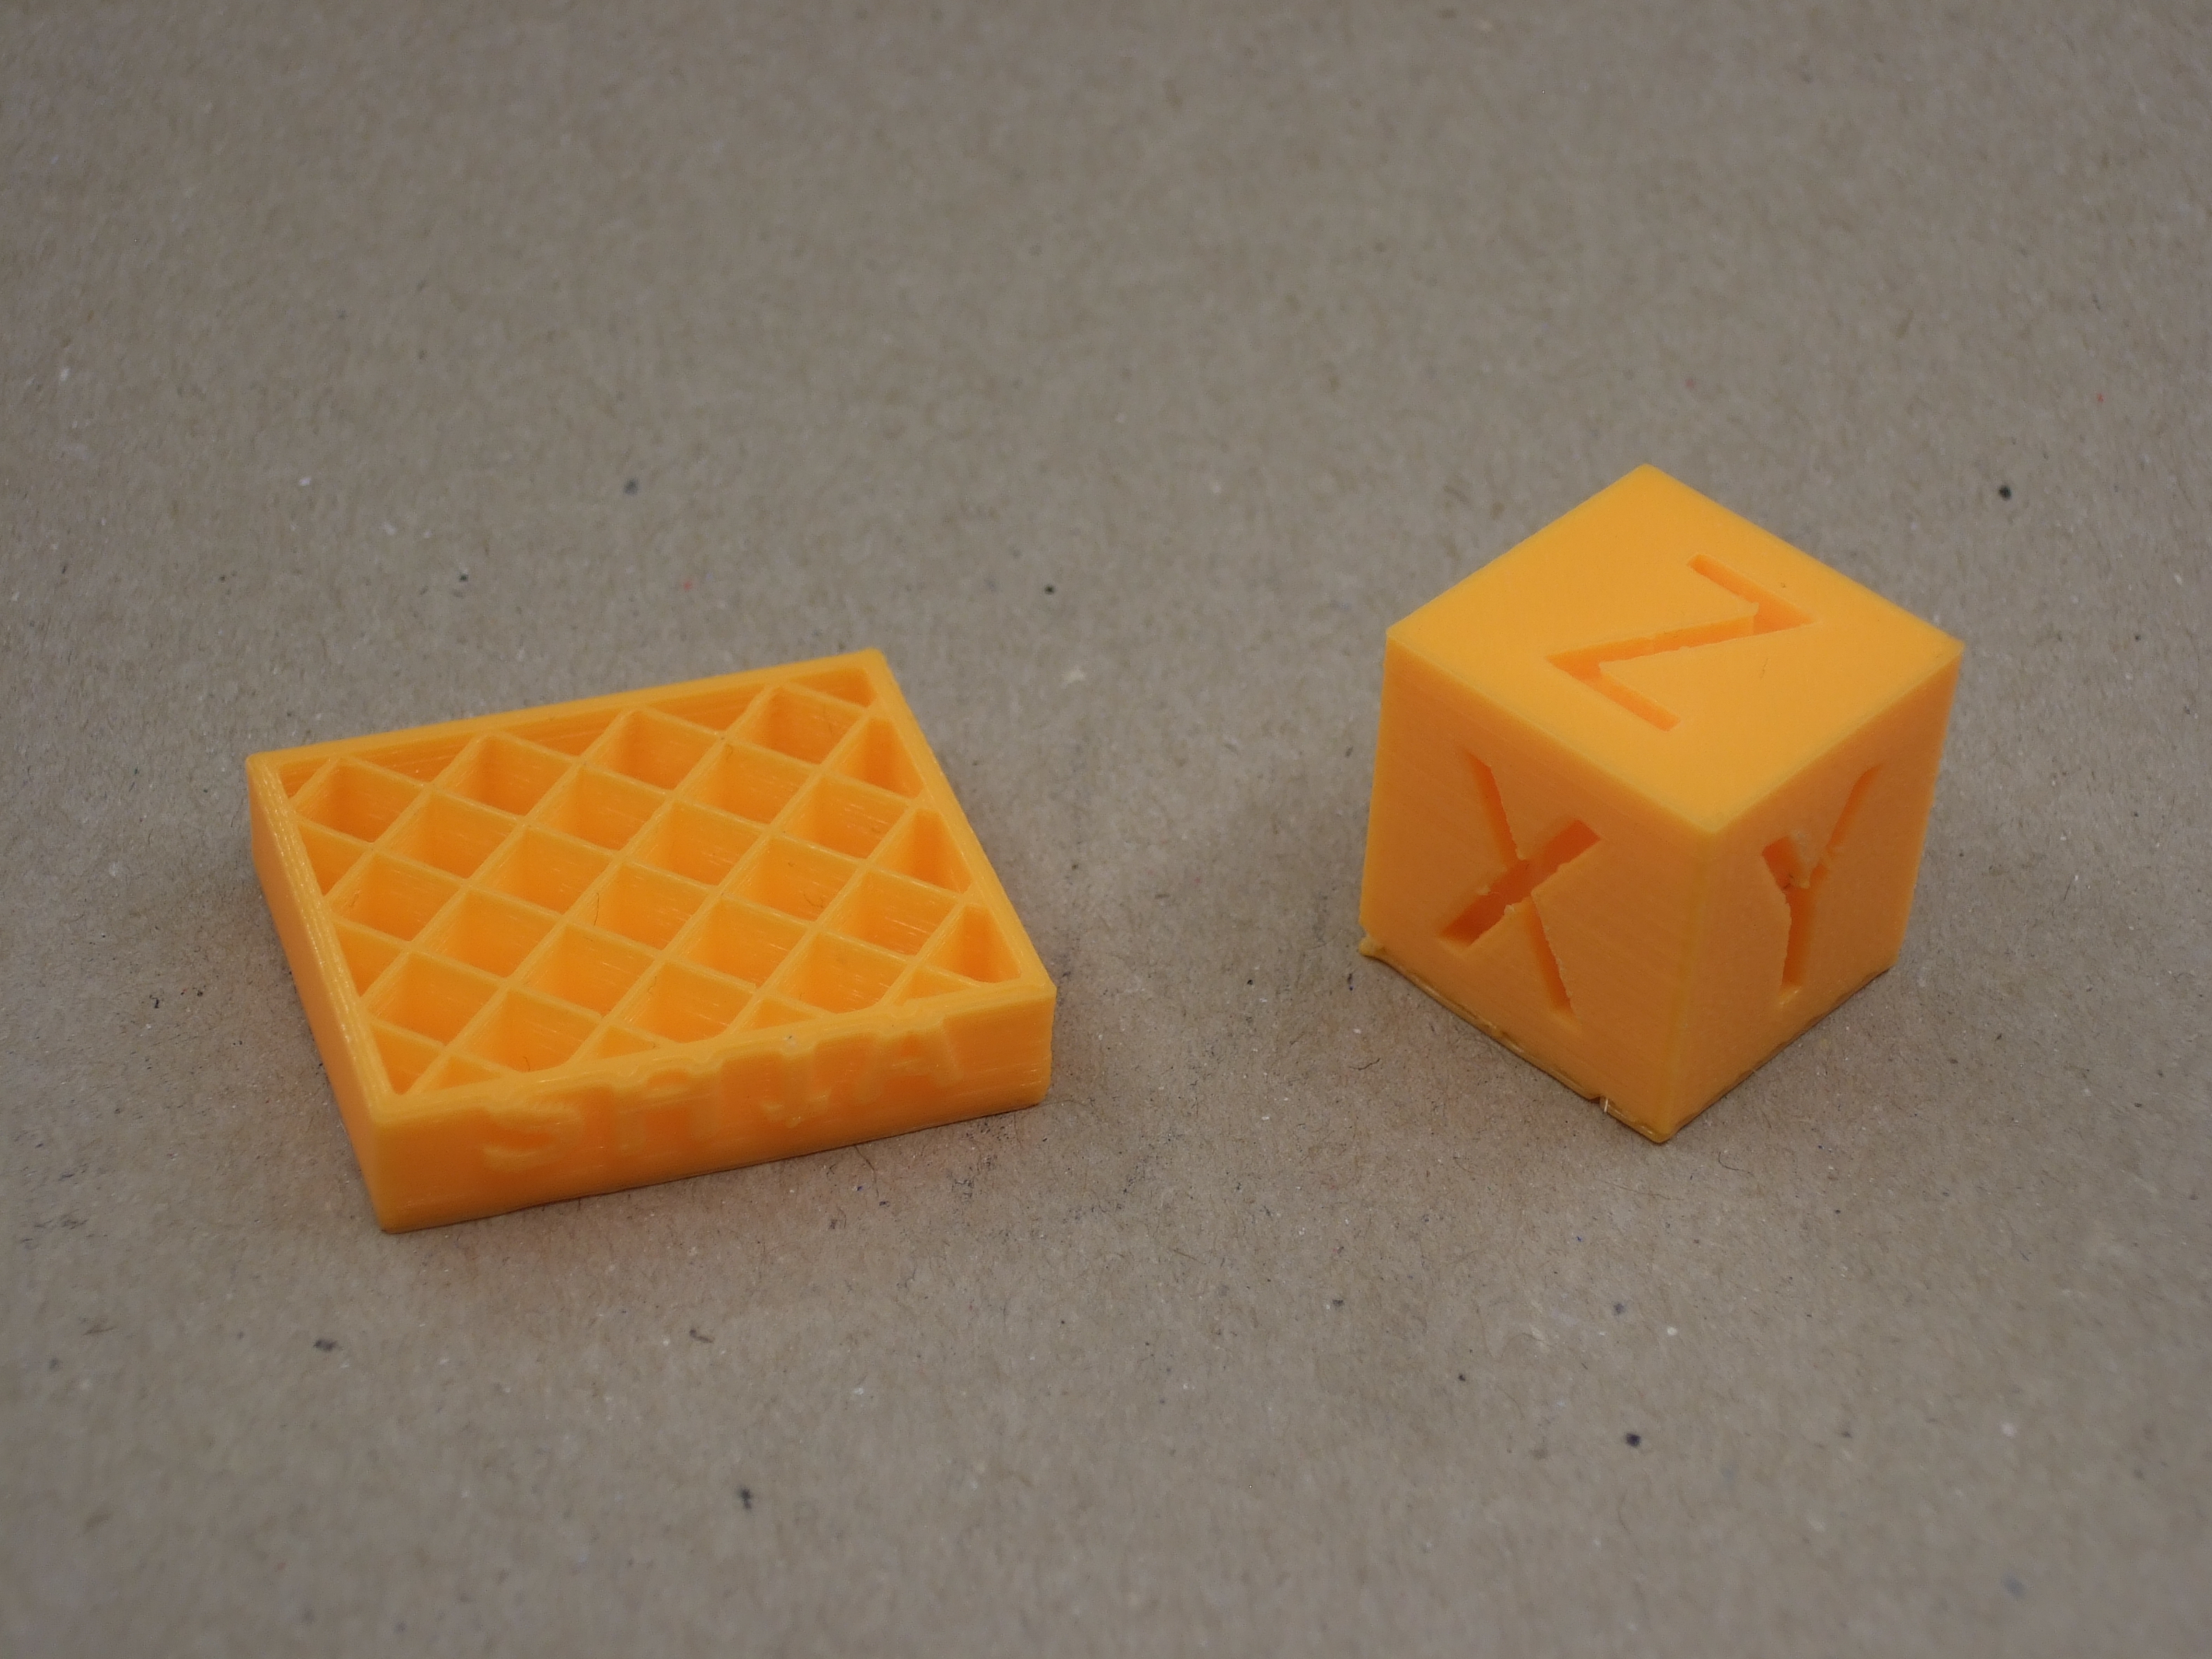
Once the printer is built and calibrated, the first thing you’re going to want to print is a new nozzle for the print-cooling fan. The one that’s included blows on the hot end and cools it down, making temperature regulation spotty. Worse, it doesn’t direct the air well enough to the print either. For PLA, which requires heavy cooling on small parts, this is a killer. I’m running the Mistral because it looks cool, but the half-circle nozzle seems just as effective. This is your first print, after perhaps a calibration cube. You could stop here if you wanted, and enjoy prints that are as good as the status quo of about five years ago. That was easy.
Celebrate a victory lap by printing a filament guide and/or a button for the horrible bolt head that will eventually tunnel into your thumb when swapping out different filaments. (More on this later.) These are quick and easy improvements to both print quality and your quality of life.
The next biggest complaint with the A8, from nearly everyone who owns one, is the frame. While billed as a “Prusa i3” clone, it’s a little bit like selling a Ford Pinto as a Lamborghini Countach clone — after all, it uses a similar steering wheel and four tires. If you owned a RepRap Mendel or first-gen Printerbot, you’ve probably seen the ringing that a wobbly X-axis causes in a print. Fixing X-axis wobble was one of the main goals of the Mendel 90 and Prusa i3. The A8’s X-axis, in contrast, wiggles like a bowl full of jelly.
![Photo by [orincus] of his test objects, demonstrating bad ringing](https://i0.wp.com/hackaday.com/wp-content/uploads/2017/12/7280628_preview_featured.jpg?w=396&h=297&ssl=1 "_7280628_preview_featured")

The quick-and-dirty solution for X-axis wobble is to print something like a T-brace to stabilize the top joint of the X-axis frame. The print is very quick and the results are, well, mediocre. Subjectively, I thought that it helped, but when I ran tests for this article, it doesn’t look like it makes all that much difference. Ah well.
Anyway, the Y-axis design is dodgy too. The front acrylic plate flexes when the motor pulls against it, and this leads to a deflection that you can feel with your finger and causes backlash in prints. This symptom got worse and worse over the printer’s life, until just recently my circles became so non-round that I had to fix it.
The good news is that a Y-axis, frame-induced backlash fix is easy. If the first virtue of the A8 is that it’s cheap, the second is that there’s a large community of people working on improving it. [Leo N], in particular, has built both front and rear Y-axis braces that work marvelously, and have been tested by many A8 owners. Measured with an XY backlash test print, my Y-axis backlash went from 0.2 mm to 0.06 mm with the front brace, and down to unmeasurable with the addition of the rear brace. Problem solved.


[Matsekberg]’s Y-axis re-work also looks very good to me, because it offloads the tension in the Y-axis belt onto two additional threaded rods. It’s a more involved modification, but it might be worth it.
This still leaves acrylic frame wobble and the ripples. The nuclear option is to replace the entire frame. You could simply buy a decent frame kit and use that instead, which for $50-70 may just be the right way to go if you’re starting from scratch. Or you could print your own connectors and build the rest of the frame out of aluminum extrusion. There is an active community around the AM8 design doing just that, for instance. Both of these options involve a complete re-build, which costs you an evening or more. For me, the minor cosmetic flaw hasn’t warranted the effort yet. I’m too busy running the thing.
The Really Bad News
Somewhere around 130 hours of runtime into the printer’s life, the hot end intermittently stopped heating. I had just swapped in a new fan duct, so I thought that maybe it was blowing on the heater or something. But when the heater failed completely, I discovered that the crimp connections on the heater cartridge had come loose. I pulled these out and re-crimped them, and it’s been running fine ever since. But I’m keeping my eyes on them. Check all of the crimps during your build to be sure.
Older versions of the A8 also had a connector on the motherboard that was insufficiently specced for the current it had to carry, and this printer got the deserved reputation as a firestarter. My August 2017 A8 had swapped these out for screw terminals, a welcome change. My heated bed failed after around 150 hours anyway.


The singed plastic was to be found on the heated bed itself. The connector at the joint there is repeatedly wiggled every time the Y-axis travels back and forth, losing contact and arcing hot enough to melt and blacken the plastic shroud. Scary business.
In the end, I simply removed the pins and soldered the wiring from a PC power supply, complete with a pair of Molex connectors, directly to the heated bed. I would do this modification before installation if I were doing it again to prevent eventually rebuilding the Y-axis.
Both of these problems stem from dodgy connections of parts that are heated to various degrees and under repeated flex strain and significant vibration. Here’s an Ask Hackaday: what is the right connector or strain relief solution here?
Filament: Creature Comforts
My last complaint about the A8 is changing filament. The filament path is blocked by a fan and heatsink that keep the top of the hot end cool. Inserting new filament without completely unscrewing these is a pain. Various solutions range from forgoing the heatsink entirely to designing a hinge or basket for it.


I took the middle road and cut down the heatsink to 1/3 of its original size, and printing a shroud and clip system for the fan. I don’t want the fan blowing dust into the filament path, so a shroud was a must, and I didn’t feel comfortable about losing the heatsink or its tight mechanical connection to the top of the heat break.
It’s very easy to change filament now, and the top of the heat break seems to stay cool, even under sustained use. I’m content, but there must be a cleaner solution out there. The filament-changing issue is a creature comfort, and if you don’t switch among filaments often you might not even care, but for me, it was worth experimenting around for a few hours and eventually taking a hacksaw and drill to the heatsink.
The Bottom Line
If you’d like to walk down the A8 path, get ready for a fair amount of work that can eventually be rewarded with proximity to printing Nirvana, if not absolute bliss.
Would I recommend the Anet A8? First, you have to be sure that you want a kit. A lot of labor goes into turning a pile of parts into a working printer, and a bit more goes into making it a good printer. If you think you’d enjoy that kind of hands-on experience, just order one — you won’t be out that much money anyway. I love mine, and it’s proven very reliable in the grand scheme of things, but the gears needed to be adequately greased with my blood, sweat, and tears.
If you want a printer to work beautifully straight out of the box, this is not for you. You’ll be much better off spending $500-$1500, and there are many attractive options these days. In the long-run, you’ll probably still be doing a similar amount of maintenance and tweaking — that’s just the reality of 3D printing — but at least you’ll hit the ground running.
The only serious qualm I have about recommending this printer is the problem with intermittents in the hot end and heated bed. Because it’s potentially a fire hazard, I take this shortcoming reasonably seriously. My printer sits on a 4 cm thick slab of concrete, and I don’t want you burning your house down.
At the price, I’m sure that many of you have at least toyed around with an A8. Post up in the comments with your favorite mods, workarounds, and fixes. What’s the right solution for the hot end and heated bed connectors? Do you have a better solution to the filament loader issue? Good experiences or bad?


Anet A6 has more rigid frame and its price is almost the same as A8.
Tevo tarantula is aluminium frame and is almost the same price as an A6 – it also doesn’t have quite as many fire risks (though a mosfet for the heated bed and a better psu are probably still a good idea).
And for a few dollars more than a tarantula…
feature creep.
and for a few dollars more the Tevo Tornado, which I think along with the CR10s are a step ahead.
And for a few more dollars, a Monoprice-Branded Wanhao Duplicator i3!
>And for a few more dollars, a Monoprice-Branded Wanhao Duplicator i3!
And for a few more dollars, a proper Prusa i3 MK3.
And for a few more dollars…
I originally bought the A8 b/c even if the frame was a total fail, it was a cheap parts kit, and I’ve always wanted to make a Mendel 90 / wooden box design. But now I like the thing so much that it feels a shame to gut it for parts.
And that’s the point of the article — you don’t get the best printer at the absolute bottom of the price pool, but you do get something surprisingly workable. At least I was surprised.
bought a a8 for 100 bucks off ebay used the parts to make it print 24x24in with a new frame sized up frames made from carbon fiber reinforced plywood no flex frame was 20 bucks on ebay for wood frame reinforced it with 2 yards 2x2twill carbon fiber what parts catch fire no problems yet 180 investment
This does seem to ignore the Monoprice printers which come assembled for that much.
Don’t they have quite a small printbed though? A6/A8/Tarantula are all around 200mm XYZ
The Monoprice Mini (was $154 cyber Monday, $220 normally) has a 120mm^3 print volume.
I get 210 mm x 210 mm x probably 200 mm out of the A8. It’s a lot bigger.
not really comparable…the cheapest MP printer is 220$ but that’s the mp select mini which is much smaller. the equivalent printer would be the maker select plus which is 400$.
check it our yourself:
https://www.gearbest.com/3d-printers-3d-printer-kits/pp_337314.html
https://www.monoprice.com/pages/3d_printers
Nobody is debating that if you want something cheap, easy, and not completely terrible, then the Monoprice machines are probably the best bet.
But if you want to put in the time, you can get a much bigger and better printer for similar cost. Even if it isn’t about the money, some people just enjoy tinkering with these things.
I had the same problem with the heated bed. I just soldered the wires on directly. Thanks for the advice on the frame stiffeners. I’m going to give those a try.
It’s not how cheap you can print, it’s how well you can print cheaply ;)
1++
You read the article! :)
I have the A8 Anet printer, but I am at the point where I need to be tuning it up a lot. It is getting frustrating. I wonder how other printers do. The build takes a long time.
Yesterday I had bought my second A8 for just 128usd at gearbest. Including shipping and werehouse in germany so no tax. Incredible how low you can buy it. If I want u build my own printer I would pay mor just vor motors, electronic and extruder. My first Anet i screwed to the table to minimize flex. Now i am going to build cheap and easy frame from 3030 extrusions to get rid of frame flex in Z axis. and other directions. That would be much solution better than any printed bracket.
I think the solution to that molex connector would be moving it elsewhere. The wire can run out of the bed and the molex connector placed somewhere immobile.
Get a TROXY X1 on ebay. They can be consistently purchased for $150 including shipping to the US. Easiest kit ever to assembly.
You can get them cheaper if you look around a bit.
+1. Got mine for US$140 including shipping, took a very casual 4 hours to assemble. First thing I did was have it print itself a few upgrades, now it prints better than the $2k Makerbot at my office.
I understand what you’re saying but that’s not a very high bar….
My A8 chewed 4 KG of PLA filament in the last 3 Months with only one Problem. The Heating element was loose in the Heatend and got shaken out of the Aliminium block. after fixing this issue, i had zero complains.
the only modifikation i did was replacing the cooling fan with a 80mm PC fan (silent). Didnt touch the Axis.
And the heated Bed works fine with cheap masking tape. no glue, no PEI film. My prints are stuck really well to the bed. i have to use brute force, to get them off.
Great Printer in my opinion.
my favorite thing about the a8 is how there’s always something you can upgrade on it. It comes ready to print but for a hacker it always keeps you busy with new ways to make it better. Its very educational.
My first car was a beater ’73 Volvo station wagon. I learned a lot about auto mechanics, DIY and otherwise, for not much money. The thing drove like it was on ice, even on dry pavement in the summer, and it leaked transmission fluid. In comparison, the A8 is a cakewalk.
But I second the sentiment that the A8 is a great learning experience, even if it’s not particularly forgiving.
I have the Anet A2 which seems to have a more solid frame but needs more “fixing” to be a good printer. In regards to the heated bed connector I removed it and soldered the wires directly. I also added a cable chain from the bed in a loop back to the frame. This stops the movement tugging on the wires and spreads the bend evenly over a large length. The cable chain looks cooler than wires hanging around too!
Maybe use the car electronics type connectors instead of molex, those are meant for challenging situations including various temperatures and vibration I figure.
The good thing about the ANET A8 is it has a pretty broad following with lots of people having built and used it ready to tell you all about the problems and how to fix it.
The bad thing about the ANET A8 is it has a pretty broad following with lots of people having built and used it ready to TELL YOU all about the problems and how to fix it. :-)
And for a few $ more you can get a Folger Tech 2020 i3 that’s much more rigid. I’ve had mine for a few years and Aside from printing cable chain, part cooling fans ducts and a spool holder it’s been mint. No breakdowns at all. Just fire it up and it runs.
Nearly twice the price, that is. And a smaller build volume. And for a few dollars more you can buy this, and then that one, and that’s almost the same price as this…
I don’t think the article is about the pros and cons of a specific brand or model of printer. It’s more about the art of tweaking and tuning a cheap printer to rival the big-ticket items.
I find a very similar one (Geeetek) for only 130 € (including shipping). Ok, it’s not the acrylic version, but plywood, but it seems reasonably solid… So I guessed it was the price I can put in it for my usage… Just finished mounting it, Now, I have to calibrate it (and learning how to made some print : I have a lot of useful idea — and no, I will not print yoda :-) ).
I would take plywood over acrylic any day — it’s stronger and damps noise much better. That’s probably a strict win. Congratulations. :)
The only reason the A8s aren’t made of plywood is that it’s cheaper to laser-cut acrylic, if you leave the sticker-peeling to the end user.
Plywood is a terrible building material for a precision instrument. It expands and contracts with the temp, is susceptible to moisture, and can warp. Acrylic doesn’t have any of those drawbacks. It’s a bit weaker sure, but it’s stable, which is far more important for a 3d printer’s frame.
Having dealt with acrylic in 3D printers from day one in a disasterous Darwin, through the horrible acrylic extruder design in the Cupcake, to the now kinda lousy frame on the A8, my experience with acrylic and 3D printers has been nothing but negative.
Metal is probably better than either, but I haven’t found plywood to be all that much of a problem for indoor use, and neither did Joe Prusa when he designed the i3.
Why would you choose the A8 for this? There are many machines in that price range, or less, that are much better machines.
Such as…
I believe it’s because it has a following of sorts. People to help you, people to share files to fix/improve parts etc.. Where other printers don’t have that traction yet and are stuck in open water for you to figure out.
Adding “how much your time is worth” to the cost of the printer is like trying to tell someone you spent 30 minutes eating a big mac meal and it cost you $67; or that $50 worth of groceries actually cost you $150 because you had to be at the grocery store to buy it.
it’s a different story if you’re building this printer for work, but this printer isn’t meant for professional use so if that’s what you’re going for you have the wrong printer.
Absolutely. I amortized the cost of my printers purely in the number of hours entertainment I got from assembling them. After that, it’s all free!
+1
I have had success with the He3d EI3. They can be found for 180$, but usually come with a 50$ shipping fee from China(was 4 days in shipping). The instructions are TERRIBLE, but it was fun figuring out how to get to together taking about 3 hours for assembly (due to terrible directions) and another three hours to go from knowing nothing about 3d printers to printing my first viable 20mm test cube.
To give an idea of how bad the instruction video was; halfway through the video set the guy’s hands drift off screen only to return a minute later with an assembled sub component. My contempt for the author of the video, nor what I said at the time, could be elaborated upon nor repeated in good company. I do suggest that whatever 3d printer you purchase you check the build instructions before you buy.
“I do suggest that whatever 3d printer you purchase you check the build instructions before you buy.”
That’s good advice that applies to many other potential purchases. I sometimes forget that the Internet age has given us the ability to look at the manuals before buying.
I’ve got a Prusa i3 payed $240 3 years ago and my son and I put it together in 4 hrs. Put it on a small micro wave stand and built a box around it. Yes you do have to do the odd thing to it but I believe that with any printer if you are a hacker you would make some changes to it. On average every 3 to 4 months you have to do a little tune up on it. I go threw 1 – 3 kg of filament a month with it.
Right now it is down. I am so so stupid.
It was time for a tune up because I was going to do a lot of printing for Xmass.
I was drilling a hole for the reset button. I had a peace of wood between the plastic I was dilling and the board.
The drill went threw the plastic but I didn’t stop it fast enough and it moved the wood and drilled into the circuit board.
So now I eather have to try to solder the board that is 4 layers thick or put in a new one.
So So mad.
But I must say I really do love the Prusa i3 3D printer. Its gone threw hell and back.
I can print with a #2 head no problem and they all look great.
“So now I eather have to try to solder the board that is 4 layers thick or put in a new one.”
https://hackaday.com/?s=PCB+repair
Might still work without reset
For a site catering to people who build things that’s an awful lot of whining about the time and effort of assembly. Sure, if this were a site for consumers pointing out that one’s time is worth something would make sense. Aren’t HaD readers building RepRaps for fun anymore? It does seem like an awful long time since I have seen an article about a scratch-built printer. I just assumed it was because it’s been done so many times as to be un-interesting, not because people stopped doing it.
My other printer is a triangley Prusa Mendel — with printed parts from Joe himself! Still runs fine after six years. Holla!
“Fixing X-axis wobble was one of the main goals of the Mendel 90 and Prusa i3.”
Ah Ha! I wondered about that. Every “how to tune your printer” article talks about that symptom but I have never seen it. But… guess what I built.. a Mendel 90!
I wish someone would take the design principles of a normal commercial inkjet paper printer.
Stamped metal bits for the structure, DC motors with optical strip encoders for the axes, and greased plastic runners for the axes guides.
Only then will we know truly how cheap these can be?
I (unfortunately) own an Anet A8. I jokingly call it the Anet H8 (Hate, because most of the time i hate the thing).
Ive been a member of multiple support groups for it and it seems the problems go well beyond just the poor design choices in the frame. There seems to be some QC issue with the electronics as well. Ive seen bone stock A*s print some amazing things… of course ive also seen some that literally cant print a straight line.
While it is a kit and much comes down to the indivisual efforts put in by those building them I have to say I spent a good amount fo time building mine making sure everything was square, secure but not to tight etc etc and it “prints” garbage almost every time. I tore the thing down and reenforced the frame with some steel L bar which helped but the stepper drivers chatter and the build plate warps and on and on and on.
I would not recommend this printer to anyone other then a seasoned maker simply due to the ammount of work that needs to be done and the attention to detail required just to get it to make an “ok” print.
Spend a little more, get a better printer.
After all said and done, time and materials the thing cost well over $1000 (yes that includes time @ $10/hr, which is WAY below what its worth)
I also bought the A8 from gearbest… It’s the BEST 3d printer I’ve ever seen. (It’s only the second 3d printer I’ve ever seen) The other one was some doodad that printed with gypsum and superglue. Maybe I just have low standards… but the thing works great right out of the box (after assembly). I did buy some PEI, but melted through it on my first attempt to print, threw it out and got a sheet of borosilicate glass, I haven’t looked back. Sometimes I have issues with ABS sticking (I use acetone and an abs square to rub some on) And I have some probeljm with the bed not getting to 100C (I cover it with a piece of cardboard to start)
But other than that. I thought the thing works great!
Again… I’ve only ever seen one other printer.. so maybe my standards are off, or maybe I can just appreciate the fact that I can get super accurate parts made in any design I want, in a few hours?
Still working on how to print gears… but I’ll figure it out. Somethign with the tooth size. 3/32 is too small I think. But it’s really hard to find any information 3D printed gears, and what sizes should be supported.
https://www.emachineshop.com/ has free CAD software that includes a gear wizard. Input your parameters then export the model. Import that into the software you use for making STL files.
I went this route since I didn’t have much expendable income at the time and I couldn’t be happier with it. Loved the joy of putting it together which reminded me when I was younger building old radioshack kits. My first test print came out gorgeous I didn’t even know what ringing was till it was pointed out in the article and even then I still don’t care hell I didn’t even change the fan duct till months later.
I never encountered Y-axis flexure, maybe because I don’t have my belt that tight but a brace couldn’t hurt. As for the hotbed connector I hear most solder the wires on, for me I never had the issue and may never since my hotbed plug & cables run through a cable chain. Only tip I have is do not brace the tops of the lead screws they are meant to wiggle and play, they only carry the Z load otherwise it may end up binding there’s a reason the motor coupling flexes.
Sounds like a need for replacing with precision ACME screws and better couplers. Get the things straight so they don’t wobble and won’t be putting wonky forces into the machine.
Nothing is actually visibly wobbling they’re straight it’s just a bad “tip” I keep hearing, It’s quite the opposite if you do put a bearing & brace on the other end it will introduce forces into the frame. Best way to describe it is it’s basically a moot argument among two sides but the end result is you never needed it in the first place… Maybe people just dont like seeing the end of a shaft sticking in the air so it has to do something if you hold the other end :D
I’m with you @rbrat3. The smooth rods should keep the axis straight, and the screws should flop in the breeze — that’s why the motors have couplers on them. Otherwise, you’re trying to get four elements parallel and square instead of just two.
That said, my z-screws would fit through those holes in the acrylic if they extended that far. One is off by more than the other. Manufacturing tolerance in the frame? Screws? No allowance to square the motors up with the frame? Don’t know, don’t care. Just leave ’em floppy.
Actually the motor depth isn’t set properly in the coupling from the factory, easy thing to miss. Not terribly important but if the motor shaft and lead screw are nuts to butts inside the coupling it will limit its range of “flex” motion defeating the point of the flex coupling. IIRC depth should be 10mm-ish for both motor and screw, just before the first flex line cutout on each end.
I own one for one an a half years now and I am still amazed. It just works and does everything I want. Printed the usual upgrades like braces and fan nozzle, changed the horrible wingnuts for bed-levelling for some custom made knurled nuts with bigger springs and installed a commercial grade nozzle.All set.
On my A8 in standard configuration the heated bed never gets above ~80 C. For printing ABS and PC i just “hotwire” it straight to my bench power supply and crank it up to 15V. Until now, it survived this abuse…
The A8 is my second kit printer (preceded by another Prusa clone by CTC). I took less than 8 hours to mount it, but made 2 mistakes : the X axis was reversed, and the Y belt was too loose. Judging from the horror stories I just read, I must be lucky with my kit experience.
My bed connector also burnt out, I replaced it with an XT60 connector and beefier AWG12 wire. This molex connector seems a bit flimsy on the amperage side (and my XT60 is overkill, yes).
I also added a mosfet betwween the motherboard and the bed.
I use bluetape strait on the original heatbed and I’m satisfied with the results
I never had any problem with the stiffness of the frame, my print are square every time.
My current stats : 176 prints done, 245.919 m of PLA
“I never had any problem with the stiffness of the frame, my print are square every time.”
It’s not whether it’s square or not, which mine seems pretty much to be, but whether the frame vibrates while printing, which makes surfaces ripple and filament not overlap as much as it should. It’s subtler, and if you’re printing organically shaped objects or not stressing them to breaking, you might not notice. (Making it a non-issue.)
Try the linked wiggle artifact test, and maybe you’ll see it. Or leave well enough alone and happy printing. :)
I still have no idea why the y-axis on mine got so much worse over time. I thought maybe a bolt came loose, but I checked them all. I may have accidentally changed something in the geometry when picking the printer up to move it. Meh. Fixed now.
Here you can find the ultimate upgrade for Anet A8: https://www.facebook.com/tatarasteelframe/
Try it and you will never regredit the dxf file are released under CC, license. I build 2 Tatara A8 and I go for a third one soon. If you enjoy rembeber to tips the designers.
What size Igus Drylin bearings did you use? Seen reviews that the 8mm ones won’t fit right to replace a LM8UU
The plastic bearings depend on being surrounded by something rigid — like the pillow blocks from the old LM8UUs — to hold their shape. I know that some folks have just strapped them into plastic holders and been less than happy.
(Just tested this out.) There is some slop in the way they fit on a smooth rod — you can wiggle a single bearing a little bit perpendicular to travel. But then you’ve got four of them on the y-axis for instance, so it’s seriously overconstrained and you’ll need _some_ slop for it to move at all in the real world.
My experience is that they’re pretty good. I should have run before/after tests, but I didn’t. With rebuilding the whole y-axis to install them, though, I’m not sure I’d believe results anyway. They’re certainly not horrible.
Well, l just order on from lightinthebox for $119. Spent another $100 on materials and upgrades.
Love my A8; leaps and bounds better than my Makerbot Replicator 2X.
Plus I had a great time assembling and upgrading it. Highly recommend it as a 2nd printer or even a first if you have a lot of patience.
Sainsmart actually did this cool deal where it was $27 for a very short time so I bought one. Haven’t assembled it yet though.
I just got the M3D micro for CAD$200 on a groupon. Not a bad little printer for the money, but the big gotcha is that the heater element cannot be second-sourced and they don’t sell replacements. They’re doing some goofy measure-the-heater-resistance to measure temp and it’s calibrated for each heater.
I’m sure I can find a close enough heater element on AliExpress and the printer firmware has an OSS variant so I’ll be able to make it work, but finding a physically compatible element is the trick.
As far as calibration… the biggest thing the M3D needed was backlash calibration. After that I’ve been pretty happy with the print output.
Got one, and absolutely love it.
It reliably makes prints way better than what years of online browsing led me to believe were possible.
Without any further tuning, I could use it to reliably print working keys.(As in keys for locks) and many other tiny mechanical pieces.
I definitely recommend the Y axis rework (https://www.thingiverse.com/thing:2045010) as an early upgrade.It is very cheap and will both prolong the printers life by changing the “belt pulling frame in” design to a more positive lock, and at the same time provide an easy tensioning mechanism, all of which with a minimal material cost compared to the wasteful braces people seem to like printing for it.
I would advise against delrin bushing though, I went that route, and those are meant to be mounted with a tighter fit that the stock blocks provide. They make for a noticeable noise reduction, but bring in more print quality issues than was worth the trouble to me.
It is a very capable and crazy cheap machine. But proper assembly and “equalizing” the various forces on the frame are critical to good operation. In that department youtube features an awful lot of crazily badly assembled (or “fixed” by butchers) machines that would just deserve a bit of realigning.
The plate connector issue is however a very common one, and you should totally expect to have to fix that if you get that printer.
At any rate, can’t go wrong for the price.
Good to hear that the y-axis rework works. It really looks like a clean solution. I just don’t want to unbuild the y-axis to accomodate it. (Lazy!)
But calling the y-axis braces “wasteful”? They got me from ridiculous y-axis backlash to unmeasurable and required less than $1 worth of filament. I’ve wasted a lot more for a lot less. Heck, the whole point of a 3D printer is to 3D print things. :)
We’ll see how they hold up over time. I can imagine that they would weaken with the repeated stress.
I only really meant “wasteful” as in “using a lot of time/material for a single function”, where the rework solution only uses a couple small parts and has the added benefit of providing both the stabilisation, and an adjustable tensioning mechanism that one would end up adding too anyway, all in a single mod..
I’m a lover of elegant and polyvalent solutions :)
Now you mention it, yeah,apart from the additional printing time, the actual cost for printing braces is probably negligible anyway.
Like I said, I still love the design, so I think we agree on that front. :) I’ll try out the rework when I next have to take the y-axis apart. (Which might be soon — I tried to tape a piece of cork under the heated bed to insulate it a bit, and the tape has come undone. Should have used silicone…)
I like the idea of the y-axis tensioners too, but in truth you can tweak the tension simply by turning the two M8 nuts on the inside of the front acrylic frame piece (or bracket in my case). I.e. adjust the tension by sliding the whole front plate forwards or backwards, which takes the little pulley along with it. It’s only likely to be off by 1/4 turn or so, so you probably have enough slop on the threaded rod already.
A lot of the people debating the merits of this printer, suggesting spending upwards of nearly $270 more than the Anet’s rockbottom prices of around $130 (Black Friday deal), and calling it “nearly the same” are not just taking into account some functional printed bracing and changed parts, and maybe a frame kit or something, but adding in stuff like a brand new bed, and a swapped hot end.
Yes, if you are going with that much modification, sure, maybe you should spend $400 or more, but at the same point, what about the machines you refer to? Do they need the same modifications in the long run? If so, maybe you’re better off just going with the Anet and you get all of this for less than $400 if you shop carefully, right?
If you buy this or geeeeetech crap, you will also need to buy a pile of linear bearings, choose the most tight and install them. 4shorts instead of two longs on the print thead/x-axis do big difference. Glue those Y smooth rods on both ends, they rattle. then make the thread rods free on the upper side, you get rid of Z-wobble. MK8 extruder has crap gear, put MK7 or MK8 here immideately. Rework the pressure arm to regulated pressure, prin one more rigid and change slotted bearing to smooth.
A simple fix to the wobbly frame are this frame braces: https://www.thingiverse.com/thing:2074478
The small brackets mentioned in the article dont do anything at all, you need to triangulate the whole frame in the z-direction to reduce wobble.
It’s not fair to say that they don’t do _anything_… I had the placebo effect working for nearly a month before I did before/after testing with a good calibration test for the article. But yeah. They do not measurably help with the ringing.
Those stiffeners look good.
Still, the real problem with this frame design, is that they can rack — bend at the joint between the horizontal and vertical pieces. That’s why the i3 / Mendel 90 use a cutout of a bigger box for the frame — there’s no joint, and thus no way to trapezoid it. I’m half tempted to just cut out a plywood U-shaped piece, wedge it in the frame, and see how it goes.
Those stiffeners have a very wide base at the top, and if they’re jammed in tight enough, that should be almost as good as a proper all-around frame. Shame they require unbuilding so much to install…
Yeah, I got a run of the boards where one of the capacitors were bad. You have to have a firm hand with the vendors in order to get refunds, and RMS will most certainly cost more than just taking the loss and buying another–or better–controller board.
Waste of money. My main board failed after some time even after spending hours in assembly.
Electronics parts can be faulty. Get another from the manufacturer?
I ordered ANET A8 printer, I noticed white square boxes on the LCD panel after heat bed and extruder calibration (0.2mm gap). I tested with cross-checking connections and reset test (no D1 indication) . I have reported the problem to the supplier (GEARBEST). Buying a cheap stuff is good but issues are more in this printer.
I just got an Ender-2 for $150, and the machine is FANTASTIC. It took me a few hours to put together, has all metal parts, a heated bed, and genuine v-slot rails. It is built like a tank, so that none of the parts have much discernible play at all. Even printing at 0.2 layers, I can barely even see them because they are so consistent. My biggest concern right now is the tiny z seam, which is the only “flaw” in the part that you can see. But that is just settings.
So it’s a myth that unless you spend $500 to $1000 on a printer, it will be made of acrylic and 3d printed parts. There are many good, cheap printers out there. You just need to look for them.
Bought an A8 on a whim. Though for the price, I wouldn’t be out much if it was crap. Surprise surprise, it actually has worked great from print one. Only issue I have had is tall, skinny prints start to wobble at about 180mm and end of as a fail…
Had been considering adapting my cnc mill for some time (it has a place you could mount to on the head).
Fi ally ended up picking up one of these on eBay coupon @ $120
Just got it and together this weekend, seems to have some issue in the Z axis related to limit switch and Z1 motor, hear it may just be cold solders.
Will get the bugs worked out and printing soon.
Thanks for the advice, Elliot! Good article.
I bought Anet A8 from here, and I was very pleasure of their services: https://www.gearbest.com/3d-printers-3d-printer-kits/pp_337314.html?wid=1640583&lkid=15467805
All I have to say is my anet a8 has done more 3d prints than my Robo3d r1+. I chunked my Robo3d. I <3 muh A8.
My US$180 (shipped) Creality Ender 3 has been my workhorse for the last two years. Took all of 30 minutes to assemble and the only major thing I replaced was the extruder which cost less than US$20 for an all aluminum unit. The frame of the Ender 3 is all extruded aluminum and has a 230×230, 24V heated bed. I use a glass (regular window glass) print bed and hair spray. I print with PLA, ABS, PETG, and TPU. It has no problem printing non stop for several days in a row.
In my opinion the Ender 3 is by far a better printer than the ANET in price, specifications, and performance. It prints fine straight out of the box and requires very little maintenance. No, it’s not perfect but I can’t think of a better value in 3D printing.
12hrs to assemble? Ok. Do not purchase this printer if you’re not that bright. It took me about 2-3 hrs to assemble. I wonder how long it would take you to put something together from IKEA…
Here’s Elliot from the future. This printer has been going strong with little or no modification since writing this article. It took a good three-month shakedown period, as described, with a lot of printing and occasional tweaking and repairs, but it’s been 100% solid for the last 2 1/2 years.
That said, the market has moved too, and the price difference between an A8 and a mostly assembled printer like an Ender 3 is tiny. I don’t have one, and I’m irrationally prejudiced against Bowden designs, but if I were shopping around…