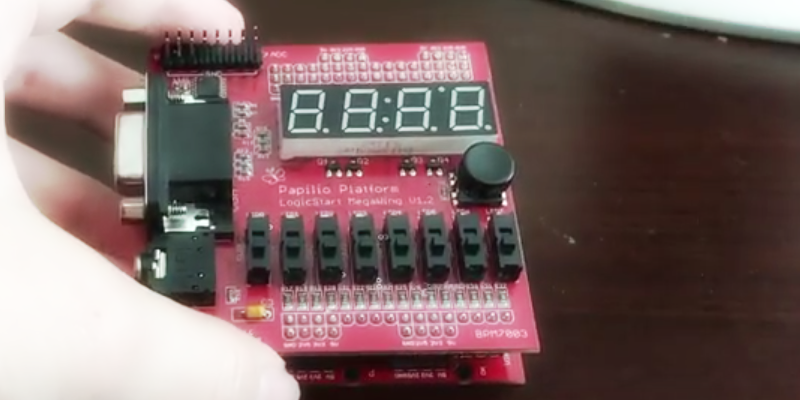
FPGAs are great fun, but sometimes you need a few starter projects under your belt. These projects might be something you could just as well do with a CPU, but you have to start somewhere. [LambdaPI] recently shared a 4-bit calculator created using an FPGA, and you can see it in the video below.
The calculator uses a Papilio FPGA board and a LogicStart accessory board for the display and switches. The Papilio normally uses schematic-based entry and Arduino code, but [LambdaPI] used VHDL. You enter the two 4-bit numbers on the 8 switches and then the joystick selects one of four operations (add, subtract, multiply, and divide).
Inside the code, you’ll see that the FPGA does all four calculations at once. The joystick just selects which outputs go to the display. Each module also decodes the LEDs separately which is an interesting design choice. On the negative side, it duplicates a lot of code, but there is no need to change the format with for example division (which shows as a fixed-point decimal number).
We’ve seen Papilio boards doing duty as a 128 MHz Z80 CPU. Or you can use one to create an Ambilight. However, as a first project, this calculator can really fit the bill. If you don’t have any hardware, you could experiment with using EDA Playground.


maybe one day open source tools will come to spartan 7, then I’ll dust my pappillio board off, I’ve just been having way more fun with icestorm…
Most of the papillio boards are ancient spartan-3 devices. The slightly more recent boards are the spartan-6, but the toolchain for those is almost 5 years old now.
Someone please release some affordable 7-series boards.
Joystick on a 4 function calculator, that is thinking outside the box!
And you can use diagonal input for multipy-accumulate for all your napkin DSP calculations.
I’m there, dude ????
If nothing else it is a great conversation starter and if you are basic math, it will look like you are working on something more complex.
Several FPGA development boards have devices that can run at hundreds of MHz, then choke the performance with [relatively] low speed interfaces. Depending on you choice of display [LED / LCD screen] a calculator actually makes sense, in that you can reduce the speed, measure the impact on power consumption, and still have a functional device.
Mind you, finding a decent keyboard & display combination is still a major exercise.
Very nicely done. I especially like the fractional output (along with the GitHub “initial chicken” comment). :-)
Quote [ Al Williams]: “The Papilio normally uses schematic-based entry and Arduino code”
I have both the Papilio one (not the pro) and a LogicStart MegaWing.
The base module Papilio does have HDL for a Arduino like board that is compatible with the Arduino IDE as far as I know but I have never used that.
I use the Papilio purely for VHDL which I write in the Xilinx ISE. If I want something Arduino like then I just use an actual Arduino. Though the Arduino running on this FPGA would be very fast indeed and have some advantages.
Also, in relation to the LogicStart MegaWing, it is designed as a learning board for VHDL and there are beginners tutorials aimed specifically for this add-on board.
Hello from the ORE community! :D
May you please post a video explaining your codes, i really have a had time understanding them especially what anodes represent