The Apple II was the popular darling that truly kicked off the ascention of the company that would later bring you darlings such as the iMac, iPod, and iPhone. The brainchild of the legendary Steve Wozniak, it was a low-cost home computer that made use of some interesting compromises to create video output with the bare minimum components. This can make it difficult if you want to output full-bitmap graphics on the Apple II – but it is certainly possible.
[cybernesto] set about completing this task, and released VBMP on GitHub. Programmed in assembly, it builds upon the work of democoder Arnaud Cocquière to display bitmap images on the vintage 6502-powered machine. Capable of displaying monochrome images in 560 x 192 or sixteen colors in 140 x 192, it loads slowly but does get the job done.
We’ve seen similar development underway elsewhere, too – on this vintage satellite tracker project. [Keplermatic] reports that their code runs at a similar speed to the VBMP loader, despite doing several things differently. It’s also available over at GitHub, for your reading pleasure.
If you’re looking to achieve something similar with your vintage hardware, it’s worth a look. Having the source available makes integrating it into further projects a snap. Learning to program these older machines can be challenging, but that’s half the fun – and when you build something awesome, be sure to drop it on the tips line.


I guess this is cool, but I could swear Broderbund’s “DazzleDraw” accomplished exactly the same thing decades ago, being a double-hi-res paint program for the Apple II. Meaning 16-color 140×192, or monochrome 560×192…
According wikipedia, the hires has only 280×192. So the trick is to double horizontal resolution.
So a lot of software on the Apple used normal HGR, there was less that used Double Hires (DHGR). That mode can be thought of as two modes:
1. A 140×192 color mode that has some “funniness” in how the colors are organized on the screen (it’s really 560×192 but only certain colors live in each pixel slot).
2. A 560×192 monochrome mode that is exactly what you expect.
The difficult part of DHGR is that the memory map is all over the place. Well, not without organization, but it’s definitely not a linear frame buffer where line n+1 is the (horizontal pixels / 8) bytes away from line n. It hops around, which is an artifact of Woz’s spartan hardware design where some of the addressing structure falls to the programmer to implement as opposed to hardware.
In the time of the Apple II, this was less of an issue when graphics were created on the machine itself. You can just straight BSAVE the video RAM to disk, weird structure and all, and when you load it back up everything goes back to where it was and your graphics are intact.
These days, we make graphics on PCs which output graphics files with a more or less linear structure, and you can’t just BLOAD something like that into the Apple II video RAM and expect that WYSIWYG. Tools have been created to preprocess, say a BMP, reorganizing the bits into the proper structure and they work quite well. When creating Keplermatik though, I really wanted to take a BMP as-is, put it on a floppy, and have a tool to load it in-place. So what’s where keplermatik-bmp came in. As noted in the article, sometime after I finished I found that someone beat me to it with VBMP but I’d still do it all over again as it was a great way to learn how Apple II graphics work. When I start putting sprites on the screen, it’s going to be a lot easier having done this project!
Also, I now adore 6502 assembly and believe it’s about the perfect instruction set for teaching someone how computers work. Enough to get the job done, not too much to where it gets overwhelming. Plus I can go hack on NES stuff or any number of other platforms that use it.
Actually, the 560 pixel mode isn’t quite what one would expect as one bit out of each byte remains unused!
It’s 7 pixels per byte. That’s right SEVEN.
Wikipedia is right with the 280 horizontal limit, but it may have been possible to get it to 560 using an 80 column add-on card (normal text width was 40). Almost nobody did 560 but it may have been possible. (I never had such a card. My old Apple ][ plus didn’t even have lowercase. :-) )
Pretty sure that’s incorrect.
Dazzle Draw is from 1984. The BMP file format isn’t easy to track down the date it was made, but there was zero documentation before the early 1990’s on it.
I suppose it’s possible, Microsoft was in business back then and even wrote Applesoft Basic, but as far as I can tell BMP wasn’t invented until the 90s. Corrections on that date are certainly welcome.
I have an Apple IIe with 2 floppy drives, but no DD floppies. Should build a SDISKII, but haven’t gotten around to it. Too bad flash floppy doesn’t support Apple II, although i understand it, since it’s not the same “standard” interface as the newer machines have.
The Apple II disk drive is a marvel of hardware simplicity unlike any other disk drive. They even replaced the board that’s normally part of the drive with their own hardware.
Just found this (although i think i’ve read it before)
https://www.cnet.com/news/the-untold-story-behind-apples-13000-operating-system/
Tells the story pretty well.
If you can get your hands on one and it’s in the budget, grab a CFFA3000. Amazing project that stores stuff on a (granted, outdated) compact flash card and emulates floppies and/or hard drives.
You can also get your hands on floppies fairly easy, eBay or Amazon is your friend. Grab ADTPro and use your PC’s sound output hooked to the Apple IIe’s cassette port to bootstrap the Apple IIe side of things, and you’ll be off and running. For faster transfers, you can get a serial cable or even better an Uthernet card that will let you transfer over Ethernet.
The latest CFFA card also has a USB jack for flash drives and the like.
I have a 2′ USB extension cable connected and running outside along with the disk-swap panel.
That way you can even put the lid back on and still swap storage!
Unfortunately the CFFA3000 is just too expenssive for me. I’m just trying to get this Apple to run, which i currently can’t do anything with, except load the ATPro into it. It’s not that much fun. I have otherwise never used Apple //.
I actually redrew the SDISK II for Arduino Nano and an SD card module. I have one that has a normal crystal, so it’s easy to replace it. That’s hopefully the quickest way to get something going on. There’s not much about it on the internet other than the original page, but i just found Suaide’s repository with LCD enhancement https://github.com/suaide/SDisk2.
Well oh crap. Now that i opened the //e again, i noticed i don’t have the regular 10×2 header on the card. It’s some weirdo, flatter, wider connector. So i need to connect to the D19 connector.
> it was a low-cost home computer that made use of some interesting compromises to create video output with the bare minimum components. This can make it difficult if you want to output full-bitmap graphics
Um, so what are those compromises and why is it difficult? It would be nice if the article explained a little bit more, rather than just dropping a link to assembly code.
Could be the interleave factors as well as color fringing?
https://en.wikipedia.org/wiki/Apple_II_graphics#Peculiarity_of_graphics_modes
It’s probably easier to get an aesthetically pleasing result with a monochrome display. You can’t have color fringing if there’s only one color.
Back then many color monitors also had a monochrome mode button right on the front so if the graphics were funky-colorful when they should not be, you could just go to green, then back to color when that was wanted. The most wonderful monitors out there were the nice soothing amber ones with lots of latent glow like old WWII radar screens had. :-) I loved those. (naustalgia mode up to 11 right now :-) )
The Apple2’s native way of showing high res images is direct memory mapping of a block of RAM to the display.
The expanded memory in later revisions like the 2e gives you 3 such blocks of RAM that you can pick between the first 2.
It also isn’t a one-to-one mapping but interleaved in memory and of course having color coding mixed in there too.
Our standard way of saving/loading images is to just store the block of memory “as-is” on disk and later read it back in to the same block.
This new software seems to bring translation of the official BMP file format to the table.
You might note in my above description it starts with the assumption you have an image in memory already that needs saved, so how do you get it there in the first place? Generally a paint-like program on the apple is used to create it initially.
Now you can use current tech and software to downscale an image to the right res/color scheme and just save it as a BMP file to transfer over to the apple. This code translates the BMP into native formatting.
If you read my post at https://hackaday.io/project/5358-keplermatik/log/152669-apple-ii-bmp-display-success I do go into some detail of why this is. If you want to do a deep dive, there are a lot of resources available, just google “Apple II DHGR” and there’s some great info to wade through
There were a few:
One, the signal is non-interlaced, has somewhat odd timing.
Another is color. Apple ][ computers are actually monochrome machines. Two levels, on and off. Color happens due to how NTSC will render smaller pixels (higher frequency signals) as color information. Most 8 bit computers with a “high resolution” mode can do this. And the outcome is something like even pixels being red, odd pixels being blue, or thereabouts, depending on that computer and it’s video signal timing, and color options.
In addition to this artifact color, the Apple ][ computers, except for the very early revisions, take the top bit of each byte as a color shift value. So, a given byte can be green / cyan or red / blue. It was the very first color cell, delivering the first color clash, to be seen in some of the early graphics demos.
So, with a monochrome signal, hacked in sync, colorburst, the Apple 2 ends up with color graphics. Over the years, people have experimented with patterns of dots, particularly in the double high res mode (twice the pixels), to get more color than one would think. Older television displays would render subtle colors, due to what I can describe as “loose” circuits, or maybe just simple ones. An Apple ][ video signal being rendered on, say a PVR, looks a bit different from one on a 70’s or 80’s era TV.
Finally, the screen addressing is bizzare! It’s not linear (like each line being x bytes for y lines), and it’s not character cell, like the C64 did. It’s interleaved throughout the screen! That, in addition to each byte holding 7 pixels, not 8, makes which colors happen with which bits different for odd and even bytes! Doing this in assembly language is non-trivial. Doing it fast is a programming challenge.
I remember having used other hi-res on the Apple ][, using an assembly routine I took from a german magazine.
“democoder”
That is a new word for me.
https://en.wiktionary.org/wiki/democoder
Here’s a primer on Apple II hi-res, why it’s so weird, and modern techniques we use to get more speed:
https://youtu.be/byVvMsW__Cc
The tool shown in this article is double hi-res, which is even more complex. Here’s a great overview of it:
http://www.battlestations.zone/2017/04/apple-ii-double-hi-res-from-ground-up.html
Watched your presentation after finishing keplermatik-bmp but still found it very enjoyable! Haven’t ever made it to kfest but always look forward to seeing what you and the others have been up to, thanks to you all for expanding the knowledge around the Apple II.
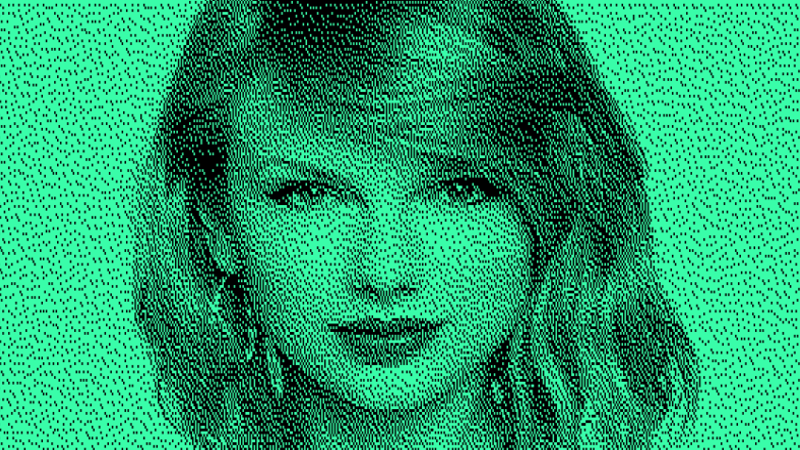
Good Lord if you’re going to the trouble to display a bitmap on the Apple ][e, why in the heck waste it on a picture of Taylor Swift? How about something more relevant like Steve Jobs or a modified Apple logo?
Lame pun, based on the TAY 6502 mnemonic. We can’t all have an amazing sense of humor :)
A Swift picture on a really slow computer. ;)
I have to admit I didn’t recognize her until you mentioned it. I just thought that was a picture of some random pretty girl that happens to be “not so busy” compared to the standard Lena image.
You can learn how to transfer your favorite BMP files to your Apple ][ with this video tutorial: https://youtu.be/DX9XC-OWQfQ
Hey! I referenced your code while building my project but never got in touch. What’s the best way to get in touch with you? Would love to trade notes and have you look through my code :)
Didn’t anyone ever make a decent videocard for the apple ][?
There were some exotic ones made. They only saw use in science, test, measure applications. A “home” arcade card or two were also made using the TMS9918 type of chip.
Problem was chicken and egg. Few users had them. Most software targeted the native display as a result.
I think, had Apple themselves made better graphics cards, the situation may have been different.
Today, it’s totally possible to do. Some people are doing it. It’s fun, but a curio without some software.
Great work, and a platform that can be a lot of fun, especially with a CFFA and a modest accelerator.
In the 1980’s I and Paul Baker from Apple designed and sold the ImageMaster, ImageWorks, and ImageWorks II boards for the Apple II. These were frame grabbers that could overlay 8 bits per pixel on Apple Video and worked really well. The biggest problem was printing them. The Laserwriter was new along with Adobe Postscript and I was able to make bitmaps at 300dpi with control of every dot. http://www.regnirps.com/Apple6502stuff/redshift_limited.htm
There was a great book out at the time about dithering with pink noise versus blue noise, etc. It was called “Digital Halftoning” by Robert Ulichney ( https://books.google.com/books/about/Digital_Halftoning.html?id=2P4hvscEjRYC&source=kp_book_description ). I was able to implement his best algorithm (in Forth) and got great results. I also tested some very expensive full color printers/plotters at Apple and they were quite amazing for the time. Sourcing that data with an Apple IIe and a Sony monochrome CCD was a lot of fun. (I see pixel patterns in the Taylor Swift image that his algorithm will prevent.)
BTW, I had sample photos from Voyager at Saturn by way of NASA Ames. I took in an Apple IIe and tapped the serial to one of their imaging terminals when they displayed images and popped them up on a 7″ monitor that was the Apple display. The NASA folks were using a VAX and a lot of expensive hardware and I was doing not quite real-time basic image processing. I think they bought some units.
The first board we made was a slow scan that required still images and captured one column per vertical sweep. The arrival of VideoRAM simplified the the circuitry for capturing an odd or even frame to 5 PALS and some glue. The Apple had an accessible 7MHz pixel clock and a nice part came out that handled sync and front-porch and color burst and all that for timing. Paul designed a really clever “super-syncer” to handle the offset between the Apple clock and the incoming sync. I fit it into one PAL. I think it made the capture clock sync within 1/5 or 1/7 of a pixel and got rid off all the jitter.
It was a very satisfying design and of course, as soon as it worked I wanted it to be faster. 8MHz accelerators cards made it pretty snappy.
If anyone runs across an ImageWorks II, I would not mind finding a couple.