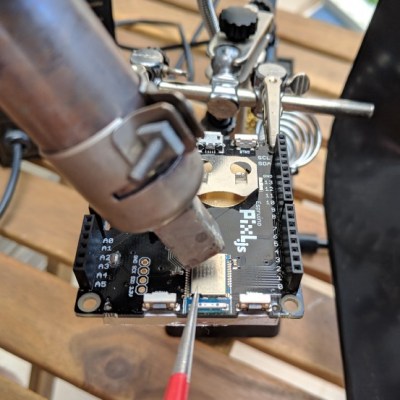
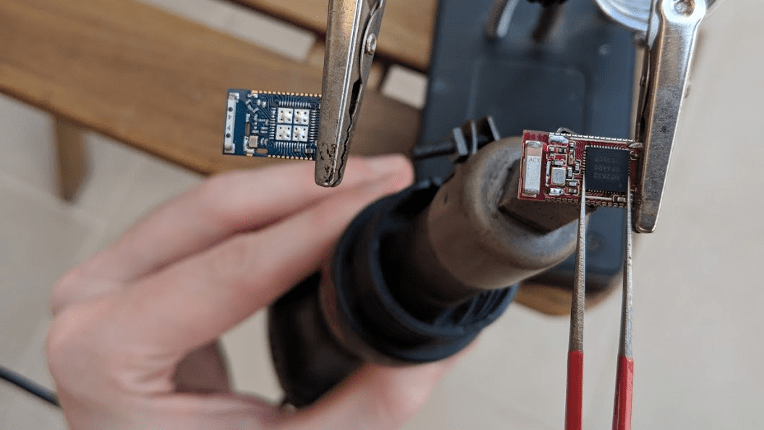
[Uri Shaked] accidentally touched a GPIO pin on his 3.3 V board with a 12 V alligator clip, frying the board. Sound familiar? A replacement would have cost $60, which for him wasn’t cheap. Also, he needed it for an upcoming conference so time was of the essence. His only option was to try to fix it, which in the end involved a delicate chip transplant.
 The board was the Pixl.js, an LCD board with the nRF52832 SoC with its ARM Cortex M4, RAM, flash, and Bluetooth LE. It also has a pre-installed Espruino JavaScript interpreter and of course the GPIO pins through which the damage was done.
Fortunately, he had the good instinct to feel the metal shield over the nRF52832 immediately after the event. It was hot. Applying 3.3 V to the board now also heated up the chip, confirming for him that the chip was short-circuiting. All he had to do was replace it.
Digging around, he found another nRF52832 on a different board. To our surprise, transplanting it and getting the board up and running again took only an hour, including the time to document it. If that sounds simple, it was only in the way that a skilled person makes something seem simple. It included plenty of delicate heat gun work, some soldering iron microsurgery, and persistence with a JLink debugger. But we’ll leave the details of the operation and its complications to his blog. You can see one of the steps in the video below.
It’s no surprise that [Uri] was able to dig up another board with the same nRF52832 chip. It’s a popular SoC, being used in tiny, pocket-sized robots, conference badges, and the Primo Core board along with a variety of other sensors.


Yep, sounds familiar. This weekend I pumped 13V into a 1.1V rail when my probe slipped! The 43″ display controller was already toast but I made extra sure by killing the Tcon board.
Nice save with the chip transplant! Those pin headers must be of the nicer variety if they withstood the hot air…
Q: What is embedded luck?
A: Embedded luck is when a chip transplant can be done without a firmware transfusion.
:o)
Without flux and/or cleaning the pads I have some doubts about the longevity of those connections. Seems like cold or dry joints waiting to happen. I would probably also have put some kapton or other heat protection over the pinheaders and switches.
Then again this might be the reason I don’t have the patience for doing SMC so far.
Those chinese hot air stations and a roll of chinese “Kapton” tape are a really good investment. Just do some practice on some garbage boards and you will be able to desolder big SMD really quick.
I find that [de]soldering larger SMD chips (not BGA) easier than [de]soldering 2 or 3 lead SMD’s with right application of a (small nozzle) heat gun.
Almost need a holding clip as small as the board.
My chip transplant.
Renesas microcontroller in the Nissan Leaf BMS:
http://wolftronix.com/E10_LithiumUpgrade/images/IMG_5579.jpg
To a Microchip dsPIC33EV, So I could re-use all the BMS hardware with different battery pack configurations.
http://wolftronix.com/E10_LithiumUpgrade/images/IMG_6698.jpg
That’s godlike. Wholeheartedly approve.
Kudos! How did you attach all the legs to the board?
The bottom of the interposer board is a 100 pin TQFP footprint.
The top of the interposer board is a 64 pin QFN footprint.
Lots of vias connect the two sides.
http://www.wolftronix.com/E10_LithiumUpgrade/images/PD70F3236_dsPIC33EV_layout.jpg
I chose the dsPIC33EV series because of the peripheral pin select, so I could map the nearest available pin to a specific function that the Renesas chip had on that same pin.
Nice hack, so much more worthy than the original post.
Definitely. The original post is just what you’d normally call a repair.