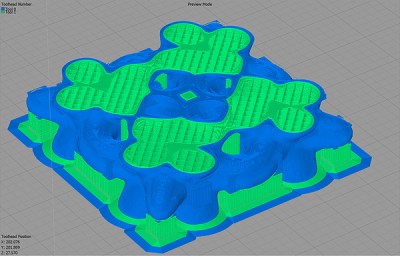
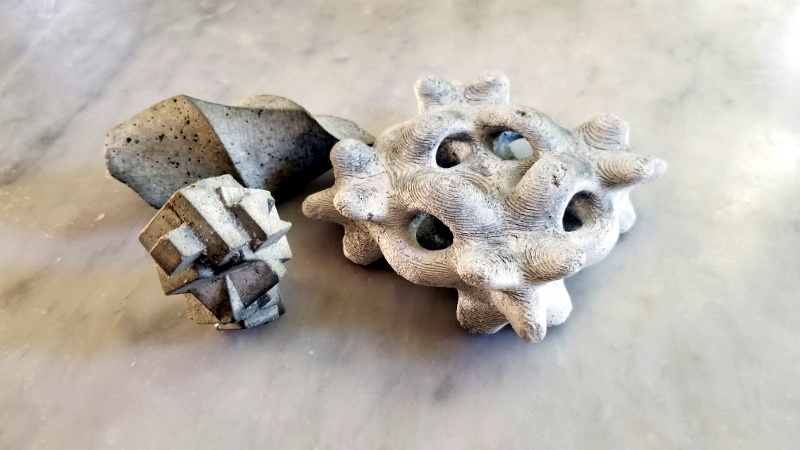
Complex 3D-printed designs often require the use of an automatically generated support structure around them for stability. While this enables some truly incredible results, it adds considerable time and cost to the printing process. Plus there’s the painstaking process of removing all the support material without damaging the object itself. If you’ve got a suitably high-end 3D printer, one solution to this problem is doing the supports in a water soluble filament; just toss the print into a bath and wait for the support to dissolve away.
But what if you’re trying to print something that’s complex and also needs to be soluble? That’s precisely what [Jacob Blitzer] has been experimenting with recently. The trick is finding two filaments that can be printed at the same time but are dissolved with two different solutions. His experimentation has proved it’s possible to do with consumer-level hardware, but it isn’t easy and it’s definitely not cheap.
 You might be wondering what the possible application for this technique is. For [Jacob], he wanted to be able to print hollow molds in complex geometric shapes that would ultimately be filled with concrete. The molds required extensive internal supports that would have been all but impossible to remove if they weren’t printed in a soluble filament. But he also wanted to be able to dissolve the mold once the concrete inside had cured. So he needed one easy to dissolve filament for the supports, and a harder to dissolve one for the actual mold.
For the mold itself, [Jacob] went with High Impact Polystyrene (HIPS) which can be dissolved with an industrial degreaser called Limonene. It’s expensive, and rather nasty to work with, but it does an excellent job of eating away the HIPS so that’s one problem solved. Finding a water-soluble filament for the supports that could be printed at similar temperatures to the HIPS took months of research, but eventually he found one called HyroFill that fit the bill. Unfortunately, it costs an eye-watering $175 USD per kilogram.
So you have the filaments, but what can actually print them at the same time? Multi-material 3D printing is a tricky topic, and there’s a few different approaches that have been developed over the years. In the end, [Jacob] opted to go with the FORMBOT T-Rex that uses the old-school method of having two individual hotends and extruders. It’s the simplest method conceptually, but calibrating such a machine is notoriously difficult. Running two exotic and temperamental filaments at the same time certainly doesn’t help matters.
After all the time, money, and effort put into the project (he also had to write the software that would create the 3D models in the first place) [Jacob] says he’s not exactly thrilled with the results. He’s produced some undeniably stunning pieces, but the failure rate is very high. Still, it’s fascinating research that appears to be the first of its kind, so we’re glad that he’s shared it for the benefit of the community and look forward to seeing where it goes from here.


ABS or HIPS will dissolve in Acetone many times faster than HIPS will dissolve in D-Limonene. Probably doesn’t solve the toxic disposal issue, but should make the process much smoother.
but that doesnt help because with the supports made with hips then the abs or pla goes bye bye also…
Or he could just print the part in ABS, encase it in plaster, solve the abs with cheap acetone, pour the concrete and then solve the plaster in water. Lake a lost wax casting but with acetone to remove the model.
Is plaster really that easy to remove with water? After all, when you add water it hardens… A tip – when you add water glass (sodium silicate), plaster hardens so fast you can’t even mix it properly. Maybe if you thin it with water, it will speed up plaster hardening.
Can’t use water soluble material for the final step, because it has to withstand water based concrete.
Maybe it is not a good idea of him to make a photo of his keys as a size comparison.
It’s obviously a honeypot.
How about ABS and PVA but the opposite of what is usually done. Have ABS for support and PVA for the model. Acetone dissolves supports and water dissolves the model.
Having worked with PVA release films, I’m pretty sure the water in the concrete wouldn’t play nice with a PVA mold.
How about printing with one solvable material and burning the second away?
Do like the incas did back in the days. Mill what you want to mold i wax -> put clay around wax -> make a hole in the clay to get wax out and mold in -> burn the clay in an oven -> pour out wax -> pour in mould -> break clay…
Hey, Jacob here. to each question:
Why I didn’t use ABS? Because I didn’t think of it. Its absolutely worth a shot, though I wonder what acetone would do to a water soluble filament. Acetone does wacky things to most filaments, but if something nylon based doesn’t react to it, then a ABS/Hydrofil Combo might work.
Why I didn’t use plaster or lost wax casting? Well, it would have been easier. I was more interested in producing a supported mould than in the actual sculpture that would result.
Is it a good idea to take a picture of my keys? no, won’t be doing that again. Never underestimate the ability of enterprising thieves to take an innocuous piece of personal data and extract something compromising. So if you want my bicycle with two flats or my 11 year old toyota with mismatched tires, I suppose, have at it.
How about printing one solvable material and burning the second one away? Can’t imagine what that would smell like. I found a filament spec’d for lost wax casting that prints in the same temperature range as PVA, and burns out in an oven at 270. So it may at least be possible to dissolve one filament, cast it, and then melt the wax mould off of it. Not as fun as burning.
Can’t use water soluble filament for the final step, as it would degrade due to the moisture content of the concrete. I actually found with Hydrofil that you could, i made a couple flat moulds with hydrofil. I don’t know about PVA, but Hydrofil dissolves slowly if you don’t circulate warm water and keep it fresh, so it held up for 24 hours, long enough for the concrete to cure.