Getting PCBs made is often the key step in taking a dodgy lab experiment and turning it into a functional piece of equipment. However, it can be tedious to wait for PCBs to ship, and that can really slow down the iterative development process. If you’ve got a 3D printer, though, there’s a neat way to make your own custom PCBs. Enter PCB Forge from [castpixel].
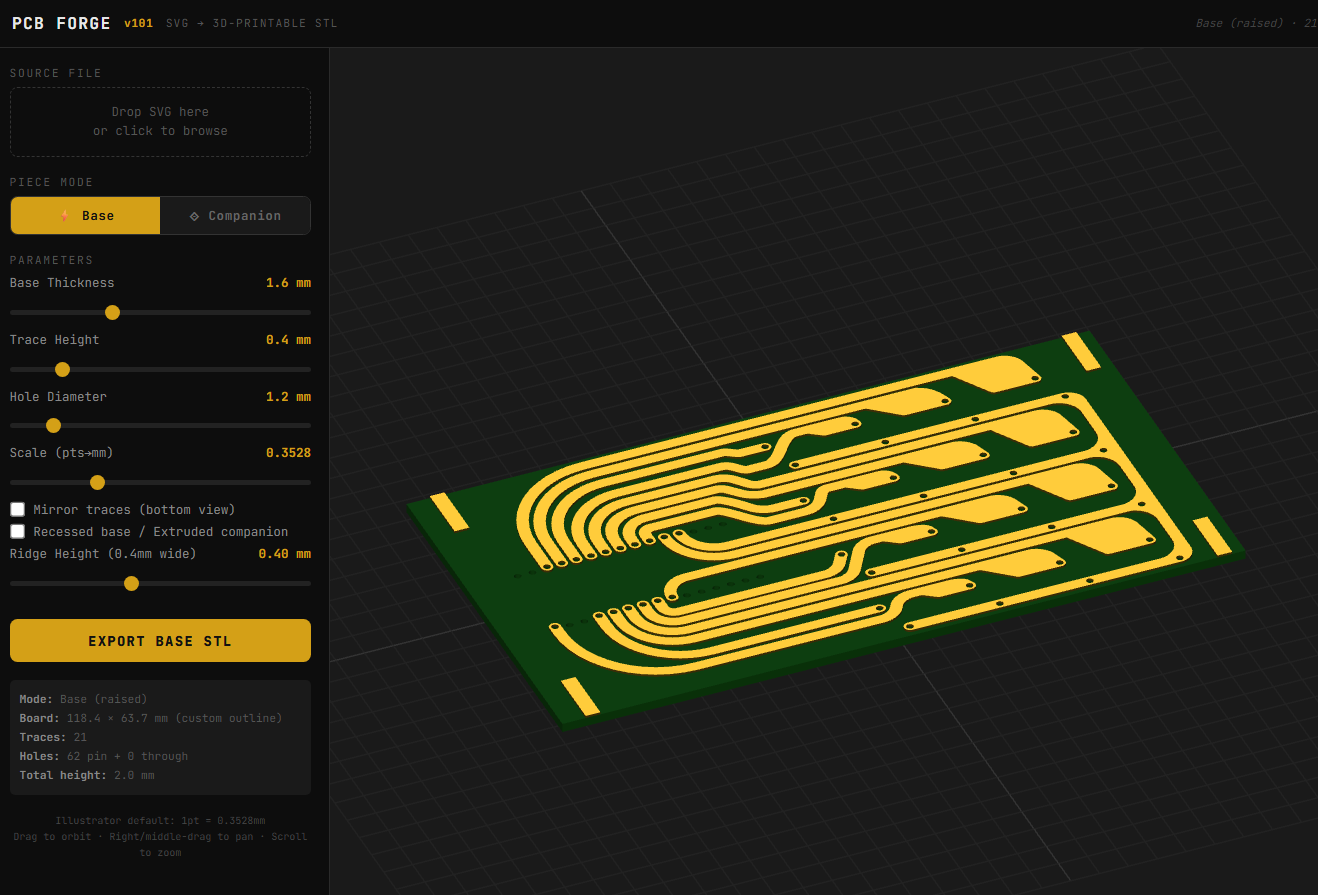
The concept involves producing a base and a companion mold on your 3D printer. You then stick copper tape all over the base part, using the type that comes with conductive adhesive. This allows the construction of a fully conductive copper surface across the whole base. The companion mold is then pressed on top, pushing copper tape into all the recessed traces on the base part. You can then remove the companion mold, quickly sand off any exposed copper, and you’re left with a base with conductive traces that are ready for you to start soldering on parts. No etching, no chemicals, no routing—just 3D printed parts and a bit of copper tape. It rarely gets easier than this.
You can design your PCB traces in any vector editor, and then export a SVG. Upload that into the tool, and it will generate the 3D printable PCB for you, automatically including the right clearances and alignment features to make it a simple press-together job to pump out a basic PCB. It bears noting that you’re probably not going to produce a four-layer FPGA board doing advanced high-speed signal processing using this technique. However, for quickly prototyping something or lacing together a few modules and other components, this could really come in handy.
The work was inspired by a recent technique demonstrated by [QZW Labs], which we featured earlier this year. If you’ve got your own hacks to speed up PCB production time, or simply work around it, we’d love to know on the tipsline! Video after the break.
![[Denny] removing a plaster bust from a microwave-softened mold](https://hackaday.com/wp-content/uploads/2026/01/pla-mold-feat.jpg?w=600&h=450)