An Alternative Orientation For 3D Printed Enclosures

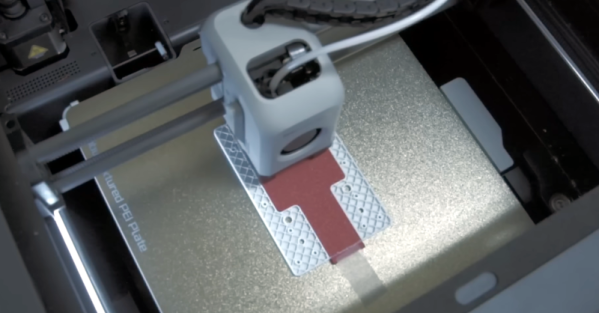
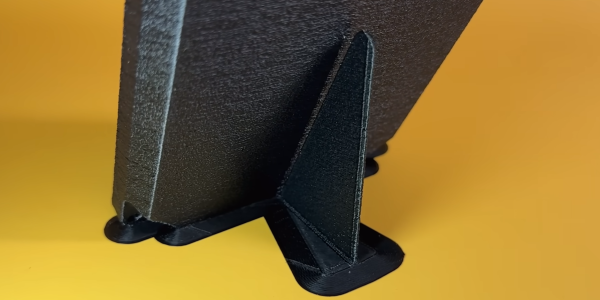
When it comes to 3D printing, the orientation of your print can have a significant impact on strength, aesthetics, and functionality or ease of printing. The folks at Slant 3D have found that printing enclosures at a 45° provides an excellent balance of these properties, with some added advantages for high volume printing. The trick is to prevent the part from falling over when balance on a edge, but in the video after the break [Gabe Bentz]  demonstrate Slant 3D’s solution of minimalist custom supports.

The traditional vertical or horizontal orientations come with drawbacks like excessive post-processing and weak layer alignment. Printing at 45° reduces waste and strengthens the end product by aligning the layer lines in a way that resists splitting across common stress points. When scaling up production, this orientation comes with the added advantage of minimal bed contact area, allowing the printer to auto-eject the part by pushing it off the bed with print head.

Continue reading “An Alternative Orientation For 3D Printed Enclosures”

A Comprehensive Look At FDM Supports

When we first started 3D printing, we used ABS and early slicers. Using supports was undesirable because the support structures were not good, and ABS sticks to itself like crazy. Thankfully today’s slicers are much better, and often we can use supports that easily detach. [Teaching Tech] shows how modern slicers create supports and how to make it even better than using the default settings.

The video covers many popular slicers and their derivatives. If you’ve done a lot with supports, you might not find too much of this information surprising, but if you haven’t printed with supports lately or tried things like tree supports, you might find a few things that will up your 3D printing game.

One thing we really like is that the video does show different slicers, so regardless of what slicer you like to use, you’ll probably find exactly what different settings are called. Of course, because slicers let you examine what they produce layer-by-layer, you can do like the video and examine the results without printing. [Michael] does do some prints with various parameters, though, and you can see how hard or easy the support removal is depending on some settings. The other option is to add support to your designs, as needed manually, or — even better — don’t design things that need support.

This video reminded us of a recent technique we covered that added a custom support tack to help the slicer’s automatic support work better. If you want a longer read on supports that also covers dissolvable support, we’ve seen that, too.

Continue reading “A Comprehensive Look At FDM Supports”

3D Printing Support Gets Down To Tacks

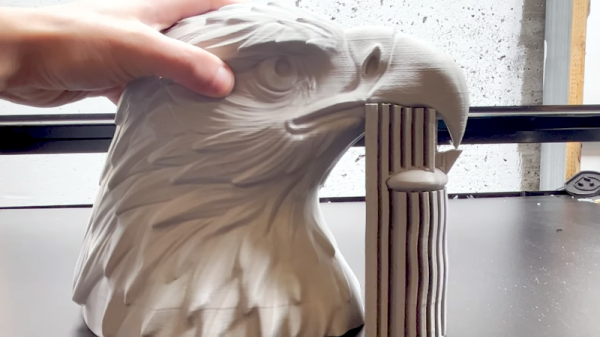
If you use supports for FDM 3D printing, you might find that some designs are more amenable than others to automatically-generated supports. [Slant 3D] , for example, shows a cool-looking eagle with a downward-curved beak that comes to a point. Using traditional supports would allow the print to succeed, but didn’t allow the beak to form correctly. To combat this, he uses something called a “thumbtack” in the design. There are several flavors, as you can see in the video below, and it widens out the small part yet has a tiny contact with the actual part so you can easily remove it.

One of the thumbtacks looks more like a Hersey’s kiss to us. It makes sense. The point can touch the part to support and the fat base gives a nice target for the automatic support feature in your slicer to grab. There’s also a spherical base so you can rotate to odd angles. The final thumbtack looks like an alien spacecraft and provides multiple contact points.

Continue reading “3D Printing Support Gets Down To Tacks”

Cura Plugin Offers Custom Support

[Chuck] likes the ability of Simplify3D to add support to parts of a model manually. However, not everyone wants to spend $150 for a slicer, so he’s shared how to install a plugin that allows you to do the same trick in Cura.

The plugin is “Cylindric Custom Support.” That doesn’t sound very exciting, but you get five choices of shapes you can create custom supports easily. There are also size and angle parameters you can use to customize the effect.

Continue reading “Cura Plugin Offers Custom Support”

3D Printing With Multiple Soluble Filaments

Complex 3D-printed designs often require the use of an automatically generated support structure around them for stability. While this enables some truly incredible results, it adds considerable time and cost to the printing process. Plus there’s the painstaking process of removing all the support material without damaging the object itself. If you’ve got a suitably high-end 3D printer, one solution to this problem is doing the supports in a water soluble filament; just toss the print into a bath and wait for the support to dissolve away.

But what if you’re trying to print something that’s complex and also needs to be soluble? That’s precisely what [Jacob Blitzer] has been experimenting with recently. The trick is finding two filaments that can be printed at the same time but are dissolved with two different solutions. His experimentation has proved it’s possible to do with consumer-level hardware, but it isn’t easy and it’s definitely not cheap.
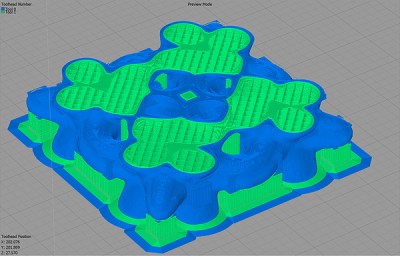
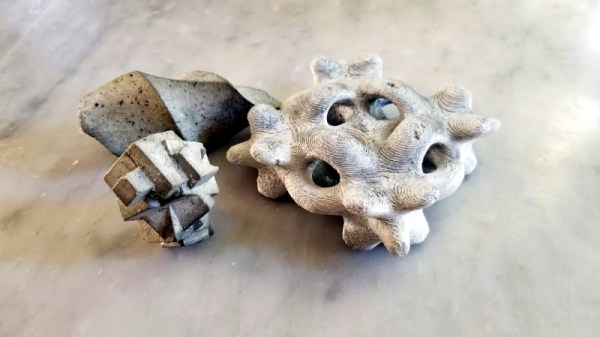
You might be wondering what the possible application for this technique is. For [Jacob], he wanted to be able to print hollow molds in complex geometric shapes that would ultimately be filled with concrete. The molds required extensive internal supports that would have been all but impossible to remove if they weren’t printed in a soluble filament. But he also wanted to be able to dissolve the mold once the concrete inside had cured. So he needed one easy to dissolve filament for the supports, and a harder to dissolve one for the actual mold.

For the mold itself, [Jacob] went with High Impact Polystyrene (HIPS) which can be dissolved with an industrial degreaser called Limonene. It’s expensive, and rather nasty to work with, but it does an excellent job of eating away the HIPS so that’s one problem solved. Finding a water-soluble filament for the supports that could be printed at similar temperatures to the HIPS took months of research, but eventually he found one called HyroFill that fit the bill. Unfortunately, it costs an eye-watering $175 USD per kilogram.

So you have the filaments, but what can actually print them at the same time? Multi-material 3D printing is a tricky topic, and there’s a few different approaches that have been developed over the years. In the end, [Jacob] opted to go with the FORMBOT T-Rex that uses the old-school method of having two individual hotends and extruders. It’s the simplest method conceptually, but calibrating such a machine is notoriously difficult. Running two exotic and temperamental filaments at the same time certainly doesn’t help matters.

After all the time, money, and effort put into the project (he also had to write the software that would create the 3D models in the first place) [Jacob] says he’s not exactly thrilled with the results. He’s produced some undeniably stunning pieces, but the failure rate is very high. Still, it’s fascinating research that appears to be the first of its kind, so we’re glad that he’s shared it for the benefit of the community and look forward to seeing where it goes from here.

Making An Ultrasonic Cutter For Post-processing Tiny 3D Prints

An ultrasonic knife is a blade that vibrates a tiny amount at a high frequency, giving the knife edge minor superpowers. It gets used much like any other blade, but it becomes far easier to cut through troublesome materials like rubber or hard plastics. I was always curious about them, and recently made my own by modifying another tool. It turns out that an ultrasonic scaling tool intended for dental use can fairly easily be turned into a nimble little ultrasonic cutter for fine detail work.

Cheap ultrasonic scaler. The blue disk is for adjusting power. Foot switch not shown.

I originally started thinking about an ultrasonic knife to make removing supports from SLA 3D prints easier. SLA resin prints are made from a smooth, hard plastic and can sometimes require a veritable forest of supports. These supports are normally removed with flush cutters, or torn off if one doesn’t care about appearances, but sometimes the density of supports makes this process awkward, especially on small objects.

I imagined that an ultrasonic blade would make short work of these pesky supports, and for the most part, I was right! It won’t effortlessly cut through a forest of support bases like a hot knife through butter, but it certainly makes it easier to remove tricky supports from the model itself. Specifically, it excels at slicing through fine areas while preserving delicate features. Continue reading “Making An Ultrasonic Cutter For Post-processing Tiny 3D Prints”

Try This For 3D Printing Without Support

Have a look at the object to the right. Using a conventional fused deposition printer, how would you print the object? There’s no flat surface to lay on the bed without generating a lot of overhangs. That usually requires support.

In theory, you might be able to print the bottom of the sphere down, but it is difficult to get that little spot to adhere to the bed. If you have at least two extruders and you are set up to print support material, that might even be the best option. However, printing support out of the same material you are printing with makes it hard to get a good clean print. There is another possibility. It does require some post-processing, but then again, not as much as hacking away a bunch of support material.

A Simple Idea

The idea is simple and — at first — it will sound like a lot of trouble. The basic idea is to cut the model in half at some point where both halves would be easy to print and then glue them together.  Stick around (no pun intended), though, because I’ll show you a way to make the alignment of the parts almost painless no matter how complex the object might be.

The practical problem with gluing together half models is getting the pieces in the exact position, but that turns out to be easy if you just make a few simple changes to your model. Another lesser problem is clamping a piece while gluing. You can use a vise, but some oddly-shaped parts are not conducive to traditional vise jaws.

In Practice

Starting with an OpenSCAD object, it is easy to cut the model in half. Actually, you could cut it anywhere. Then it is easy to rotate half of it so the cut line is at the bottom of each part. That doesn’t solve the alignment problem nor does it help you clamp when you glue.

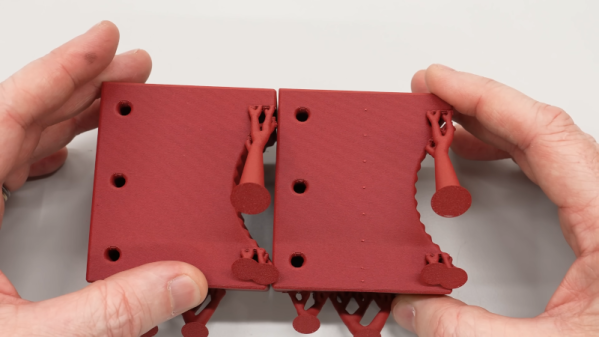
The trick is to build a flange around each part. The flanges mate with a few screws after printing so alignment is perfect and bolts through the flange holes can keep the parts together and immobilized while your glue of choice sets. The kicker is that I even have an automated process to make the design side of this trick very easy.

Continue reading “Try This For 3D Printing Without Support”