Anyone who’s done a bit of metalworking will know how quickly your stockpile will pick up a coating of rust with even just a bit of humidity. While welding requires only a bit of wire brushing at the joint areas, cleaning a large frame for paint is a completely different story. The projects [Make it Extreme] gets himself into tend to involve a lot of steel, so he built his own electrolysis tank for rust removal.
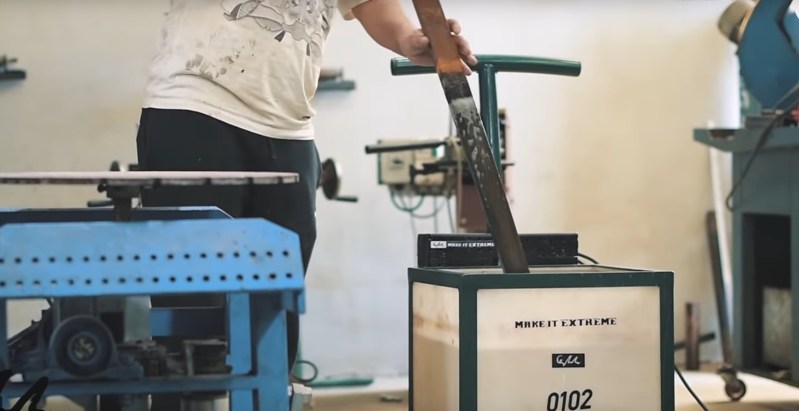
Electrolytic rust removal involves placing the piece of steel to be cleaned into an alkaline electrolyte solution (water and washing soda) with a sacrificial steel anode and connecting a low voltage DC supply over the two pieces. [Make it Extreme] started with an old plastic container, around which he built a very neat trolley frame. He obviously put some thought into how the tank will be cleaned, since it can be removed by unscrewing six bolts and removing the top part of the frame.
The high current, low voltage power supply that is required for the process was built using an old microwave transformer. The secondary coil is removed and replaced with coil of thick insulated wire, to convert it into a step down transformer. After the rewinding the transformer outputs about 13 VAC, which is then run through beefy bridge rectifier modules to get a DC current. A custom machined copper bolt terminal is mounted through the side of the tank to attach the sacrificial anode plate to the positive lead of the power supply, while the negative lead is clamped to the rusty steel to be cleaned.
[Make it Extreme]’s projects never get old, with everything from rideable tank tracks to rotary electric guns. Check out the video after the break to see the build and an impressive demo.


so he makes a tank that you can literally pick up for free in most towns (55 gallon plastic barrel) goes overboard making a power supply (i’ve used old laptop power supplies before) then throws in a tube and because it is line of site literally misses half the rust on there. What am i missing?
Why don’t you post a link to your method?
Actually i did in my initial post so there really is no need for a write up , but if you must here you go. 55 gallon plastic drum i got for free then i cut the top cut off of it. Old laptop power supply, again do not use a current one they do not work. water, washing soda, rebar placed several places around the barrel and for a grand total of may;be 5 bucks i had my electrolysis rust remover. I’m not sure why you need yet another write up when there are tons already on instructables and youtube showing this exact same thing with very little effort involved.
Higher current apparently
OMG. He machines a bunch of stock, including threads. He recores a transformer. Welding also. I suspect the length of steel used was for demonstration purposes only. Get back on your porch.
Complaining that it IS a hack? That’s a first.
*line of SIGHT
Haha. The tank with handles and wheels is basicaly the same thing as a plastic waste container.
Nice Job.
You want to use washing soda not baking soda. And FWIW, I agree with the first post. Any non conductive tub will work just fine, and if you can keep your pieces from touching the side, you can even use steel barrels as both the tub and the anode. Almost any power supply you have will work, it is not real critical. Lots of people use battery chargers, which they have already.
I believe that either soda just turns to sodium hydroxide when you start putting current through it.
The actual voltage requirement, for a single piece, which is a single cell as it were, is somewhere around a couple of volts, depending on exact metallurgy and electrolyte concentration. Very much over that is just wasting power heating everything. So older ATX supplies with dozens of Amps on 5V or even 3.3V would be tending to be more efficient than battery chargers unless you hooked up 5 or 6 pieces in series.
The 3.3V on old PSU uses a linear regulator from 5V.
Yeah, not the ones with “dozens” of amps on them though, was a brief period where the 3.3V demands were higher, 98ish to 2002ish I think, where the extra SM circuit made sense, then they went to increased 5V capacity for a a bit then realised it was better to use 12V around 2004-2005. Real cheapie ones will tell you they have 5A and have a single 1A reg bolted to the same sink the mosfets are, so preheated rather than cooled by it.
The extra voltage does not hurt anything and if you can use something you already have in my book, you are ahead of the game. The fact is that the power supply is not super critical. With electroplating I have found the power supply to be very critical for a nice finish, but for rust removal it is not a big deal and a lot of people use battery chargers they already have.
ATX PSU here and old wheelie bin(s)
Does pretty much any part from the cars I fix up inc all suspension bits.
Would love to try doing a body someday for giggles.
It’s traditionally a pit of calcium hydroxide for disposing of bodies…
I think he meant car bodies–I hope anyway.
Hahaha …. Hope so too
DO NOT DO THIS WITH ANYTHING CHROMED OR STAINLESS STEEL.
You will generate chromates, which are seriously bad news for both you and wherever you dump the water – they are highly carcinogenic.
If you don’t know what it is made of – not just what major metal but what specific alloy it is, and what’s in that alloy – don’t put it through electrolysis.
Ehh, it’s no lead or methyl mercury. I mean I’d avoid exposure and dispose of it safely like I would with all metal solutions, but it’s not “OMFG you cleaned a spoon, we’re all dead!!!”
Please note that your polarity is INCORRECT .Steel plate is anode (+) and part to be derusted cathode (-)
Sorry, just reread the text, you have explained the hookup correctly. It was the red clip for the cathode in the video that threw me!
Thanks. Corrected the baking soda part
Ah, another hack done not for practicality but for those sweet youtube view$.
Considering he can get paid for it, sounds pretty dang practical to me.
Hanging around in (very) old vehicle circles I am aware of two ways to do this. Electrolysis certainly works, as shown here. But if you have time then soaking the parts in a mixture of 10 parts water to 1 part black treacle (Molasses) works very well too. It just takes weeks rather than hours. But all you need then is big enough tank to throw it in.
Then, the iron chelate solution can be used for your iron deficient citrus tree growing in alkaline soil.
One of the reasons that I have used the treacle solution is that a tank of dilute sugar seems less of an environmental time bomb than one of Phosphoric acid. (Though _adding_ phosphoric acid and selling it as a cut-price Cola might work :-)
There’s always fermentation. You can sell *anything* that’s overloaded with hops.
Then on to distillation.
Phosphoric acid is no “environmental time bomb” – in the opposite, phosphate (it’s salt) is a vital plant fertilizer. Of course too much fertilizer can kill pants. Metal ions can be toxic, depending on type and concentration. Iron is also necessary for plants, but I think only in tiny amounts.
Yeah it fertilises plants, and algae, which blooms in toxic amounts if runoff gets into freshwater. There’s no dis thing good, dat thing bad, it’s all careful balancing.
I am wondering does this method just eat rust – or can you also use it to plate iron onto steel objects? I am thinking – I have a worn steel item, can I plate iron onto it to “make it thicker” (assuming I leave it in for long enough). I’m not expecting the iron to be as tough as the steel but it might extend the life of a worn part.
I guess that might work. But considering that building up parts with chrome is fairly common, you would have to wonder why depositing iron for the same purpose is not common. My guess would be that pure elemental iron is so very soft that the result would be at best a very short-term fix.
Or. possibly, the fact that nickel-chrome plating is self-levelling. Perhaps iron plating isn’t?
Why not experiment?
Soldering iron tips are plated with iron (which is tinned then). the iron must be electroplated because it’s melting point is higher than the copper core of the tip.
But normally electroplating is done in quite thin layers. If you want significant structural buildup (thickness) then a very long time is necessary.
Such repairs are often done with welding, sometimes spray welding / flame spraying, where metal powders are injected into an oxy/acetylene flame and then deposited on the work piece.
Use vinegar and salt:
https://www.youtube.com/watch?v=G-PtnwtOR24
An old guy around here uses the same technique, but he just uses his heavy duty car battery charger – so when it’s not de-oxidizing iron, it’s charging batteries. This only works with old manual style chargers though
I use this to strip rusty metal somewhat often. You can also do lithography in very thin sheet steel with it, in a manner: spray-paint the steel with a couple layers of paint, scratch through the paint with what you want cut out, and electrolytically etch it through. I’ve built valves and planar springs from spring steel sheet this way. It’s not perfect. The edges are ragged. But you get 95% of the job done in a hurry and then go to a fine grinding wheel to finish it up.
Thanks for that, definitely one to file away for future reference.
I used a cheap manual car battery charger, a plastic 5 gallon bucket to clean rust from motorcycle parts for years.
Baking soda works as well. I do metal detecting and have cleaned several very rusty dug up parts that way. The results looked no different than ones done with washing soda.
Interesting. That’s exactly why I am here. I am wanting to clean up my rusted finds, just out of curiosity obvs