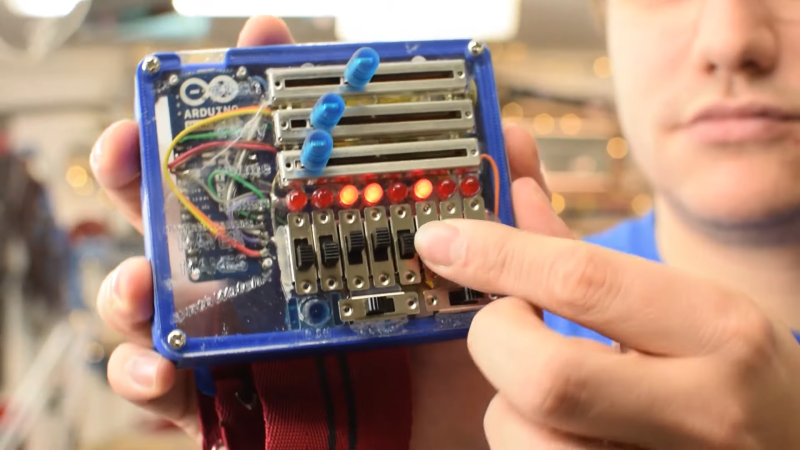
Synths are a ton of fun no matter how good or bad they sound. Really, there are no bad-sounding ones, it’s just that some are more annoying to listen than others to if you’re not the one making the beep boops. [Clem] had built a tiny LDR-based synth into a watch case a few years back and took it to many a Maker Faire, where it delighted and annoyed until it ultimately broke.
Naturally, it was time to make a new version that’s more capable. Whereas the first one was Atari-punk-console-meets-light-Theremin, this one has a bunch of inputs and can be programmed on the fly to record and play back bendable tones. It’s driven by an Arduino MKR, and the inputs are managed by an impressively squash bug-wired shift register. [Clem] used beefy switches this time in the hopes that this one will last longer. We think the slide pots are a great touch, as are the candy-colored knobs printed in PMMA.
Our favorite part is that [Clem] took advantage of the random states the microcontroller pins are in when it’s first powered on. If you don’t want to program any notes, you can use the ones generated at boot and just play around with those. Be sure to check out the build video after the break.
We’ve seen our share of synths, but few as delicious-looking as KELPIE from this year’s Hackaday Prize.


For clarification the Frontplate and Backplate were lasercut form PMMA. The Slider Knobs were 3dprinted with translucent UV-Resin , that was mixed up in the article. thanks for featuring my project!
This would be the perfect christmas present to your enemies kid! Try driving while someone makes tunes with that in the back seat :D.
But great idea and nice build!
Not sure it had its own speaker… it had a headphone jack though and your plan could be easily thwarted by mandating that headphones be used.
it has a headphone jack, but there is an amp inside so you could easily integrate a speaker in it.
One thing I’d comment on regarding the code shown in the video…
The pin declarations all seemed to be done as variables with pre-defined values. Unless these are likely to change during operation this is a bad idea for two reasons:
1. Each “int” is 2 bytes taken away from other parts of your program
2. The compiler can’t assume that the value will not change, and so has to fetch the value of that variable and store it each time it is needed. (Since the variables are not “volatile”, the compiler may make some assumptions, but you’re at the mercy of the optimiser.)
#define is a much better solution for Havard-architecture systems like AVR. (On more generic Von Neumann systems, you can meet half-way by declaring as “const int”, but #define is still better for this use-case.)
The pre-processor will basically replace all occurances of your macro with whatever value you defined, meaning the compiler sees a literal constant, and will generate the code accordingly. This will also free up the RAM that is otherwise being used to store “constants”.
Hi, I usually tend to use the same ways people see in arduino tutorials so everything is clear to the average viewer.
surely there are better wys to do this, not sure how changing to #define would alter the inner workings on the SAMD used.
I know that this is old, but I see this advice repeated every so often. I don’t think this is correct. Modern compilers are smart. Just mark the variables as const. Doing this rather than a #define means that you get type checking and prevents some errors.
Additionally, the Arduino style guide recommends using consts over #defines: https://www.arduino.cc/en/Reference/StyleGuide