One of the best applications for desktop 3D printing is the creation of one-off bespoke components. Most of the time a halfway decent pair of calipers and some patience is all it takes to model up whatever part you’re after, but occasionally things get complex enough that you might need a little help. If you ever find yourself in such a situation, salvation might be just a few marker scribbles away.
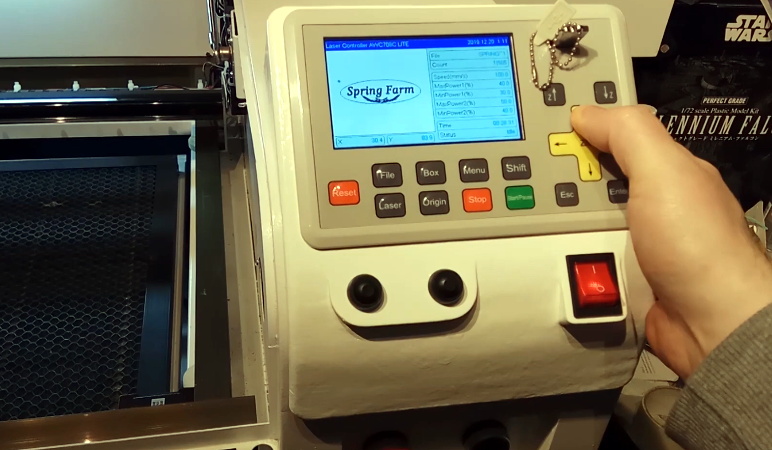
As [Mangy_Dog] explains in a recent video, he wanted to model a control panel for a laser cutter he’s been working on, but thought the shapes involved were a bit more than he wanted to figure out manually. So he decided to give photogrammetry a try. For the uninitiated, this process involves taking as many high-resolution images as possible of a given object from multiple angles, and letting the computer stitch that into a three dimensional model. He reasoned that if he had a 3D model of the laser’s existing front panel, it would be easy enough to 3D print some replacement parts for it.
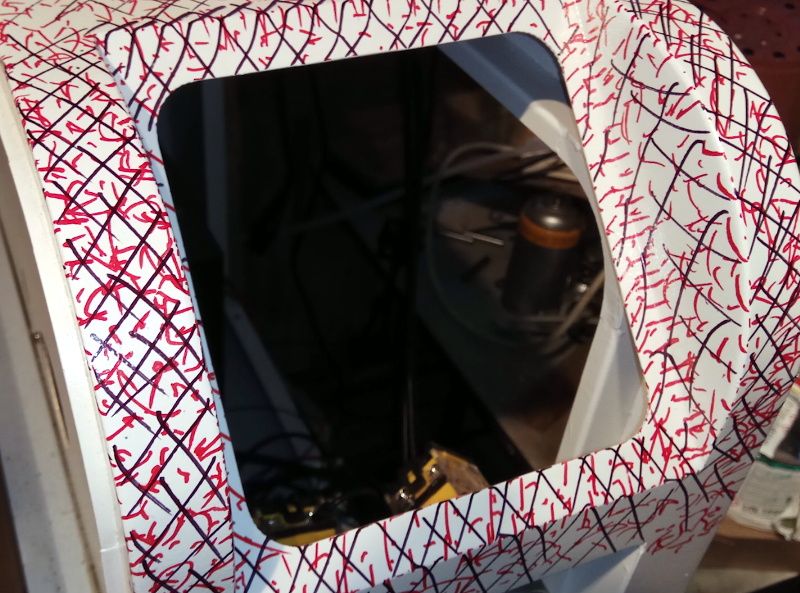 That would be a neat enough trick on its own, but what we especially liked about this video was the tip that [Mangy_Dog] passed along about increasing visual complexity to improve the final results. Basically, the software is looking for identifiable surface details to piece together, so you can make things a bit easier for it by taking a few different colored markers and drawing all over the surface like a toddler. It might look crazy, but all those lines give the software some anchor points that help it sort out the nuances of the shape.
Unfortunately the markers ended up being a little more permanent than [Mangy_Dog] had hoped, and he eventually had to use acetone to get the stains off. Certainly something to keep in mind. But in the end, the 3D model generated was accurate enough that (after a bit of scaling) he was able to design a new panel that pops right on as if it was a factory component.
Hackaday readers may recall that when we last heard from [Mangy_Dog] he was putting the finishing touches on his incredible “Playdog Blackbone” handheld gaming system, which itself is a triumph of mating 3D printed components with existing hardware.


You know, I actually likes the red scribble look of the surround :0
I imagine some software does better than others implementing photogrammetry.
The extra features/markers are pretty much required for all of them if you are using regular cameras and not something like a structured light approach (projector projecting a pattern + camera). Featureless, monochromatic surfaces don’t have anything on them for the algorithm to “latch on” – typically corners or sharp contrast changes are needed.
> this process involves taking as many high-resolution images as possible of a given object from multiple angles
no, it does not. It involves taking the RIGHT pictures from the RIGHT angles. “as many as possible” will NOT result in the best result. Knowing what you do will.
Probably the better approach (“bettter” as in “simpler and faster”) would have been to use structured light projections. No need for “mad-dog-scribbles” there plus good enough results for this specific purpose.
Any guidance on how one might accomplish that for home use? Most of the setups I see online require a several-hundred dollar investment in a projector. For this project… might have been out of reach.
+1
Would like to see a step by step tutorial using low cost parts.
well that’s exactly what an xbox kinect uses and its been used a billion times for this type of project, maybe that’s a good start wiseass
Trouble with the kinect is the focus is set for room size objects e.g. people. Using it for a 3″*5″ control panel probably won’t work very well.
Sidenote, use grease pencils instead of magic markers, cleans up with methanol.
Wrap with saran wrap, mark on that. Or vacuum bag it, or shrink-wrap.
White board markers, chalk pens or watercolour paint would work too.
Heh yep white board or chalk markers in the future… live an learn :D As for structured light projectors that wouldnt have even worked here on this surface as its a shiny gloss paint. Also that equipment is an extra cost I wouldnt even use in this use case.
Laser scanning freehand would work but is also very costly. But in this case photogrammetry is accessible to everyone.
I still stand by what i say as well, with photogrammetry more photos the better as it it makes that point captured in 3D space more accurate. Just look at all the blobby mess of the background stuff that wasnt the focus of the scan.
Again Kenect scanning wouldnt have worked on this because of the shiny surface.
A few years ago there were smart phone apps that basically did this using hand-made “paper filters”. I can’t find them with a quick search and since I approach this kind of scanning differently anyway, I am sorry that I cannot provide a DIY tutorial.
I would claim that even a cheap shape-detection would have worked well enough, the very first applications out on the market (1990s?) did that. You basically detected the outer shape of the object you “scan” and from shadow-changes in between you got some extend of concavity captured. Today even a smartphone could do that in real time.
The point being: Using photogrammetry is time-consuming (OK, he used Agi as it seems, so it’s not THAT slow, RC would have been ~10 times faster probably but more expensive) AND you get noisy results that need clean-up. His time-wrap workflow shows HOW MUCH work he had to invest after the scan, I ASSUME that even manual measurements would have been faster!
Silhouette-scanning (even back then) is much “smoother” in the workflow shown here.
He got what he wanted and for a “hacker” this often does the job. Time often is not of the essence, I get that. It’s just that I am not impressed with the result he got (warping due to 3d-printing?) given the amount of work he put into it.
Hi mr Nitpicker :) Ive been wanting to use the method for a while and this situation was perfect for it…. The biggest issue I had if I was to manually measure this was to measure the large rounded corner and its exact relation to the 45(ish) degree angle face in the recess… Manual measurement would have been rather difficult with that profile… The photo scanning process took only 3 or so hours? Which if you asked me isnt a big deal. My final print came out fine not warped… Just not perfect as I still need to tune this new printer. I didnt even do a test print with this machine which was a bit stupid tbh… But I admit by that point I was rushing and wanted to get this over with…
But it came out pretty decent. Not warped its functional and gave me the opitunity to test the method out.
I did use Agi in this test. But i was just trialing it. I’ll likely use meshroom in the future as that programs really matured. It lacks a few features still but the end results are still very good…
Doing and or implementing photogrammetry is not an expensive process. A lot of 3D programs will take the file and as for compiling the photos and getting the model from the image there are a tone of free photogrammetry softwares out there. The only real expensive things is the 3D printer. All of it is feasible. The program he used you can get a student version for free and still 3D model things. The scanning software you can also get for free, and you can’t take photos on your phone if you have an at least decent camera. The only limitation is some software allows only up to 200 photos per scan so that could be a problem for higher things but smaller things are quite easy or less but better photos as far as capturing what you want to scan in.
Theoretically not difficult, as each image used in SLP is static: find a service that can make photo slides of the images with sufficient precision, then use them in a garage sale slide projector.
Another option would be to have a line laser on a pan rig. Leave the camera’s shutter open as the laser is blinked on briefly at each location as it pans across the object, then close the shutter. Voila! an image with up to a few hundred lines for cheap.
Not quite. Structured light has comparably lower resolution (you are limited by the projector) and it is much more difficult to calibrate compared to a simple camera rig (two devices to calibrate distortions out + mutual calibration).
And it is also definitely true that the more images you can get, the better, covering all sides of the object of interest and with significant overlap. Then the algorithm can work on it.
> And it is also definitely true that the more images you can get, the better, covering all sides of the object of interest and with significant overlap.
That is a discussion on its own (I have been doing scanning for ~20 years now and have gathered some experience) – while you aren’t wrong, the article definitely did miss the point when it claimed that pure number will do the job.
From experience I can tell that even professionals often come back with 100s or 1000s of images that are almost ALL garbage. NUMBER is not the point. Quality is. 20 GOOD images might have done here, while 500 bad ones wouldn’t.
Even surfaces are indeed difficult for fotogrammetry, but reflecting surfaces are even more difficult.
Adding structure to a surface and reducing reflectivity are common preparations to get better results from fotogrammetry.
Using permanent markers for this is not such a good idea, unless you want it to be permanent…
A few handfulls of corn starch or other powder that can be easily washed of is common. (Do NOT apply evenly).
You can also wrap your subject in some stretcy fabric or use unregular bands or painters tape.
For objects curved in only one direction, old newspapers or magazines may be an easy solution to add something for the algorithm to work with.
Structured light is of course another option, which has been jused for 10’s of years in combination with a camera.
For a quick and cheap solution, I imagine that using some 20 or so laser line pointers on a tripod might work decently, and it’s also portable and small to put in storage.
If you have a beamer, or even an old fashioned slide projector you can use that to project a static image on your subject, but you will have some focussing problems if your object has plenty of curves.
Moire patterns on surface being scanned.
As mentioned earlier (and too deep in comments), whiteboard markers work great for this. They do tend to rub off if abused though.
12:57pm is not earlier then 7:08am I think.
I never got the AM and PM thing right as I only got used to 24hour/s a day caclulations.
Painters tape is probably easier to remove then whitboard markers though, but it also depends on the surface it’s applied to.