In a recent video by the [Chornobyl Family] it’s shown how they made the SKALA status display which was featured at the recent 40-year memorial exhibition of the Chornobyl Nuclear Power Plant (ChNPP) #4 reactor accident, along with the RBMK reactor control panel replica and SKALA console which they had made previously.
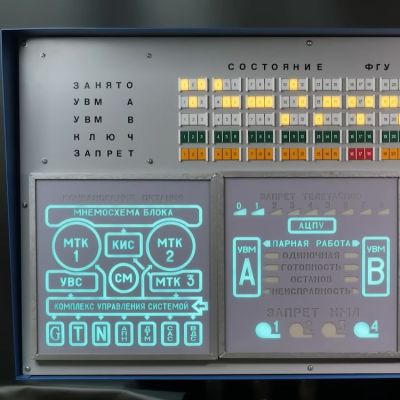
We previously covered this SKALA control system of the ChNPP’s RBMK reactors, as well as its 1990s modernization. This SKALA status display is one of the original elements of the control room, providing a status overview of the entire control system at a glance, including its processors and peripheral devices.
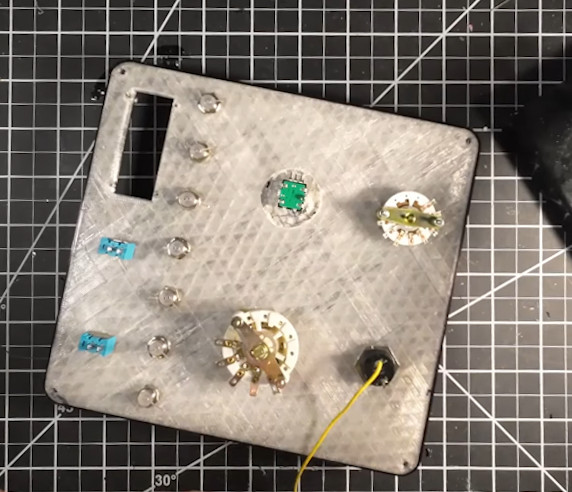
The replica uses similar looking components, with a metal casing and LED lighting that invokes the aesthetics of the original electroluminescent mnemonic panels. Overall the goal was to keep the appearance as close to the original as possible — they even had operators of the ChNPP reactors look over the panel and give it their stamp of approval.
Some of the components like the error indicators had to be 3D printed, while the metal case was cut out of sheet metal. There’s also a very big speaker for the alarm, at the top right of the panel. Along with the LEDs for the electroluminescent-style indicators this meant a lot of addressable LEDs and a lot of wiring.
The full build plans are available via the [Chornobyl Family] Patreon, if you feel like building up your own RBMK-style reactor control room.
Continue reading “Building A Working Replica Of The Chernobyl Power Plant’s SKALA Display”