Over the last couple of years, we’ve seen more and more hackers building their own custom computers. We’re not just talking casemods here; enabled by advancements in desktop 3D printing and increasingly powerful boards such as the Raspberry Pi 4, these are machines designed and built from the ground up to meet the creator’s particular set of needs and desires.
A perfect example of this trend is the Rasptop 2.0, a remarkably practical design for a 3D printed miniature laptop. Despite the name, you don’t even need to use the Raspberry Pi if you don’t want to. Creator [Morgan Lowe] has designed the Rasptop to take other single board computers (SBCs) such as the Asus Tinker Board or even the Intel Atom powered Up Board. So whether you want an energy efficient ARM machine running Linux for development, or a mobile Windows box for on the go gaming, you can use the same printed parts.
 At the most basic level, the Rasptop 2.0 is just a hollow box with a hinged compartment for a screen mounted on top. You’re free to equip it with whatever hardware you chose. If you’re after maximum runtime you could fill all the free space with batteries, or maybe install multiple hard drives if you’re a data horder in need of a mobile terminal. Even the various SBCs that [Morgan] has tested are really just suggestions. The choice is yours.
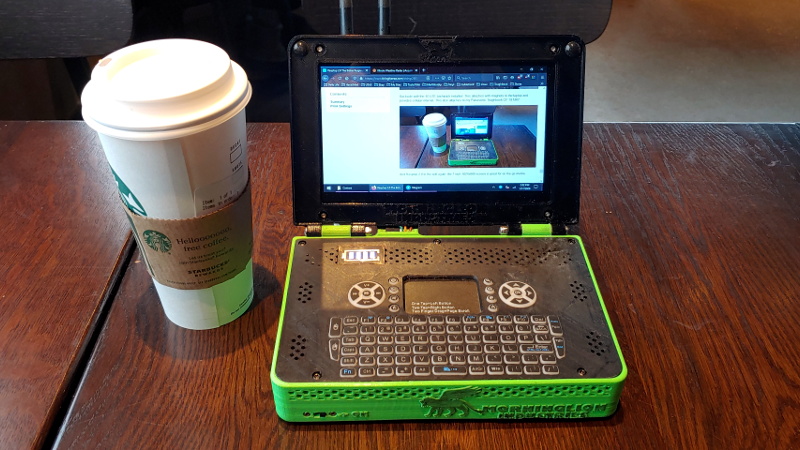
Perhaps also our favorite feature of the Rasptop is how he worked a keyboard into the design. Rather than just leaving a big rectangle in the STL for you to shove a mobile keyboard into, the top surface is designed to mount the PCB and membrane keypad of one of those mini wireless keyboards you see on all the import sites. Aside from the fact it’s a good deal chunkier than what we expect from modern mobile devices, it has a very finished and professional overall look.
Of course if you’d rather use all these powerful tools to build a computer that’s somewhat farther off the beaten track, your design could abandon the traditional computer form factors altogether.


Last week I took my idea for a laptop and put it on paper. At next payday, I will start purchasing parts, and measuring dimensions to build a portable rig. It’s a very interesting project to work on, and I think anyone who does this will learn a lot about the ingredients that go into laptops and similar electronics devices.
I’m sure we’d all be interested to follow your project.
If you have to wait until payday to buy parts, you still have time to rethink your decision and truly enjoy life.
Ha! You’ve described my hobbies in a painfully accurate and succinct way. I need to find something else to be interested in.
(nervously sweats and fidgets)
Its… Its not like that at all! I could…quit anytime. I could quit if I wanted to. I have it under control. Its not I buy i2c LCDs everyday! You know…I just do it socially. I’m not rEaLlY addicted.
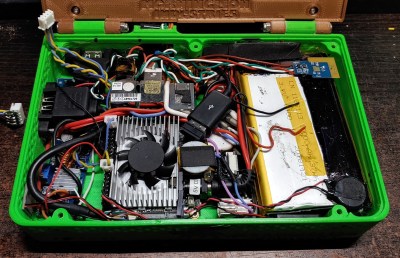
That bird’s nest of wires though…
Yeah that one has the Up board and takes a lot more wires. The Pi4 one is way cleaner inside, but that’s why there’s so many options!
Looks like my junk drawer. But as long as it works…
it looks like a lunchbox :)
Ah, the old keyboard problem. For mine I went with the one from this guy’s grimoire:
https://hackaday.com/2019/02/25/a-raspberry-pi-grimoire-for-the-command-line-wizard/
I still have yet to see a good solution for getting a numpad onto one of these projects.
My idea is to recess a generic Bluetooth keyboard in a panel. It won’t be especially compact, but the goal is to stuff in features and go for a meaty look, like something from a tank. But even for the compact types, I suspect that a Bluetooth type keyboard might be a nice solution for many of the other configurations.
The keyboard in this design is wireless not bluetooth so it always works even when using a non-desktop OS or not a Pi.
It really be the same thing, no? The one I’m planning to use connects with iPads, Androids, PCs, Laptops, and if there really is something without built in BT but it has a USB ports, then you just add a USB BT dongle, and off you go. So the cool thing is that wireless and Bluetooth are all good, and one can really choose something that gets the right shape//colour//look//feel.
What’s nice about Bluetooth keyboards these days is that they buttons to rapidly switch devices. So I can type into my Android, press #2, start typing on the iPad, press #3, start typing on my nanopi computer, and have a pretty interesting setup. This idea will be a big part of the form of the cyberdeck I’m starting to build.
This keyboard is https://www.amazon.com/gp/product/B07WTQ3WV8
It comes with a wireless dongle that is not bluetooth so it requires no drivers or config.
If you had a bluetooth one and let’s say an Asus Tinkerboard you would need to install the os, find and install bluetooth drivers then finally pair the keyboard, all while having to have a second keyboard to do the setup.
This is avoided in my design by not using bluetooth.
I have a 220mm printer so made this 200mm to fit, plus the 7″ form factor is what I wanted. It fits in the tiny spaces in my gold wing or other motorcycles. The one in the pictures up there is the Up Board Intel Atom one with Windows 10. The keyboard offered a nice touchpad and media buttons plus some nice D-pads.