Mini Blinking Barrels Keep Desktop Traffic In Check

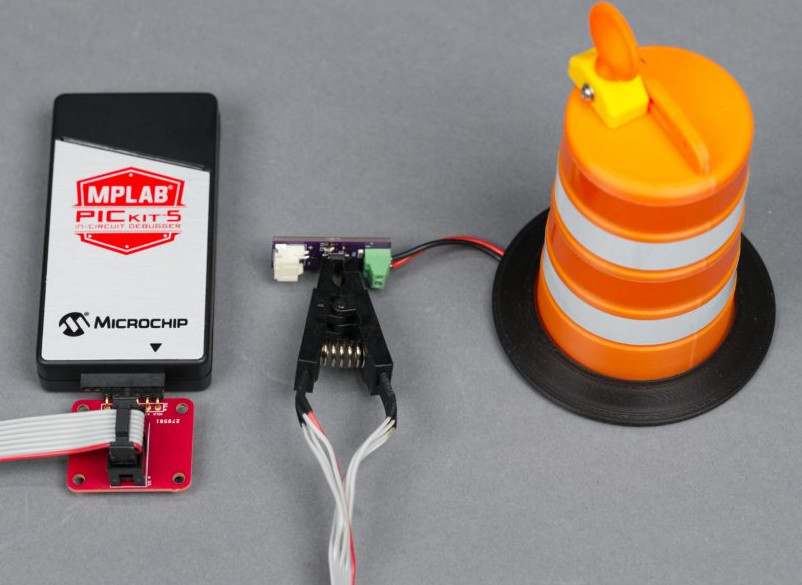
Your desk or bench is a work area, so why not make it look the part? That’s the idea behind the miniature blinking traffic barrels that [Glen Akins] recently put together. Of course, just a single blinking light doesn’t really sell the idea of a busy construction zone, so he spent a somewhat surprising amount of time and effort optimizing the design for small-scale production.

The end result is a fascinating write-up that dives into the design decisions [Glen] made. Every aspect of this project, from the overhang of the “handle” on the 3D printed barrel to the number of passive components on the PCB was carefully considered. Critics may say [Glen] put too much thought into something that didn’t need to be so complex, but projects like these are an excellent way to keep your skills sharp — there’s no such thing as practicing too much.

Starting with the design of the barrel itself, we appreciate that [Glen] kept the capabilities of his desktop 3D printer in mind. By breaking the design up into multiple pieces and avoiding overly steep angles, he produced a design that prints cleanly without the need for support material. His step-by-step documentation and screenshots also serve as a great introduction to designing parts in Fusion if that’s something you’re interested in.

From there, things switch over to the electronics. Some in the audience will bemoan that he’s using a PIC12F1612 microcontroller to blink a single LED instead of a 555, but [Glen] brought the receipts on this one. Not only does the PIC offer more flexibility in terms of getting the blinking to look the way he wants, but it requires fewer passive components on the board and is considerably more energy efficient than the iconic timer IC. Even if you ignore all the other advantages, he calculates that going with a 555 would have cut the battery life of the finished product by approximately 15%.

This is one of those projects that’s difficult to summarize in such a terse format, as every time you think the write-up must be about over it takes a new turn on you. We were mildly bemused when the second iteration of the PCB popped up, but by the time he introduced the custom programming adapter board, we knew [Glen] wasn’t messing around.

Unsurprisingly, this isn’t the first time we’ve seen [Glen]’s handiwork. You may recall seeing his RP2040-powered sound board earlier this year, but his name has been popping up on these pages for more than a decade now.

An open-source, DIY, point-and-shoot digital camera.

PolyShot Camera Focuses On Nostalgia

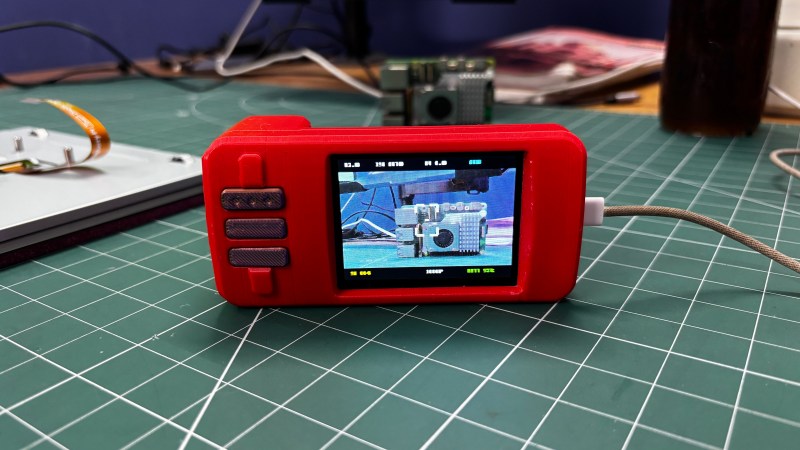
Although we personally have yet to see anyone brandishing an old digital point-and-shoot camera, we hear they’re back in vogue. Why, though? People are nostalgic for that image quality. While he certainly could have simply picked up a vintage model somewhere for a likely inflated price, [Arnov Sharma] decided to build his own version and call it the PolyShot.

The core of this project is the Unihiker K10 dev board, which uses an ESP32-S3, a whopping 2 megapixel camera, and a micro SD card to capture photos and display them back on the screen. The tricky part, if you can call it that, is the custom PCB. It’s a simple board with just three buttons: shutter, gallery, and next image. We do like that the position of the battery compartment creates a nice grip.

The biggest difference here is that there is a few-second delay between pressing the shutter button and actually capturing the image, which you can see in the short videos below. So if you’re trying to get a shot of a skink or something equally speedy, we wish you good luck.

In a future iteration, [Arnov] wants to address the issue of image quality, because this project ended up evolving into a more traditional digital camera. He would also improve the battery life, for which the current expectancy is around three hours on a charge. Ultimately, [Arnov] wants to ditch the Unihiker and design everything from the ground up, using an ESP32-S3 module.

Continue reading “PolyShot Camera Focuses On Nostalgia”

Get A Handle On This Compact Pi Portable

Between the speed and reliability of modern desktop 3D printers and the abundance of powerful single-board computers, there’s never been a better time to build a personal computing device that bucks traditional forms for something more bespoke. Whether you want to go all in on Gibsonian cyberdeck aesthetic or a distraction-free writing device to take notes on, there’s no shortage of examples out there that you can turn to for inspiration.

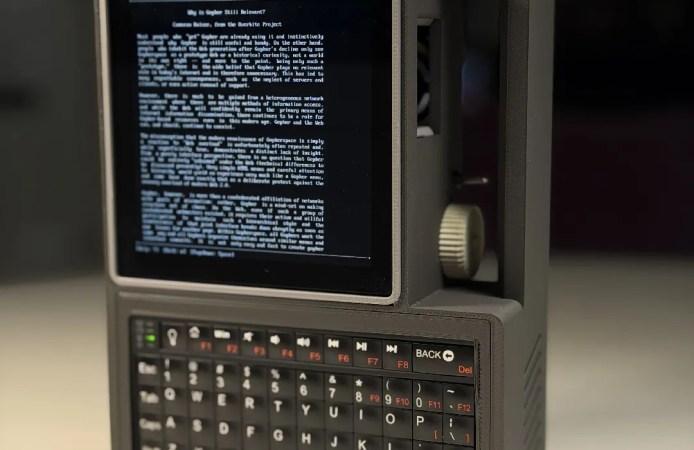
A recent entry into the field, the Don’t Panic Cyberdeck from [Paul Rickards], is a particularly approachable specimen for those looking to experiment with alternative computing experiences. While the final product certainly stands out among the throngs of nearly identical laptops, it doesn’t take a huge investment in time or money to put one of your own together.

Which is not to say the project is simplistic, exactly. Rather, as [Paul] released the design under the Creative Commons license and was kind enough to provide not only a detailed Bill of Materials but assembly instructions, the community is able to benefit from the sleepless nights he no doubt put into it.

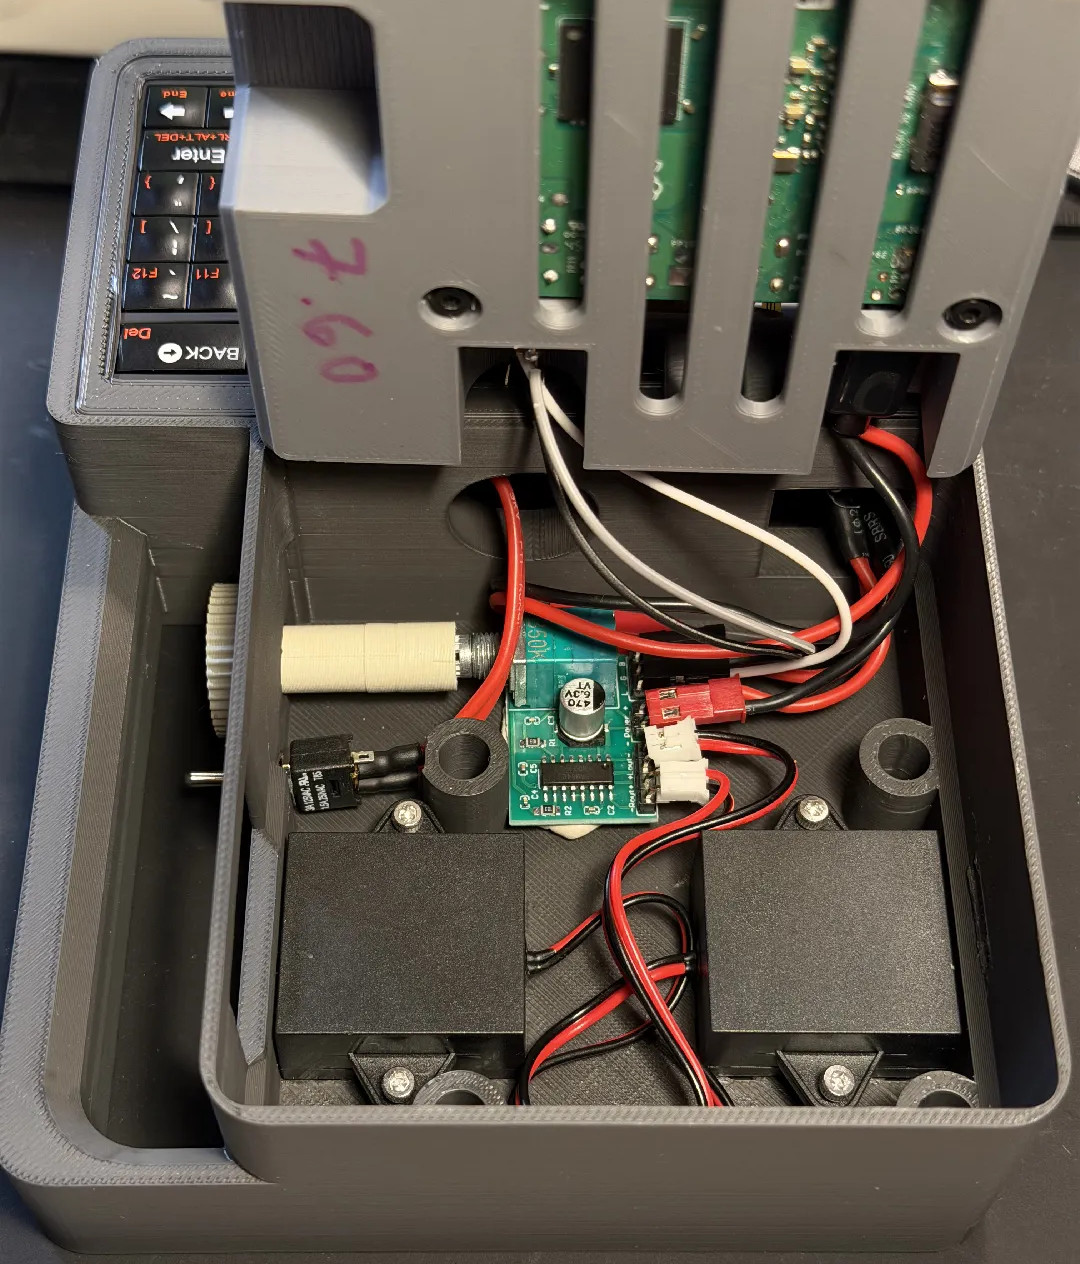
In it’s baseline configuration, the Don’t Panic uses a Raspberry Pi 3A+, a Pimoroni HyperPixel 4.0 Square LCD (touch optional), and a Rii 518BT keyboard. Those core components would be enough to get you up and running, but if you want battery power you’ll also need to add a LX-2BUPS UPS board and a pair of 18650 cells. Audio might be nice as well, and for that [Paul] recommends a PAM8403 breakout board. He’s even got a printable volume knob that slips over the board’s potentiometer and peeks outside the case.

Of course, the best cyberdeck builds are customized to meet their owner’s specific needs, so your loadout doesn’t need to match [Paul]’s exactly. Except the handle, anyway. That feature is non-negotiable. Mainstream computers have far too few handles for our liking.

Custom Watch Is On The Case

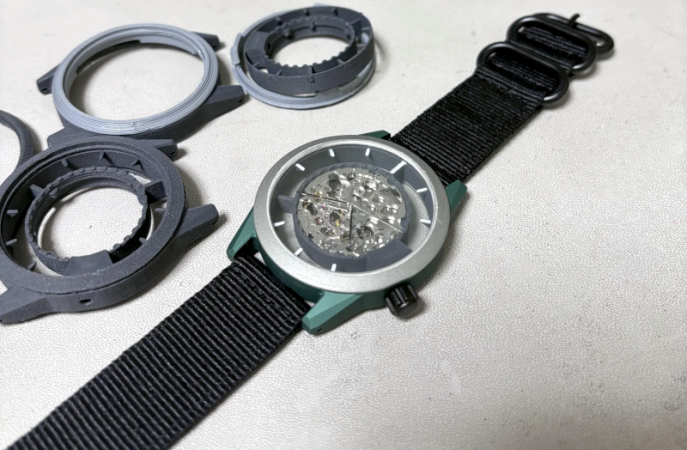
We were excited to see [Z0hn]’s project about 3D printing a custom watch from scratch — both because it was an exciting idea, and because the pictures looked great. While we still liked the project, we quickly realized it wasn’t really printing a watch so much as it was printing a case that holds an off-the-shelf movement. But it still looked great.

Many homebrew watches are cool and fine to wear to your next hackerspace board meeting. But this watch wouldn’t raise an eyebrow out among the normal public. Conventional watches use press-fit backs, tiny screws, or make the back screw into the housing. None of those are great for 3D printing, so this watch uses a bayonet connector, which is easy to create, robust, and reliable.

The watch looks easy to modify, so if you don’t like, for example, the unusual crown placement, you can change it. The movement is a Miyota 8N24 and, of course, the crystal is off-the-shelf, too.

While not exactly a printed watch, it was still pretty cool, and there are lessons to be learned here if you want to pull off the same feat. Or just go full on hacker. You could, too, try your hand with an open source movement.

Reverse Sundial Still Tells Time

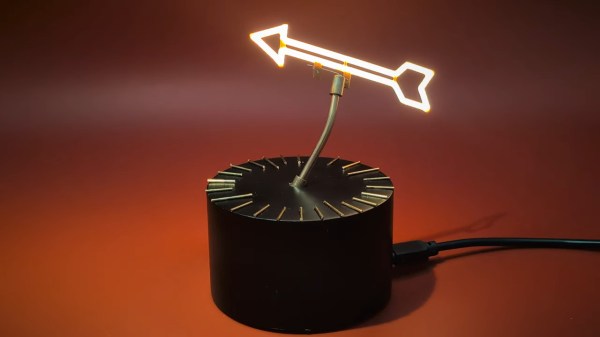
The Dutch word for sundial, zonnewijzer, can be literally translated into “Sun Pointer” according to [illusionmanager] — and he took that literal translation literally, building a reverse sundial so he would always know the precise location of our local star, even when it is occluded by clouds or the rest of the planet.

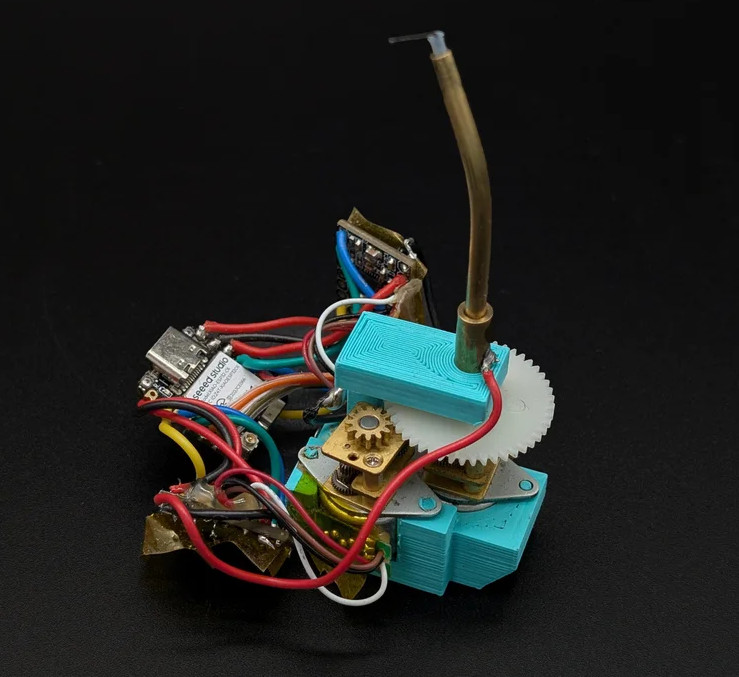
The electronics aren’t hugely complicated: an ESP32 dev board, an RTC board, and a couple of steppers. But the craftsmanship is, as usual for [illusionmanager], impeccable. You might guess that one motor controls the altitude and the other the azimuth of the LED-filament pointer (a neat find from AliExpress), but you’d be wrong.

This is more like an equatorial mount, in that the shaft the arrow spins upon is bent at a 23.5 degree angle. Through that hollow shaft a spring-steel wire connects the arrow to one stepper, to drive it through the day. The second stepper turns the shaft to keep the axis pointed correctly as Earth orbits the sun. See the demo video embedded below for full details.

Either way you can get an arrow that always points at the sun, but this is lot more elegant than an alt-az mount would have been, at the expense of a fiddlier build.  Given the existence of the orrery clock we featured from him previously, it’s safe to say that [illusionmanager] is not afraid of a fiddly build. Doing it this way also lets you read the ticks on the base just as you would a real sundial, which takes this from discussion piece to (semi) usable clock.

Continue reading “Reverse Sundial Still Tells Time”

Supercon 2025 Badge Gets Vintage Star Trek Makeover

There are still a few days before the doors open on this year’s Hackaday Supercon in Pasadena, but for the most dedicated attendees, the badge hacking has already begun…even if they don’t have a badge yet.

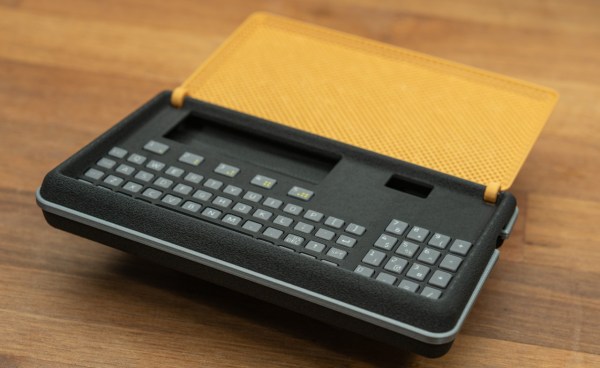
By referencing the design files we’ve published for this year’s Communicator badge, [Thomas Flummer] was able to produce this gorgeous 3D printed case that should be immediately recognizable to fans of the original Star Trek TV series.

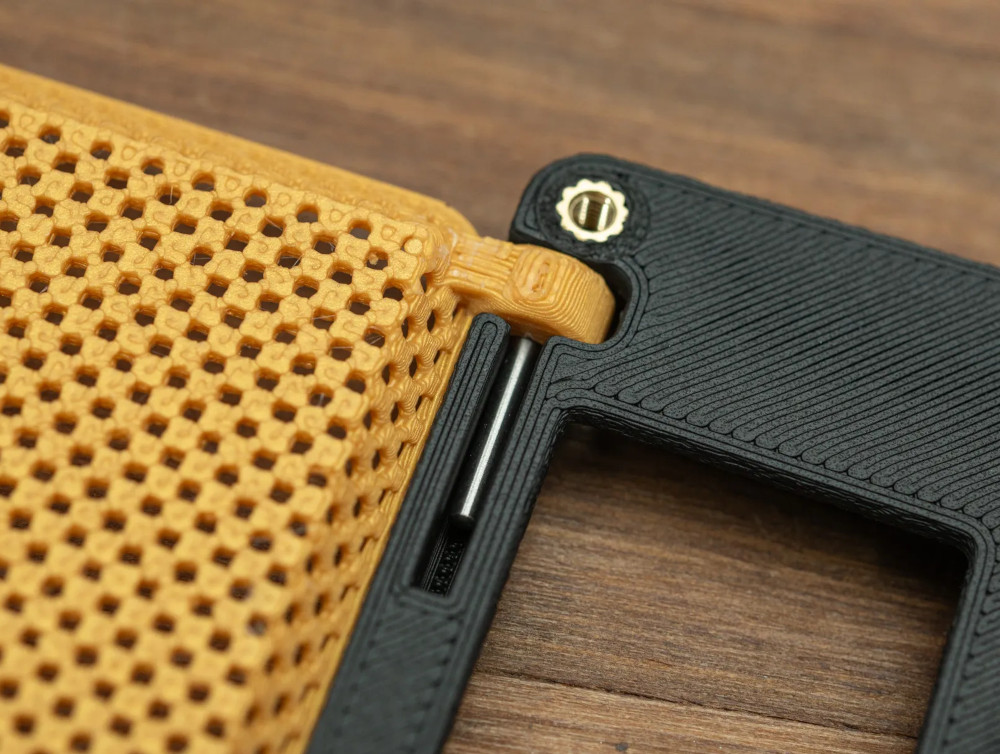
Metal hinge pin? Brass inserts? Scotty would be proud.

Although the layout of this year’s badge is about as far from the slim outline of the iconic flip-up Trek communicator as you can get, [Thomas] managed to perfectly capture its overall style. By using the “Fuzzy Skin” setting in the slicer, he was even able to replicate the leather-like texture seen on the original prop.

Between that and the “chrome” trim, the finished product really nails everything Jadzia Dax loved about classic 23rd century designs. It’s not hard to imagine this could be some companion device to the original communicator that we just never got to see on screen.

While there’s no denying that the print quality on the antenna lid is exceptional, we’d really like to see that part replaced with an actual piece of brass mesh at some point. Luckily, [Thomas] has connected it to the body of the communicator with a removable metal hinge pin, so it should be easy enough to swap it out.

Considering the incredible panel of Star Trek artists that have been assembled for the Supercon 2025 keynote, we imagine this won’t be the last bit of Trek-themed hacking that we see this weekend — which is fine by us.

Building A Handheld Pong Game

Pong was one of the first video games to really enter the public consciousness. While it hasn’t had the staying power of franchises like Zelda or Call of Duty, it nonetheless still resonates with gamers today. That includes [Arnov Sharma], who put together this neat handheld version using modern components.

An ESP32 development board serves as the brains of the operation. Capable of operating at many hundreds of megahertz, it has an excessive amount of power for an application as simple as this. Nonetheless, it’s cheap, and it gets the job done. It’s paired with an SSD1306 OLED screen of 124 x 32 resolution. That might not sound like much, but it’s plenty when you’re just drawing two paddles and a ball bouncing between them. Control is via a pair of SMD push buttons for a nice responsive feel.

What’s really neat, though, is the presentation. [Arnov] wrapped the electronics in a neat bean-shaped housing that vaguely apes game controllers of the 16-bit era. Indeed, [Arnov] explains that it was inspired by the Sega Genesis specifically. It looks great with the black PCBs integrated so nicely with the bright orange 3D printed components, and looks quite comfortable to use, too.

It might be a simple project, but it’s done rather well. Just by thinking about color choices and how to assemble the base components, [Arnov] was able to create an attractive and functional game that’s a lot more eye catching than some random boards thrown in an old project box. Indeed, we’ve featured stories on advanced FR4/PCB construction techniques before, too. Meanwhile, if you’re creating your own projects with similar techniques, don’t hesitate to let us know!