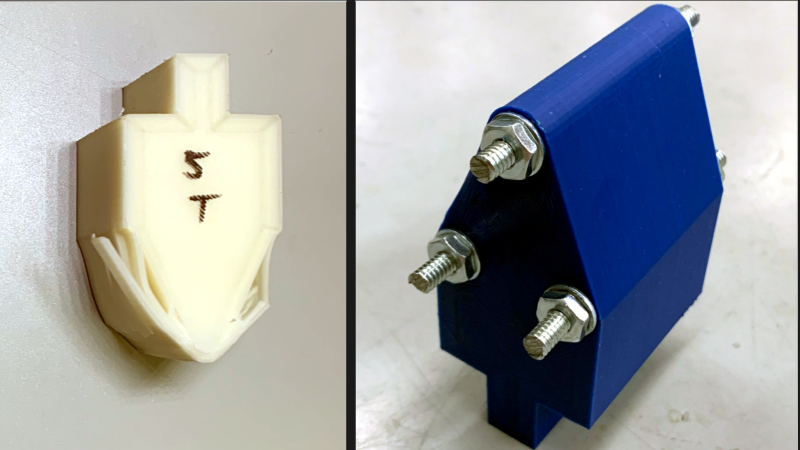
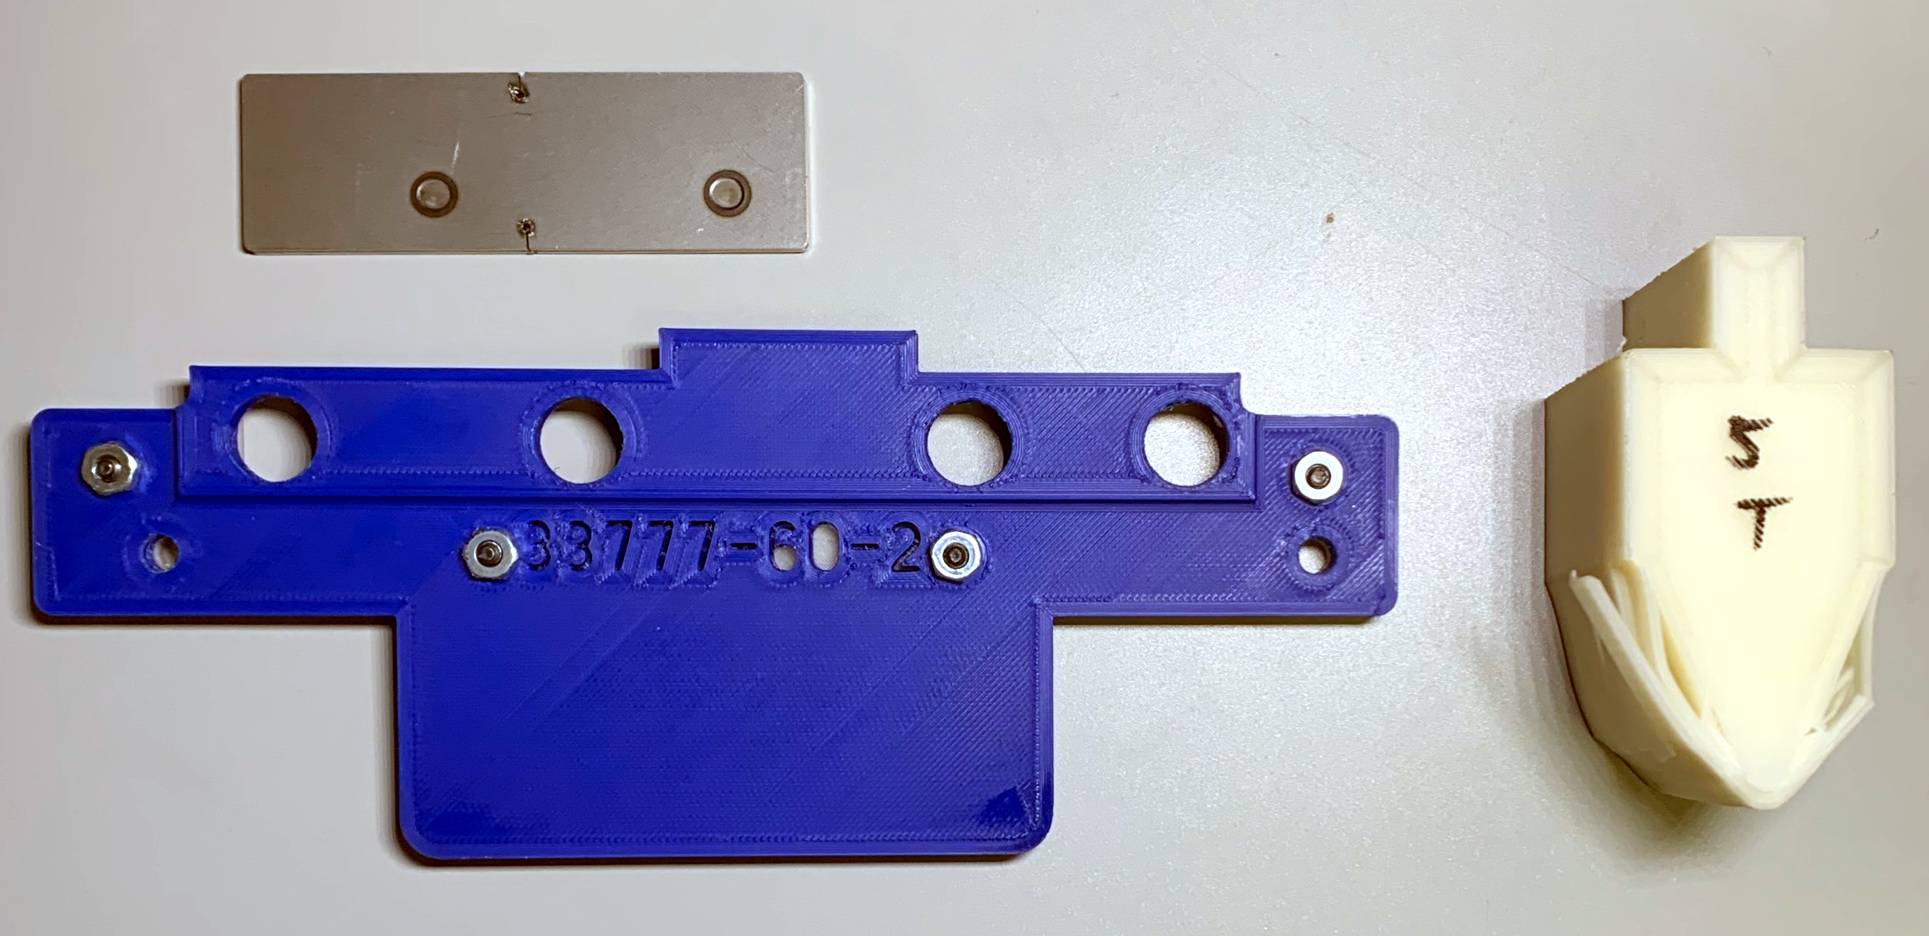
Reddit user [thetelltalehart] has been making brake press tooling with 3D printed PLA, and recently shared an interesting picture of a hybrid brake press punch, shown here on the right, in blue.
In a press, material such as sheet metal is formed into a shape by forcing the material around the tooling. Some types of tooling can be 3D printed, and it turns out that printed tools are not only fast and economical, but can be surprisingly resilient. You can see such tools in action in our earlier coverage of this approach here and here.
[Thetelltalehart]’s previous work was printed at 80% infill and 12 walls, and failed at 5 tons. The new hybrid tool adds some common hardware that has the effect of reinforcing the tool for very little added expense or complexity. The new tool made it up to 7 tons before failure. It’s a clever idea, and an apparently effective one.
The goal with these 3D printed tools is twofold: doing short-run work, and reducing costly rework when developing “real” tooling. Having to re-cut a tool because it isn’t quite right in some way is expensive and costly, and it’s much easier and cheaper to go through that process with 3D printing instead of metal.


Unles this part is intended to be a “mechanical fuse” the author should run it through many cycles to determine what is the useful load the part can bear.
It’s not intended to run through a high number of cycles. It’s intended to be cheap to produce, quick to iterate on, and to last for a small number (probably less than 1000) of cycles before it’s replaced by an equally cheap and quick to produce tool or a final steel production tool.
Haven’t realized that initially, my fault! Thanks for the clarification, that is absolutely a great use for 3d printed stuff.
Using plastic to prototype for steel has the obvious problem of a vastly different Young’s modulus – around 1% that of steel. The tool deforms under load, so the bends will never be quite the same.
Depends on what you are pressing as to how much of a differential there will be with identical geometry. When pressing something that yields easily the deformation of the PLA will be almost nothing to a steel versions so little it defied measurement. Once you start working up nearer the PLA’s failure point the difference will be more noticeable. But even then the plastic still gets you into the ballpark, some further time can refine the more enduring tooling if really required.
Overall a very useful trick for cheap ‘quick’ and prototype pressing and with the cunning reinforcements suitable for reasonably long term or high load use…
Heck, I did this at my last job to form some thin titanium shields for use in vacuum panels. PLA is a fantastic material, for sure!
If this works with low-melting point polymer, I’m somewhat surprised nobody seems to have tried (or not bothered to publicise) using a high-density hardwood for low production work like this.
still faster, more accurate, and easier to replace in PLA- and you’re using a easier to replenish resource to do so.
Well, it’s going to take hours and hours to print, versus 15 minutes on a band-saw and a sander.
And PLA isn’t “easier to replenish”.
“Hours and hours” is hyperbole. Good luck getting a cut that clean or precise with hardwood and a bandsaw in “15 minutes”. You might get a good cut but you probably aren’t getting exactly the one you want.
You’re not going to be using Lignum Vitae for something like this. Hardwoods also come in variety – balsa is technically hardwood, even though it’s not very hard.
And 3D printing is slow. Take a very coarse print at 400 µm layer height (0.4 mm) and 150 mm/s, 0.6 mm nozzle. That’s 0.4 x 0.6 x 150 = 24 cubic millimeters per second. That’s flying fast, but printing an object with a volume of 1 liter (10x10x10 cm) will still take 11 hours and 40 minutes.
The print volume racks up pretty fast. For example, you can model the press tool as a 5 x 3 x 30 cm slab – that’s 450 ml of volume, or, given the previous assumptions it would be about 5½ hours to print. That’s a waste of a working day.
I’d say PLA can be argued to be much easier to replenish – Hardwoods take decades to grow to any real size, the softer woods might be able to do the job though at which point its more debatable.
For something like this I’d rather spend an hour with saws and sandpapers than wait for a print only if I only ever wanted one of them, for a single job with no expectation of repeats. Otherwise just set a printer going and come back end of shift/tomorrow in a week every station in the company that needs one can have their own IDENTICAL(ish – at least much more consistent than wooden) ones.
Softwoods can be hard and hardwoods can be soft. The name is misleading.
You could also use thick hardboard and glue it up in layers that you cut on a CNC machine.
When it fails you grind it into pellets and extrude new filament and reprint it.
I was super impressed with the initial iteration of these 3D printed press brake dies. The bolts are an obvious solution to improve strength, especially along layer lines. I’ll have to give it a try.
I was thinking about folding a thin sheet of metal around the tool and gluing it in place. It spreads the load, so the layers won’t de-laminate so easily.
Does self-tapping screws into pla provide similar strength, or do you need the end washers? It’s a cool demo for increasing part strength!
I have used the hollow-tubes-through-solid approach to strengthen parts, and that works really well also (I’m pretty sure I saw that here). I’m guessing that combining voids (to get external perimeter walls) and self-tapped screws would do really well.
On some scales and shapes that will work fantasticly (I’ve used this method before) – but screw threads and heads are not very wide, the washer bolt combo spreads the pretension over a much wider area of the print. Screws are still a very good idea for the right geometry and will work even when you can’t go all the way through a part, but if you can washer and bolt or even full profile steel shim and bolt to clamp the entire profile of layers together evenly do it as it will work out better.