[Eric Strebel] wanted a microphone to record voiceovers, and being a designer, wanted something suitably impressive for the task. Inspired by the classic Unidyne 55, he set about designing his own mic, and used some pretty fancy techniques to get it built.
The mic was built around a ribbon element, providing good dynamic response. The design was created in CAD, and was initially intended to be constructed out of three seperate pieces. However, [Eric] realized that through the use of a binder jetting 3D printer, this wouldn’t be necessary.
Binder jetting is a technique in which a nozzle squirts binder into a powder bed to create a 3D printed part. In this case, a steel powder is used, which is then post-processed in an oven with liquid bronze. The bronze wicks into the finished part, adding strength. It’s a process which creates metal parts with very few limitations; the primary concern being minimum wall thicknesses.
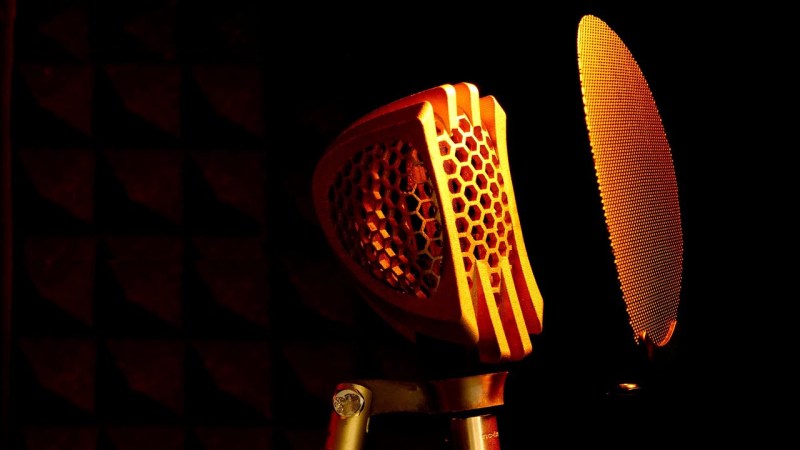
With access to a binder jetting printer, [Eric] was free to design the stylish geometry of the final product. Mashing up hexagons with classic 50s curves, the final result is impressive. [Eric] now uses the microphone regularly to record voiceovers, and the aptly-named Hexavox even made an appearance at NAMM.
If you’re looking for more ways to DIY in your home studio, consider building your own isolation shield. Video after the break.


It’s an enclosure, not a mic…
I wonder if it just “looks good” or if the home made case enhances sound, or at least is neutral.
I keep seeing comments from people (elsewhere) about the microphones they’ve bought for podcasting. And they spent quite a lot. While expensive microphones fit some situations, it seems overkill for most people.
I’m guessing that, for many people, the big switch is from an electet or MEMS microphone with good high-end response to a ribbon mic that enhances the middle/low tones of voice.
Isn’t this the same person who did the foam-core six-wheeled APC featured a few days ago?
Wish I was that prolific…
Eric is making good content regularly! His video about making molds for thc candies was 🔥
But where’s the Pop filter as shown in the title picture?
https://www.sweetwater.com/store/detail/ProPop–se-electronics-studio-mic-pop-screen
Ah, disappointing he didn’t accessorize it accordingly. The lighting gives it a look of similar construction.
It would be cool to have a mesh windscreen inside the enclosure. You could prefab the screen and insert it in through the opening at the bottom then expand it out with puff of air – like a blow-molded part. A black mesh behind the hex openings would look very cool and offer a nice functional enhancement.