High Power LoRa And Tropospheric Reflection Experiments

We’re used to LoRa as a free-to-use digital radio protocol allowing not-very-high data rate communications over distances of a few miles. It’s made all kinds of distributed sensor systems a breeze, and some experimenters have made an art of achieving communication over hundreds of miles. But what would happen if you took a brute-force approach to LoRa and simply wound up the power?

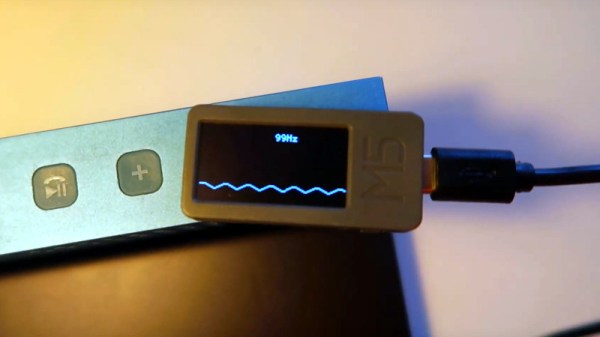
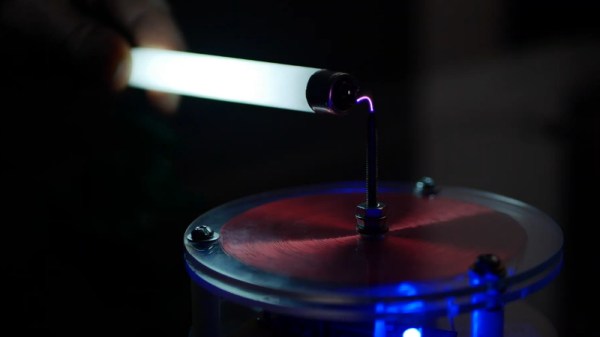
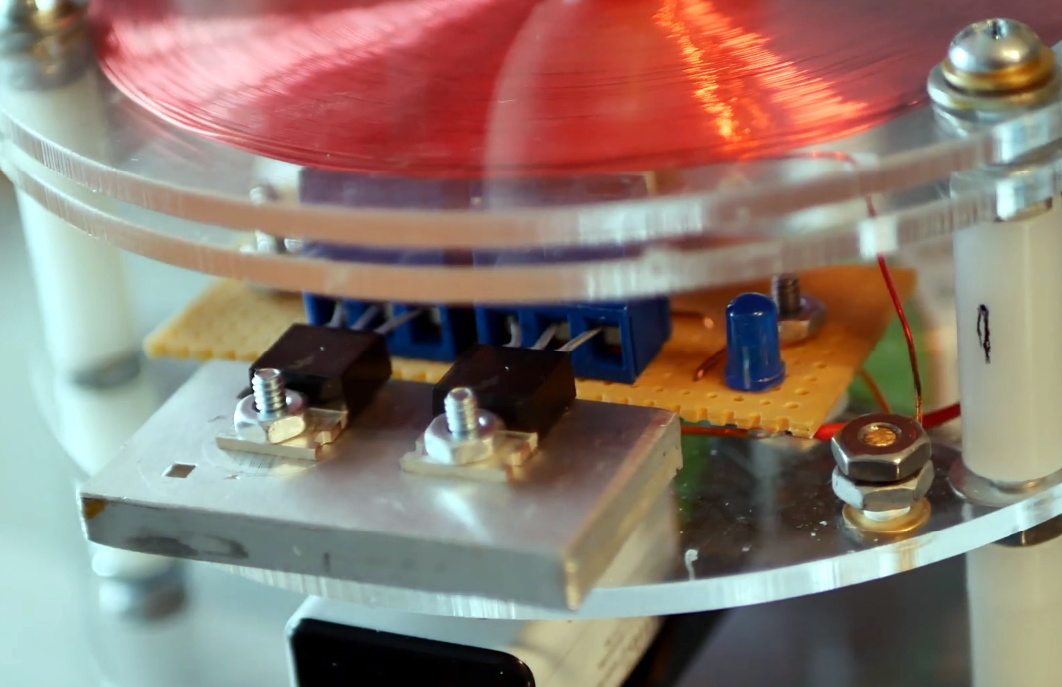
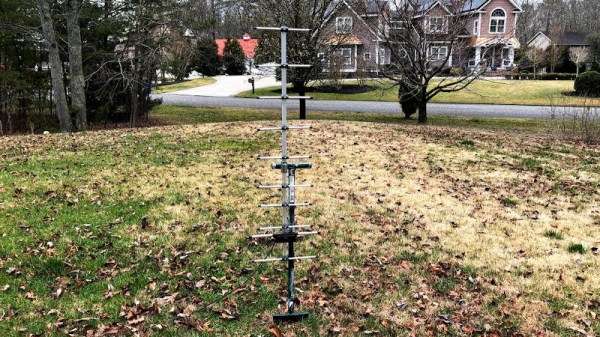
In a bid to test its efficiency at bouncing off the troposphere in normal conditions, [Inductive Twig] hooked up a HamShield 70cm LoRa shield to an 80W power amplifier and a high-gain Yagi antenna pointing directly upwards mounted with ingenuity on a spade, and drove around looking at the received result. With an effective radiated power of 1500W this wasn’t your normal LoRa, instead being operated with LoRa as an amateur radio mode.

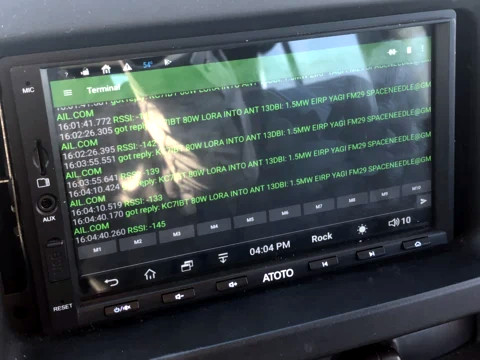
For those not familiar with radio propagation, radio waves bounce off some surprising things. In this case the aim was to bounce them off the troposphere, but while radio amateurs and LoRa distance chasers wait until weather conditions deliver a so-called “lift” in which the troposphere is especially reflective, here the experiment was performed under normal flat conditions. The result characterizes LoRa’s possibilities for everyday extreme-range mode rather than chasing records, and in that there were some interesting results. The reflected signal was receivable in bursts with low but consistent signal strength, with the limiting factor during the test as that they ran out of land upon which to drive in the southernmost peninsula of New Jersey. We’ve heard of War-Driving for open WiFi… does this car dashboard setup count as LoRa-Driving?

LoRa is designed as a protocol tolerant of low signal levels and some packet loss, so this experiment is an interesting demonstration of its possibilities when used at higher powers under a licensed transmission. It shouldn’t be possible to use the 70cm band for reliable tropospheric propagation under non-lift conditions, but this shows that it can be done. Meanwhile, take a look at a previous attempt to push LoRa using a balloon.

How Constant Is Your Choice Of Lights?

The move from incandescent filament lamps to fluorescent, and then LED lighting over the last couple of decades has delivered immense benefits in terms of energy saving, but had brought with it problems for people sensitive to flicker or to too much of a particular set of wavelengths. It’s not always easy to quantify the propensity of a particular light for flickering. So [kk99] has produced an instrument returning a visual indication of its quality.

At its heart is an M5Stick ESP32 development platform, and a TSL250R light sensor hooked up to one of the ESP’s internal ADCs. The flicker waveform is displayed on the screen as a simple oscillograph, and a Fourier transform is performed to extract its frequency. The result is an extremely accessible and compact instrument, showing the suitability of the M5Stick form factor for such designs. So far we’ve only brought you an M5Stick in a password keeper, but we look forward to seeing more projects featuring it.

You can see the light flicker meter in action in the video below the break.

Continue reading “How Constant Is Your Choice Of Lights?”

Screwy Math For Super Fine Adjustments: Differential Screws

For any sort of precision machine, precision adjustability is required. For the hacker this usually involves an adjustment screw, where the accuracy is determined by the thread pitch. This was not good enough for [Mark Rehorst] who wanted adjustment down to 10 μm for his 3D printer’s optical end-stop, so he made himself a differential adjustment screw.

Tiny adjustment can be made to the green block due to the thread pitch differences

Differential screws work by having two threads with a slightly different pitch on the same shaft. A nut on each section of thread is prevented from rotating in relation to the other, and when the screw is turned their relative position will change only as much as the difference between the two thread pitches.

The differential screw in this case started life as a normal M5 bolt with a 0.8 mm thread pitch. [Mark] machined and threaded section of the bolt down to a M4 x 0.7 mm thread. This means he can get 0.1 mm (100 μm) of adjustment per full rotation. By turning the bolt 1/10 rotation, the  relative movement comes down to 10 μm.

This mechanism is not new, originating from at least 1817. If you need fine adjustments on a budget, it’s a very elegant way to achieve it and you don’t even need a lathe to make your own. You can partially drill and tap a coupling nut, or make a 3D printed adapter to connect two bolts.

Fabricating precision tools on a budget is challenging but not impossible. We’ve seen some interesting graphite air bearings, as well as a 3D printed microscope with a precision adjustable stage.

The Fart Box, A Synthesizer Not Quite Like Others

[lookmumnocomputer] enjoys creating synthesizers, and early last year he created one called The Fart Box. It is an entirely analog synthesizer with which, according to its creator, it is difficult to make anything that doesn’t sound gassy. It’s not quite like any other synthesizer, and while it is capable of acting like a regular analog synth it is never very far from cranking out farty sounds.

One may think this is just a gimmick, but it can actually be quite musical. There’s a good demonstration at the 7:09 mark in the video of what it can do. Entirely hand-made, it’s definitely a labor of love. There’s a bill of materials and a wiring diagram (of a sort) for anyone who is interested in such details, but it looks like it was a limited run only. [lookmumnocomputer]’s whole video is embedded below, and he demonstrates its ability to act more like a “normal” synthesizer around 8:30.

Continue reading “The Fart Box, A Synthesizer Not Quite Like Others”

Compact Slayer Exciter For Your High Voltage Needs

Tesla coils are incredible pieces of hardware, but they can be tricky to build. Between the spark gap, capacitors, and finely tuned coils, it’s not exactly a beginners project. Luckily, there’s hope for anyone looking for a less complex way to shoot some sparks: the Slayer Exciter. This device can be thought of as the little cousin to the Tesla coil, and can be used for many of the same high voltage experiments while being far easier to assemble.

Now [Jay Bowles] is obviously no stranger to building his own Tesla coils, but since so many of his fans wanted to see his take on this less complex option, he recently built his own Slayer Exciter. After putting on a few of his own unique touches, the end result looks very promising. It might not be able to throw sparks as far as some of the other creations featured on his YouTube channel, but it’s still impressive for something so simple.

[Jay] uses two transistors in parallel for reliability
When we say simple, we mean it. Building a bare-bones Slayer Exciter takes only takes five components: the two coils, a transistor, a diode, and a resistor. For this build, power is provided by a trio of rechargeable 9 V batteries in the base of the unit which can be easily swapped out as needed.

In the video, [Jay] does a great job explaining and illustrating how this basic circuit creates exceptionally high frequency energy. In fact, the frequency is so high that the human ear can’t hear it; unfortunate news for fans of the Tesla coil’s characteristic buzz.

Generally speaking Slayer Exciters would have the same sort of vertical coils that you’d see used on a traditional Tesla coil, but in this case, [Jay] has swapped that out for a pancake coil held in the upper level of the device. This makes for a very compact unit that would be perfect for your desk, if it wasn’t for the fact that the arcs produced by this gadget are hot enough to instantly vaporize human skin. Just something to keep in mind.

We’ve seen Slayer builds in the past, but none as well designed as this one. Incidentally, if you’re wondering about the array of neon indicator lights that [Jay] uses to visualize the electrical field, we covered that project as well.

Continue reading “Compact Slayer Exciter For Your High Voltage Needs”

Living In Corona Times

This week the new coronavirus has spread like wildfire. The good news last week has been the success with which China, Taiwan, and Singapore have handled the epidemic, and that western nations are just beginning to emulate their approach of reducing person-to-person interactions as much as possible to slow the rate of infection. The bad news, however, is that countries like Italy currently have a number of cases that is overwhelming their health system, and that the disease seems to be spreading rapidly in other countries. It’s going to get a lot worse before it gets better.

Our sincerest thanks go out to all of the medical professionals who are providing care in this difficult situation. But also to those who are providing public infrastructure in less obvious ways: the cashiers who subject themselves to hundreds of contacts per day just so that you and I can buy toothpaste, for instance. The rest of us are staying at home as much as possible, washing our hands, and slowing the spread as much as possible simply by not catching or passing on the virus.

The original part, left, with its 3D-printed counterpart.

Of course, everyone wants to help, and there have been some heroic hacks. The fablabs and hackerspaces in Italy who’ve been 3D printing respirator parts for instance, have directly and obviously helped save lives. With respirators being the limiting factor in many hospitals, we’ve also seen an effort to design an open source ventilator, adapt one to serve multiple patients, and even a start towards converting a CPAP fan into a ventilator for emergencies.

But most of us don’t have medical expertise. If you have spare CPU cycles, consider donating them to the folding@home effort to simulate the proteins in the virus. And any hack to make the lives of those stuck in voluntary quarantine more “normal” is perhaps as important in the long run. I made a simple clock to help my son who’s stuck at home and can’t yet tell time, adjust to his new daily routine. Others have made more obviously whimsical devices. We like this computer-vision face-touching alarm. If it makes people smile while slowing down one transmission vector, it’s a win.

If you have the expertise, consider helping out your local schools with telepresence and online education. While a number of colleges are already geared up for distance learning, it’s uncharted territory for primary education most everywhere. I’m sure you can also think of other ways to help out locally. If so, don’t hesitate to tell us your success stories.

For the rest: simply washing your hands, staying healthy, and not passing the virus on to others is a quietly heroic act that we think shouldn’t be overlooked. Thanks.

This article is part of the Hackaday.com newsletter, delivered every seven days for each of the last 212 weeks or so. It also includes our favorite articles from the last seven days that you can see on the web version of the newsletter.

Want this type of article to hit your inbox every Friday morning? You should sign up!

Stylish Mic Is Metal Printing Done Right

[Eric Strebel] wanted a microphone to record voiceovers, and being a designer, wanted something suitably impressive for the task.  Inspired by the classic Unidyne 55, he set about designing his own mic, and used some pretty fancy techniques to get it built.

The mic was built around a ribbon element, providing good dynamic response. The design was created in CAD, and was initially intended to be constructed out of three seperate pieces. However, [Eric] realized that through the use of a binder jetting 3D printer, this wouldn’t be necessary.

Binder jetting is a technique in which a nozzle squirts binder into a powder bed to create a 3D printed part. In this case, a steel powder is used, which is then post-processed in an oven with liquid bronze. The bronze wicks into the finished part, adding strength. It’s a process which creates metal parts with very few limitations; the primary concern being minimum wall thicknesses.

With access to a binder jetting printer, [Eric] was free to design the stylish geometry of the final product. Mashing up hexagons with classic 50s curves, the final result is impressive. [Eric] now uses the microphone regularly to record voiceovers, and the aptly-named Hexavox even made an appearance at NAMM.

If you’re looking for more ways to DIY in your home studio, consider building your own isolation shield. Video after the break.

Continue reading “Stylish Mic Is Metal Printing Done Right”