
After going through all the trouble of printing a part in resin, discovering it feels sticky or tacky to the touch is pretty unwelcome. Giving the model some extra ultraviolet (UV) curing seems like it should fix the problem, but it probably does not. So, what can be done?
The best thing to do with a sticky print is to immediately re-wash it in clean isopropyl alcohol (IPA) before the UV present in ambient light cures stray resin. If the part remains sticky after it is dry, more aggressive steps can be taken.
We’ll get into those more extreme procedures shortly, but first let’s understand a bit more about how resin works, then look at how that applies to preventing and removing tacky surfaces on finished prints.
How Resin Cures, and the Need to Wash
The resin used in stereolithography (SLA) is a syrupy liquid that is UV-cured, meaning it hardens when exposed to the right wavelength of light. But this process is not a perfectly binary one where all exposed resin becomes completely solid, while unexposed resin remains equally and totally liquid. It happens in degrees, and taking advantage of this is indeed part of how SLA printers operate.
 In the SLA process, objects are created one slice at a time, and each slice is a thin layer of resin selectively exposed to UV so that it becomes hard. But this curing process is not always driven to absolute completion. Some of the resin in a layer remains in what is called a green state, which can be thought of as solid but not fully cured. This gives the next layer something to bond to. Each subsequent layer bonds with the previous one, and the UV hardens not just the current layer, but also further cures previous ones as the UV penetrates into the model.
The result of this process is a solid object with no distinct layers that is also covered in uncured resin from the build tank. This excess resin needs to be rinsed away with a solvent, usually isopropyl alcohol (IPA). Some resins get additional curing time by placing them in a UV cure box (or in a pinch, left in sunlight.)
Ideally this process results in a perfectly clean part, but this is not always the case. Uncured resin progressively contaminates the IPA used to wash parts, and it clings to some spots on a model more than others. Just as with hands, incomplete washing is asking for trouble.
Left-Behind Resin Makes Sticky Prints
If enough uncured (or partly-cured) resin is left behind after part washing, it contaminates a print’s surface and makes it sticky. This happens in one or both of the following ways:
- The IPA used to wash parts is dirty. The more parts are washed in a quantity of IPA, the higher the concentration of resin in the IPA becomes. Parts washed in this IPA get coated with a thin layer of diluted resin. The alcohol evaporates, and the resin is left behind. If the concentration is high enough, the part is sticky. Not all resins are alike, and Formlabs uses their own proprietary resins, but according to them, when IPA’s resin concentration reaches 5% to 10%, parts may feel tacky.
- Part washing was incomplete. In general, uncured resin clings more stubbornly to a textured surface. A wash process that reliably rinses resin off a smooth print might not be sufficient to fully remove resin from a print with nooks, crannies, or recessed features.
If the concentration of resin diluted in IPA is too high, the whole part will feel uniformly sticky. If the problem is resin left behind in problem spots, only those areas will feel sticky.
I’ll discuss prevention of sticky prints first, then explain how to salvage a stubbornly-sticky print.
Stopping Sticky Prints in the First Place
The following will help minimize the risk of leaving uncured or partially-cured resin on a print by helping ensure better part washing, and more efficient use of IPA.
Wash The Part Twice, Using Separate Bins
Instead of using only one container of IPA to wash parts, use two separate ones. One is exclusively for an initial washing. After the initial wash — during which most of the resin will be rinsed off — transfer the print directly to the second bin for a final cleaning. The IPA in the second bin will stay cleaner for longer, and do a better job of getting the part clean.
This process also uses less IPA in the long run, compared to a single wash bin of IPA that must be changed out whenever the resin concentration gets too high. With two bins, the primary wash IPA does get dirtier faster, but even “dirty” IPA can do a good job of removing the bulk of uncured resin from a fresh print. The IPA in the second bin, reserved only for finishing, also lasts longer because it has less resin to deal with. When the time comes to refresh the alcohol, use the IPA from the secondary bin as the new primary wash.
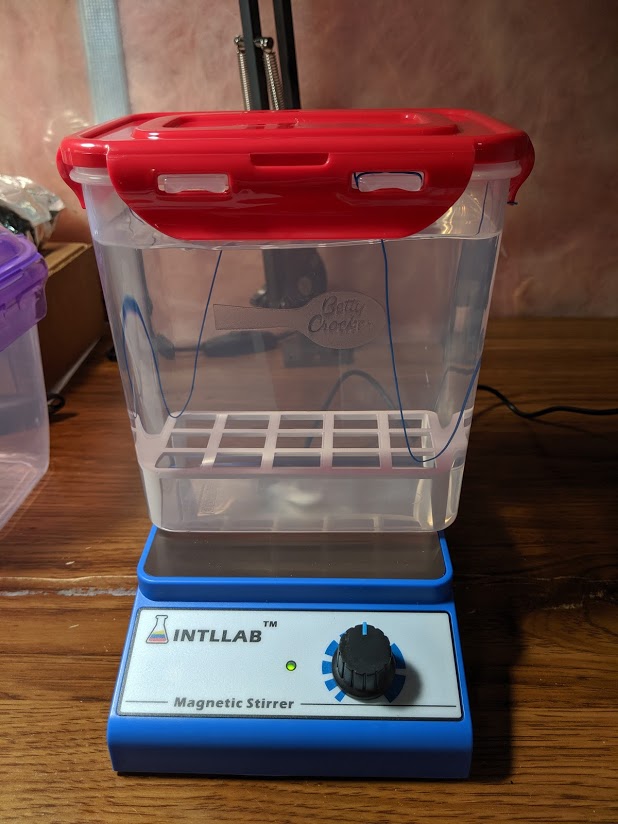
Simple containers with lids that can be sealed make good wash bins. Agitation of the IPA, either by shaking the container gently or by stirring, makes washing much more effective.
Target Problem Parts For Extra Washing
Some part geometries are simply harder to get clean. Troublesome features include:
- Pockets, recesses, or textured areas. IPA will flow poorly in and around such features, and uncured resin will tend to stick.
- Tubes, holes or similar internal features where IPA flow is restricted.
- Areas of very dense supports can prevent easy flow of IPA to parts of the model.
Parts can get some extra washing by:
- Allowing more wash time than usual.
- Agitating the wash. Automatic part washers stir the IPA to accomplish this.
- Rinsing with a wash bottle filled with clean IPA.
Different resins have different properties as well: some are easier and some are harder to rinse away. A process that works for some parts and resins may not be sufficient for others.
It may be tempting to give parts a very generous amount of time to soak to ensure a better rinse, but this can invite other problems if carried too far. As prints soak in IPA, they absorb the alcohol and will begin to swell. Over-soaking a part may result in a poor surface finish, or damage fine features.
Compensate for Dirty IPA with Longer Wash Times
In general, the “dirtier” the IPA is, the longer the part should be washed to compensate. But this only works to a certain extent; if IPA contains a high enough concentration of diluted resin, parts will always come out sticky. When this happens, it’s time for fresh IPA. In the meantime, giving a part a final rinse in clean IPA will do the trick, even if it’s just from a wash bottle.
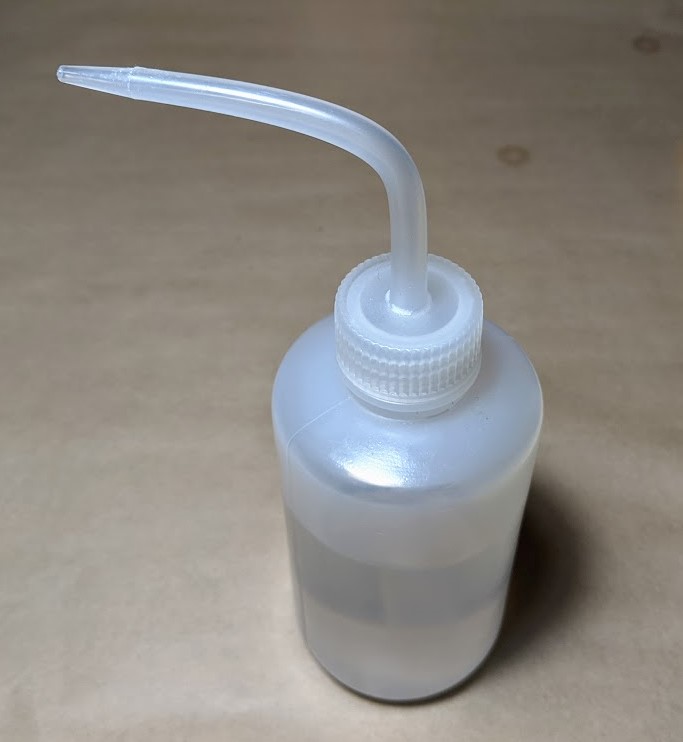
Keep a Wash Bottle Handy
If you don’t own one, you should. They can be used with one hand and are great for getting IPA into specific places, and in controlled amounts.
Fixing a Stubbornly Sticky Print
If prevention has failed, it may be tempting to banish the model to a UV cure box (or leave it out in sunlight) for extra UV exposure in an effort to harden the sticky layer on the surface. In my experience, doing this has never given a satisfactory result. What has reliably worked for me is the following process:
- If possible, re-wash a sticky part immediately in clean IPA before any residual resin cures in ambient light. Allow the print to dry, and see if the problem is solved.
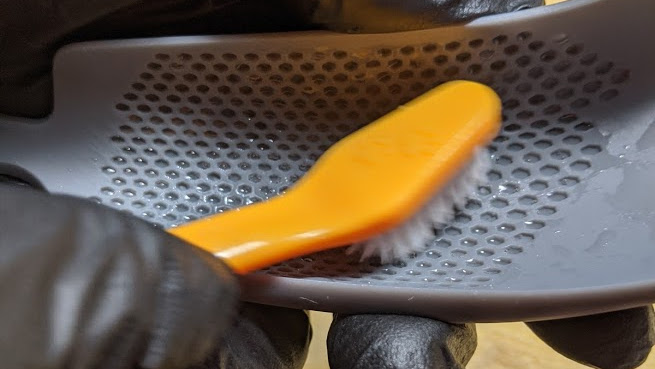
- If the part is still sticky, rinse again with clean IPA and brush with a soft and maneuverable brush such as a toothbrush. This will scrub away any stubborn, partially-cured resin clinging to the surface. Focus on problem areas, and rinse both the brush and the part frequently.
- Give a final rinse in clean IPA, and allow the part to dry. If it remains tacky, repeat the brushing process.
What Else Works?
Ultrasonic cleaning using a clean IPA bath is another possible method of getting into the nooks and crannies of a print, and may be useful for delicate parts that cannot tolerate a brush, but I haven’t personally had to resort to this. What has worked for you? Any tools or methods that have been particularly helpful? Share your favorite techniques in the comments.


I have a possibly helpful tip!
Oxygen inhibits the full cure of SLA or DLP resin. If you haven’t exposed your green state part to a cure box or sunlight yet try one of the following after cleaning:
– Put your part in a plastic zip lock bag. Fill the bag with Nitrogen or another inert gas (Argon works great and might be more common in a shop setting) and zip it up. Finish the cure by placing the bag in your curebox or in direct sunlight.
– Submerge your part in a Pyrex bowl filled with glycerol before curing in your curebox or sunlight.
– If you can’t get your hands on inert gas or glycerol, you can use water! It works pretty well but might not be as effective because of dissolved oxygen.
As mentioned above, I have found that once your part has been exposed to UV light after printing, it becomes much harder to fix the sticky surface!
Wrt oxygen in water, heating water drives out the dissolved oxygen, or even just hot tap water from a faucet with no aerator screen allowed to settle should provide good results
Fascinating. I never thought of that! Heat would speed up your cure time too! For better or worse I suppose. There is always a possibility for warping during final cure.
The difference is heatED not hot – you can let the water cool down, so long as you don’t mix air back in – no aerating agitation such as shaking a bottle of water or pouring from a long way up. Pour gently with a short drop and it should preserve the deadness of the water
I came here to say this.
In my experience, water works fine, no-mater what (with the resins I’ve used).
I think it’s mostly to do with the chemical availability of the oxygen as well as the abundance.
For example, many vats use PDMS because the oxygen in the silicone will imped the cure of resin, but water does not seem to (probably because hydrogen bonds are strong).
Who can afford IPA anyway since COVID? The price has trebled.
High pitched prices… oh noez!!!
I’m curious if you could use a UV source in your IPA soak tank between washings to cure and crash out the dissolved resin. If so, it could be caught in a filter and disposed of as a solid.
I suspect that might work if the resin were still discrete particles, but if it’s in solution, I doubt it. You’d have more luck with an evaporator/condensor setup (aka a still)…
Reading the article, that’s what I was thinking. And with the distillation, it will last longer anyway.
We use a solvent recycler at my company that uses resin printers. I have tried to cure resin out of the solvent but it was much too complicated. It forms a gel and is very nasty.
Seems like a gel could be filtered out, if using a large enough filtering surface. Like a pair of pantyhose.
I’ve been using a plastic M&Ms container (quart sized) to hold denatured alcohol. I drop a print in, shake it around a bit, then pull it out. Then I put the lid back on the container, and set it on a roll of UV LEDs. The resin clumps and falls out. I then just pour through a filter into another container, and there is a large amount of plastic left in the filter.
I’m actually looking at using a 1.5 gallon all-in-one fishtail for doing this. UV LEDs built into an airstone sitting on the bottom of the tank. Pumpind alcohol through the stone instead of air, and a small fryer basket that you put prints in, then dunk for 5 minutes. For $40, I think it’s worth a try, as the filtered particles I’m currently dealing with in my setup would easily get caught in the fish filter.
How interesting!
I normally just let “dirty” IPA settle, and then pour off the top and try to leave the sediment behind. I will have to give this a try and see how it works for me. Thanks for sharing!
Maybe try a UVC lamp, as long as it’s a real UVC lamp and not a fake one with fake UVC LEDs.
Some fake UVC LEDs emit purple light, and they’re just near-UV, not UVC. Other fake UVC LED vendors have gotten sneakier and use ice blue LEDs, which again don’t emit UVC, but the light they emit looks a lot like the light emitted from legitimate UVC bulbs.
I have done this, and the results were poor at best. Most of the resin has begun to breakdown in the IPA vat. When I exposed it to my UV source, what did precipitate out was a algae like bloom. I ran the IPA through some pain filters and it was still cloudy. Ran it thru some coffee filters and it was still tacky. Also, I thin that the long exposure to UV broke down the IPA faster than it just evaporating.
I am now trying with surfactant based cleaning solutions, (Dawn).
I think that IPA does not readily break down under UV exposure. It is a small molecule with nor tendency to polymerize or be sticky. I am sure, these are partly cured and partly degraded resin residues. And you can not separate dissolved stuff by filtration, not regarding ultrafiltration or reverse osmosis.
But for sure distillation is the best way to clean alcohol (and other solvents).
I have a tip.
Oxygen inhibits the full cure of SLA or DLP resin. If you haven’t exposed your green state part to a cure box or sunlight yet try one of the following after cleaning:
Put your part in a plastic zip lock bag. Fill the bag with Nitrogen or another inert gas (Argon works great and might be more common in a shop setting) and zip it up. Finish the cure by placing the bag in your curebox or in direct sunlight.
Submerge your part in a Pyrex bowl filled with glycerol before curing in your curebox or sunlight.
If you can’t get your hands on inert gas or glycerol, you can use water! It works pretty well but might not be as effective because of dissolved oxygen.
As mentioned above, I have found that once your part has been exposed to UV light after printing, it becomes much harder to fix the sticky surface!
Hmmm… Some good points. As CO2 is heavier than regular air and doesn’t absorb much (if any) UV (https://en.wikipedia.org/wiki/Sunlight#/media/File:Solar_spectrum_en.svg), you could also put a piece of dry ice (in a small jar of hot water) in the container a while before you add the piece to be cured.
If you own a Sodastream, a couple of squirts of CO2 from it into a ziploc bag ought to do the trick.
Plenty of people already have one of those in the house, compared to those who have shop gases for welding (or otherwise), or keep dry ice around.
I know some people swear by the under-water cure, haven’t tried it myself.
Great article — Thanks
>Ultrasonic cleaning using a clean IPA bath
This sounds a bad idea.
Wondering why you think ultrasonic with IPA is bad?
IPA is very flammable. Seems that putting it in an ultrasonic cleaner could lead to a fire or explosive reaction
IPA is not pyrophoric or will ignite by ultrasonic energy alone. Of course the ultrasound will create alcohol vapor and perhaps aerosols. Cover it, ventilate the area well and avoid sources of ignition.
For the 4 separate manufacturer resins I used so far, they all seemed to require the following:
1. longer 12 second per layer exposure time, and 10 second rest curing times.
2. extensively dabbing the part with TP/tissue/swabs after drip drying in the build vat (very important for <0.3mm dimensional repeatability, but surface finishes are less smooth)
3. washing off remaining uncured resign in 99.9% Isopropyl alcohol jar
4. rinse in 50% Isopropyl alcohol jar (the water will usually make any remaining uncured resin sticky)
5. expose each part side under UVC lamp for 10 minutes (unsure if my lamp's spectra covers UVA/UVB too)
6. let cure in ventilated area for 24 hours to harden (usually feel dry with gloved hands)
7. wash part in shop de-greaser hand soap and water
I will usually go though 2 pairs of gloves and quite a bit of tissue each run, but seem to avoid any sticky part issues even with solid parts.
;-)
Would making an IPA still separate out the resin? I’m just wondering at a time when alcohol is not always available, there must be a way to clean it.
99.9% Isopropyl alcohol is available at most pharmacy, and Amazon.
It is usually the cheapest and safer solvent to handle.
Thanks Joel, next time we’re swinging by Mars we’ll come in and get some.
Nah, they have started to restock around here, but they’re wanting $10 per 500ml now.
IPA price gouging is illegal in most areas…
And even Amazon will de-list people if reported.
If your print has a lot of internal voids that need to drain, than you must avoid solvents with too much water (or it gets the 0.1mm to 0.2mm sticky film that never cures).
Most of the parts I print were structurally solid, so the external surface is wiped almost completely clean prior to the 99.9% solvent washing. The same 1L soak-and-shake bath has lasted for 3L worth of resin prints so far, and is not that cloudy yet.
Good luck with the new normal..
personally I want a refund for 2020… ;-)
Denatured alcohol works pretty well, although it can frost the surface sometimes. I think it’s called methylated spirits in europe.
Some guys are reporting great results with simple green and water. I don’t know what the UK equivalent would be, it’s a green pine scented degreaser/soap that is biodegradable, no ammonia or bleach.
I am sure the resin has a much higher boiling point than the IPA (bigger molecules), so I would expect that.
Simple green + water + ultrasonic works great for me.
I operate a dental lab and print everyday with Formlabs and Sprintray machines. My post-processing uses 2 submerges in 91% isopropyl baths, first one is the “dirty initial wash” for bulk resin removal for 5 mins and it doesn’t have any mechanical agitation at all. I transfer to the “clean finish wash” that has a magnetic stirring incorporated for another 5 mins. I then gently blow dry with compressed air. I then place the models in a convection oven at 150 degrees F for 15 mins to really evaporate the alcohol away. I transfer the dry warm models to a clear container with hot tap water and place on a turntable under UV lights for 30 mins. Results are perfectly squeaky clean prints with a hard surface.
Does anyone have any recommendations on what brands might be good candidates to replace a Formlabs printer? Our was firmware updated to death and no longer works.
I recommend an Asiga Max. It’s a bit spendy, but great software and manual. Complete control of everything too. Sprintray is also something you should look into. The SprintRay Pro looks incredibly promising and is closer to the Formlabs price point.
This is Hackaday, surely someone here has a better solution to firmware death with functional hardware than “buy a new one”?
Ultrasonic bath…..Filled with water!. Put model in a small ziplock bag containing enough IPA to cover the model!. Works brilliantly for me, saves a LOT of cleanup.
Great article and comments. Unfortunately, after DLP printing with a high temp resin, I had no luck with anything above, including running our parts through three alcohol baths and trying various aqueous detergents as well as solvents other than alcohol. Areas of each print are always left with streaks of a shiny, sticky residue that looks like it has dripped/run there, but I can’t imagine how. It can be scrubbed off, but there are hundreds of tiny slots that must be free of residue and cannot be accessed mechanically.
Here’s what removes it: An ultrasonic bath with about a 30:70 ratio of alcohol to ammonia. I set the bath to 35°C and run it for 10 minutes. The parts come out perfectly clean. The alcohol can be high purity IPA or denatured ethanol. The ammonia must not contain detergent. Ace Hardware sells gallon jugs of “extra strength” ammonia inexpensively.
For the bath, I bought the smallest of the inexpensive units listed on Amazon as follows: https://www.amazon.com/gp/product/B08FX24125/ref=ppx_yo_dt_b_search_asin_title?ie=UTF8&th=1