Slab Casting – A New Way To Combine 3D Printing And Ceramics

Slip casting can be messy both in processing and in making the original plaster mold. What if there was a better way, thanks to 3D printing?

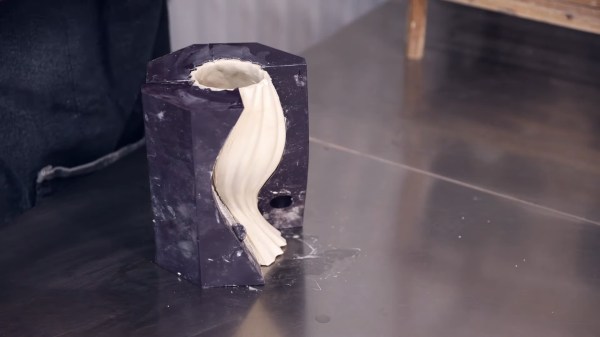
[Allie Katz] has developed a new technique using 3D printed slab molds to make ceramics. By combining the ability of 3D printing to make intricate designs and the formability of clay, they have found a way to make reproducible clay objects without all that tedious mucking about with liquid clay.

[Katz] takes us through a quick “Mould Making 101” before showing how the slab casting press molds were made. Starting with a positive CAD design, the molds were designed to eliminate undercuts and allow for air infiltration since a plastic mold can’t suck the water out of the clay like a plaster one would. Some cookie clay cutters were also designed to help with the trickier bits of geometry. Once everything was printed, the molds were coated with cornstarch and clay was pressed in. After removal, any final details like handles can be added and the pieces are then fired as normal.

If you’d like to see some more 3D printing mixed up with ceramics, check out 3D printing glass with a laser, reliable ceramic slurry printing, or this TPU-based approach.

Continue reading “Slab Casting – A New Way To Combine 3D Printing And Ceramics”

Reliable 3D Printing With Ceramic Slurry

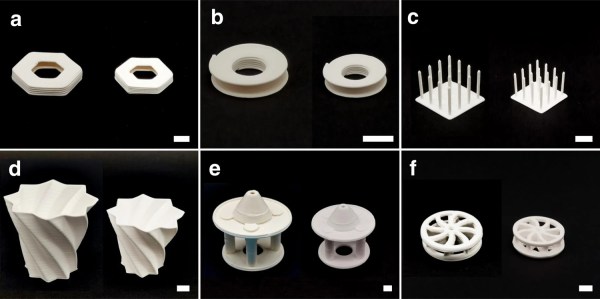
3D printing is at its most accessible (and most affordable) when printing in various plastics or resin. Printers of this sort are available for less than the cost of plenty of common power tools. Printing in materials other than plastic, though, can be a bit more involved. There are printers now for various metals and even concrete, but these can be orders of magnitude more expensive than their plastic cousins. And then there are materials which haven’t really materialized into a viable 3D printing system. Ceramic is one of those, and while there are some printers that can print in ceramic, this latest printer makes some excellent strides in the technology.

Existing technology for printing in ceramic uses a type of ceramic slurry as the print medium, and then curing it with ultraviolet light to solidify the material. The problem with ultraviolet light is that it doesn’t penetrate particularly far into the slurry, only meaningfully curing the outside portions. This can lead to problems, especially around support structures, with the viability of the prints. The key improvement that the team at Jiangnan University made was using near-infrared light to cure the prints instead, allowing the energy to penetrate much further into the material for better curing. This also greatly reduces or eliminates the need for supports in the print.

The paper about the method is available in full at Nature, documenting all of the details surrounding this new system. It may be a while until this method is available to a wider audience, though. If you can get by with a print material that’s a little less exotic, it’s not too hard to get a metal 3D printer, as long as you are familiar with a bit of electrochemistry.

These 3D Printed Biocatalytic Fibers Scrub Carbon Dioxide

On today’s episode of “What If?” — what if the Apollo 13 astronauts had a 3D printer? Well, for one thing, they may have been able to avoid all the futzing with duct tape and procedure list covers to jury rig the lithium hydroxide filters, at least if they’d known about these 3D printed enzymatic CO2 filters. And time travel…they probably would have needed that too.

A bit of a stretch, yes, but environmental CO2 scrubbing is at least one use case for what [Jialong Shen] et al from the Textile Engineering Department at North Carolina State University have developed here. The star of the show isn’t so much the 3D printing — although squirting out a bio-compatible aerogel and cross-linking it with UV light on the fly is pretty cool. Rather, the key to developing a CO2-scrubbing textile is carbonic anhydrase, or CA, a ubiquitous enzyme that’s central to maintaining acid-base homeostasis. CA is a neat little enzyme that coordinates a zinc ion in its active site and efficiently catalyzes the addition of water to carbon dioxide to produce bicarbonate and hydrogen ions. A single CA molecule can catalyze the conversion of up to a million CO2 molecules per second, making it very attractive as a CO2 filter.

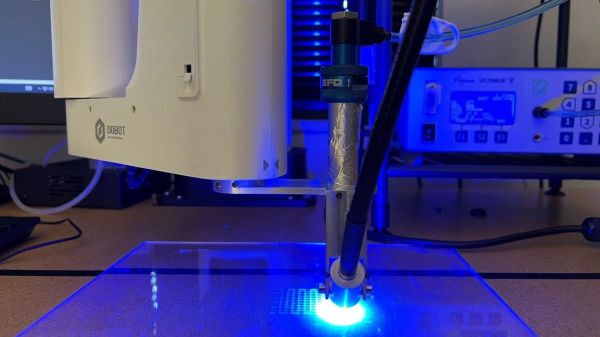
In the current work, an aerogel of poly(ethylene glycol) diacrylate/poly(ethylene oxide) (PEG-DA/EO) was used to entrap CA molecules, holding them in place in a polymer matrix to protect them from denaturation while still allowing access to gaseous CO2. The un-linked polymers were mixed with photoinitiators and a solution of carbonic anhydrase and extruded through a fine nozzle with a syringe pump. The resulting thread was blasted with 280–450 nm UV light, curing the thread instantly. The thread is either wound up as a mono-filament for later weaving or printed directly into a 2D grid.

The filament proved to be quite good at CO2 capture, managing to scavenge 24% of the gas from a mixture passed over it. What’s more, the entrapped enzyme appears to be quite stable, surviving washes with various solvents and physical disruptions like twisting and bending. It’s an exciting development in catalytic textiles, and besides its obvious environmental uses, something like this could make cheap, industrial-scale bioreactors easier to build and run.

Photo credits: [Sen Zhang] and [Jialong Shen], NC State; [Rachel Boyd], Spectrum News 1

[via Phys.org]

Modified Microwave Cures Resin Parts With Style

Once you make the leap to resin-based 3D printing, you’ll quickly find that putting parts out in the sun to cure isn’t always a viable solution. The best way to get consistent results is with a dedicated curing chamber that not only rotates the parts so they’re evenly exposed to the light, but allows you to dial in a specific curing time. A beeper that goes off when the part is done would be handy as well. Wait, this is starting to sound kind of familiar…

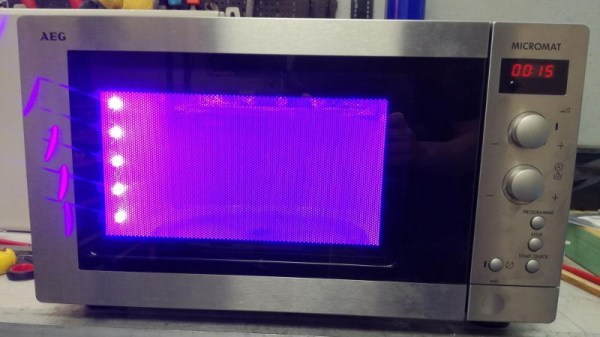
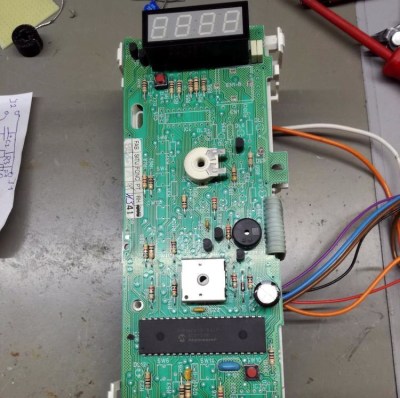
As you might expect, [Stynus] isn’t the first person to notice the similarities between an ideal UV curing machine and the lowly microwave oven. But his conversion is certainly one of the slickest we’ve ever seen. The final product doesn’t look like a hacked microwave so much as a purpose-built curing machine, thanks in large part to the fact that all of the original controls are still functional.

The big break there came when [Stynus] noticed that the control panel was powered by a one-time programmable PIC16C65B microcontroller. Swapping that out for the pin-compatible PIC16F877A opened up the possibility of writing custom firmware to interface with all the microwave’s original hardware, he just needed to reverse engineer how it was all wired up. It took some time to figure out how the limited pins on the microcontroller ran the LED display and read the buttons and switches at the same time, but we’d say the final result is more than worth the work.

With full control over the microwave’s hardware, all [Stynus] had to do was strip out all the scary high voltage bits (which were no longer functional to begin with) and install an array of UV LEDs. Now he can just toss a part on the plate, spin the dial to the desired curing time, and press a button. In the video below, you can see he’s even repurposed some of the buttons on the control panel to let him do things like set a new default “cook” time to EEPROM.

Compared to the more traditional fused deposition modeling (FDM) 3D printers, resin printing requires a lot of additional post-processing and equipment. You don’t necessarily have to gut your microwave just to cure your prints, but you’d be wise to fully consider your workflow will look like before pulling the trigger on that shiny new printer.

Continue reading “Modified Microwave Cures Resin Parts With Style”

A UV Curing Wand For Everyone

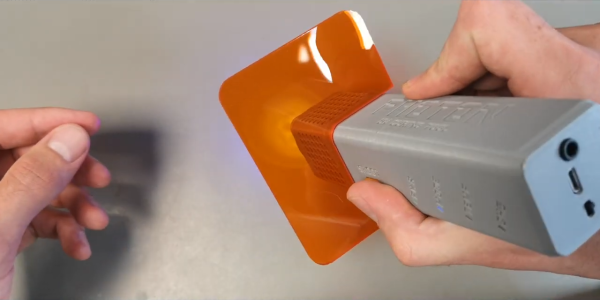
The average person’s experience with an ultraviolet (UV) wand is getting a cavity at the dentist. However, anyone with a resin-based 3d printer knows how important a UV curing system is. Often times some spots on a print need a little bit of extra UV to firm up. [Mile] has set out to create an open-source UV curing wand named Photon that is cost-effective and easy to build.

What’s interesting here is that there are dozens if not hundreds of UV curing systems ranging from $5 LED flashlights to larger industrial flood systems. [Mile] dives right in and shows the trade-offs that those cheaper modules are making as well as what the commercial systems are doing that he isn’t. [Mile’s] Photon wand tries to be energy efficient with more irradiated power while staying at a lower cost. This is done by carefully selecting the CSP LEDs instead of traditional wire-bonded and making sure the light source is properly focused and cooled. From the clean PCB and slick case, it is quite clear that [Mile] has gone the extra step to make this production-friendly. Since there are two industry-standard wavelengths that resins cure at (364nm and 405nm), the LED modules in Photon are user-replaceable.

What we love about this project is looking past what is readily available and diving deep. First understanding the drawbacks and limitations of what is there, then setting a goal and pushing through to something different. This isn’t the first UV curing tool we’ve seen recently, so it seems there is a clear need for something better that’s what is out there today.

Continue reading “A UV Curing Wand For Everyone”

Sunshine In A Bag

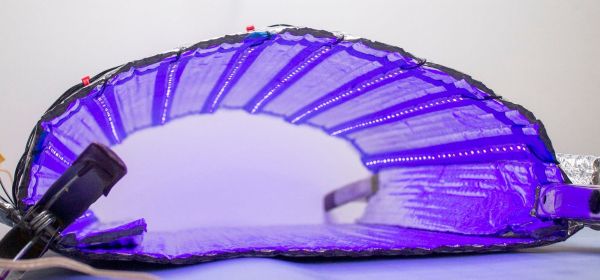
Ultraviolet (UV) curing lamps are crucial if you have a resin 3D printer or work with UV adhesives. Some folks line an old Amazon shipping box with foil and drop a spotlight somewhere inside. Other folks toss their work under the all-natural light source, Sol. Both options have portability and reliability problems, but [AudreyObscura] has it covered with a reflective mat lined with UV strip lights. This HackadayPrize2020 finalist exemplifies the ideal that good ideas are often simple, and this has a remarkably short bill of materials.

Foil bubble insulation is the medium because it provides structure and reflectivity, but it doesn’t cooperate with the LED strip’s adhesive. [AudreyObscura] demonstrates that masking tape as an interfacing layer makes everyone play nicely. A fine example of an experienced maker, their design covers bundling wires and insulating connections to keep everything tidy and isolated. With different arrangements, this can form a tunnel lit from above, a chimney lit from the walls, or you can drape it over some scaffolding.

If you need something a little less portable for your own shop you might consider a mirror-filled chamber. One nice touch to add is a turntable to help make sure the entire part is cured without any missing areas.

Continue reading “Sunshine In A Bag”

Art of 3D printer in the middle of printing a Hackaday Jolly Wrencher logo

3D Printering: Sticky Resin Prints And How To Fix Them

After going through all the trouble of printing a part in resin, discovering it feels sticky or tacky to the touch is pretty unwelcome. Giving the model some extra ultraviolet (UV) curing seems like it should fix the problem, but it probably does not. So, what can be done?

The best thing to do with a sticky print is to immediately re-wash it in clean isopropyl alcohol (IPA) before the UV present in ambient light cures stray resin. If the part remains sticky after it is dry, more aggressive steps can be taken.

We’ll get into those more extreme procedures shortly, but first let’s understand a bit more about how resin works, then look at how that applies to preventing and removing tacky surfaces on finished prints. Continue reading “3D Printering: Sticky Resin Prints And How To Fix Them”