You’ve got the RGB keyboard, maybe even the RGB mouse. But can you really call yourself master of the technicolor LED if you don’t have an RGB table to game on? We think you already know the answer. Luckily, as [ItKindaWorks] shows in his latest project, it’s easy to build your own. Assuming you’ve got a big enough laser cutter anyway…
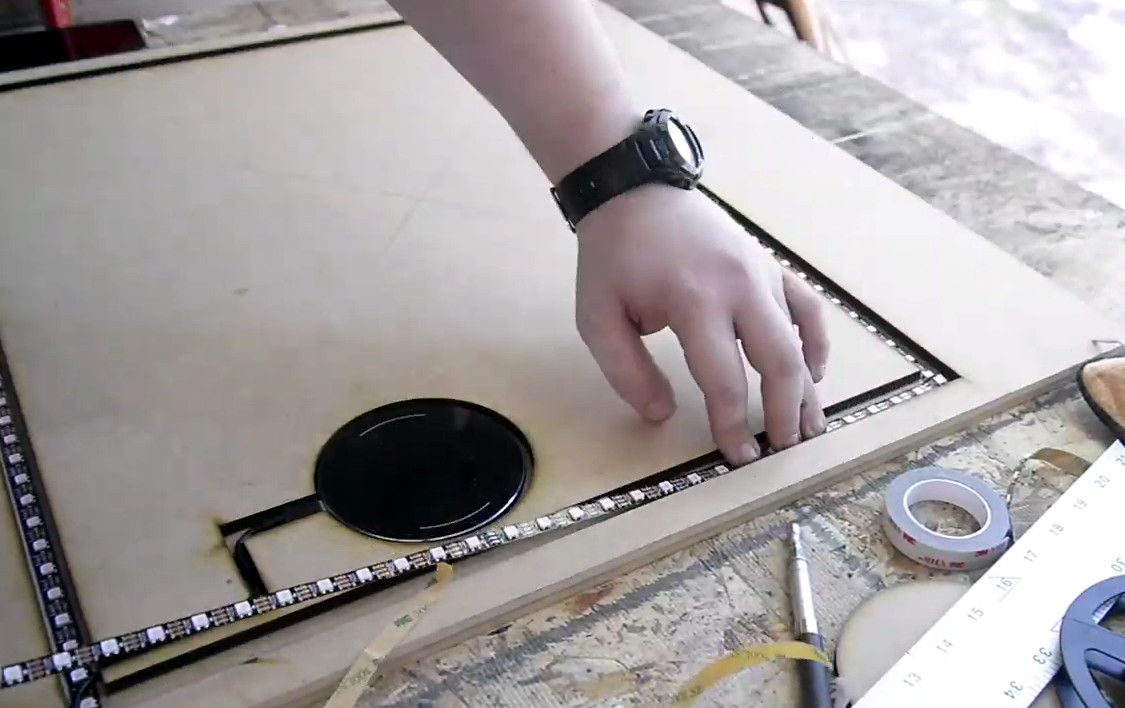 The construction of the table is quite straightforward. Using an 80 watt laser cutter, he puts a channel into a sheet of MDF to accept RGB LED strips, a pocket to hold a Qi wireless charger, and a hole to run all the wires out through. This is then backed with a second, solid, sheet of MDF.
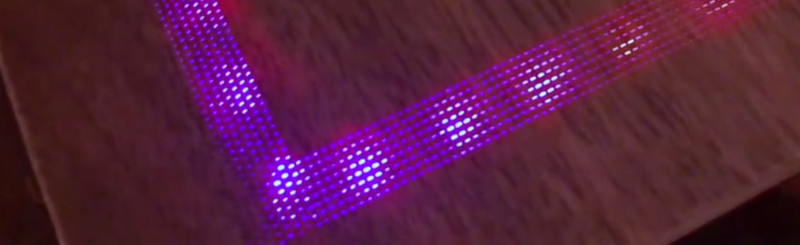
Next, a piece of thin wood veneer goes into the laser cutter. In the video after the break you can see its natural tendency to roll up gave [ItKindaWorks] a little bit of trouble, but when strategically weighted down, it eventually lays out flat. He then uses the laser to blast an array of tiny holes in the veneer, through which the light from the LEDs will shine when it’s been glued over the MDF. A few strips of plastic laid over the strips serve both to diffuse the light and support the top surface.
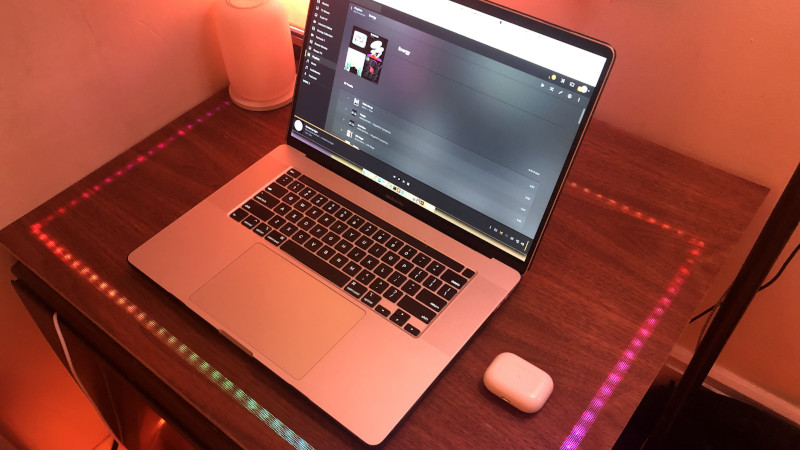
 The end result is truly gorgeous and has a very futuristic feel. Assuming you’ve got the equipment, it’s also a relatively simple concept to experiment with. It’s yet another example of the unique construction techniques possible when you add a high-powered laser to your arsenal.


It’s nice but how do we poor people without a laser cutter do it? Router and pins?
Drill and patience
You can make some mechanism to hold your driller and move it automatically (using i.e. motors from a broken printer). The driller itself also can be DIY.
Poor people shouldn’t waste their time making pointless fancy tables.
I was thinking maybe tack glue veneer to base. Drill all holes manually and into base. Remove veneer, chisel out channel with help of holes, install lights, put veneer back on.
As a veneer can be pretty transparent could get a similar effect without the pinholes or just fit a heap of fine pins into an offcut of cutting board and hammer away with it to mostly match that spotted look – less regular being hand done but conveniently quick.
Work from top down
– Find a thin enough veneer and stick it to the slotted out board
– then I’d suggest 2part expoxy fill the groove and rough sand it – to play diffuser and make that spot on the table under veneer as hard (probably harder) than the rest of the table
– then you mark out and attack the LED’s chargers etc to the base sheet and can even screw the two halves together for easy future separation should an LED burn out.
could probably benefit from putting the LEDs a bit further from the diffuser surface? Should help with diffusion even more. I think there was a good Hackaday article on LED diffusers?
Yup, move them a bit further down… bit further down…. bit further down…. bit further down… perfect.
“But they’re in the trash can now”
“Yes”
B^)
+1 XD
The offset nature of it gets my OCD flaring up. Why is it not equidistant from the edge?
I can step in on this one! The desk area was 27″x24″ and the laser only does up to 28″x20″. Given that limitation I went down to ~17″ so that it was more of a rectangle around my laptop and other main items on the table. Sorry it’s hitting your OCD haha
Well that makes sense. Could you not have turned it around and done it again half way through the paths?
I definitely could have but getting everything to line up just right would definitely be a pain in the @$$. The dimples are on a 1.5mm spacing I figured that it would take at least 5 or 6 tries to get that lined up well enough that no one would notice and thats more veneer than I’m willing to waste. Also there’s always the go-to excuse of “This is It Kinda Works” ;)
Personally I think its a sensible design element anyway – by the time you fill the back edge with some books, pencil pots, a mirror, sculptures (to suit your taste/tables purpose) the visible table area will feel centred anyway!
Making it for me an inspired bit of design – though RGB tables are stupid, its the right kind of fun stupid!
That’s awesome! Relatively simple construction with a really nice result. I’d never seen that mini-hole technique.
Lucifer: “Now then, people are getting way too comfortable with working from home now, it’s becoming low stress, there’s none of those random frustrations, no personality clashes, no jamming laser printers, no TPS reports, ideas?”
Belphegor: “How about lights, in the edge of their field of vision.”
Lucifer: “Hmmm, and this would stress them?”
Moloch: “Potentially… if we make them blink and flicker”
Beelzebub: “… and make them move”
Belphegor: “.. and make them change color so their visual phosphors don’t adapt.”
Lucifer: “Guys, guys, whoa, we’ve gotta hold something in reserve for when they get down here, damn, chill.”
The worst is if computer’s screen flickers itself. I got my new Dell laptop, but it occurs that it has very low backlight PWM frequency, only 200 Hz. It’s very bad, because they are the only one of larger producers of laptops which provide preinstalled Linux with warranty support. It’s possible to fix it by adding some capacitor in parallel with LEDs or increasing PWM frequency (it’s generated somewhere on the motherboard and transmitted through one wire of the cable going to the lid).
I know Lenovo do Ubuntu certified so perhaps they do a machine to suit? There are a few places that sell official Linux support on their machines now, not sure how many of them are re-sellers that just support somebodyelse’s hardware officially but have a look around the number is growing.
Purism, Dell and Lenovo are the ones that spring to mind.. But I know there’s more I just can’t remember now.
That said I know the pain of flickering backlights myself and laptops rarely seem to mention that in the spec sheet (where most Monitors will at least mention ‘flicker-free’ etc to fill out their spec sheet). So I’ll wish you luck in your search, its going to be rather frustrating I don’t doubt – perhaps contact Dell – they might do a ‘flicker free’ screen for that same model even.