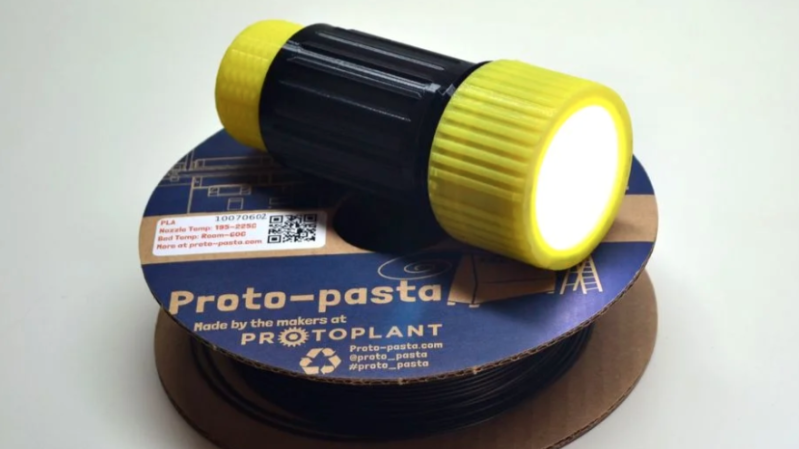
Conductive filament isn’t an ideal electrical conductor, but it’s a 3D-printable one and that’s what makes [Hercemer]’s 3D-printed flashlight using conductive filament work. Every part of the flashlight is printed except for the 9 volt battery and LEDs. Electrically speaking, the flashlight is a small number of LEDs connected in parallel to the terminals of the battery, and turning it on or off is done by twisting or loosening a cap to make or break the connection.
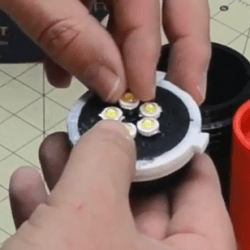
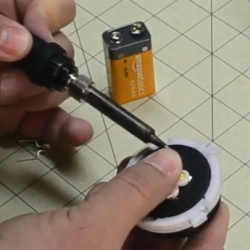
The main part of the build is a 3D-printed conductive cylinder surrounded by a printed conductive ring with an insulator between them. This disk- or pad-shaped assembly forms not only the electrical connection between the LEDs and battery terminals, but also physically holds the LEDs. To attach them, [Hercemer] simply melts them right in. He uses a soldering iron to heat up the leads, and presses them into the 3D-printed conductive block while hot. The 9 V battery’s terminals contact the bottom when the end cap is twisted, and when they touch the conductive assembly the flashlight turns on.
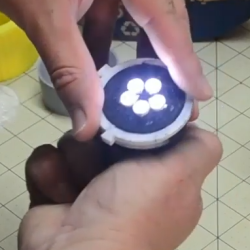
Anticipating everyone’s curiosity, [Hercemer] measured the resistance of his conductive block and measured roughly 350 ohms when printed at 90% infill; lower infills result in more resistance. You can see a video of the assembly and watch the flashlight in action in the video, embedded below.
Heat-setting of the LED leads is clever, and allows a variety of LEDs to be mounted as needed. It’s a lot like brass heat set inserts, which work well with 3D printed plastics and could themselves make a good electrical connection in a similar build.


Yes!
not even a single though about current limiting, and 9 volt batteries are the worst in terms of power density vs price … but at least there’s an expensive, time consuming 3D print that makes this project mimic a 1$ flashlight. Time well spent, you lit some LED’s clap clap
What’s up, having a bad day are we?
Criticism is fine, but perhaps you should try delivering your criticism in a constructive way that helps others learn rather than just dumping on their projects. Have you built anything recently or are you just spending your time trolling others?
You don’t get to “post it here”, you have to be worthy.
Yeah, I wouldn’t bother writing up your garage door. Projects that get covered typically require more than connecting a couple of wires to a consumer level kit and selecting a few options in a web menu. Maybe you can write an article about how you set up your home wifi or got the e icon to launch the internet.
Ingore the pushback, @Osgeld.
SOMBODY had to say it, and good snark has a value all its own.
You can make the same criticism without being a jerk about it. But from your endorsement I’d say you pride yourself with approaching situations as a jerk. Kudos /s
What is wrong with you people?
apparently they hate making stuff. why are they here?
Occasionally someone buys a little kit and a google search sends them into unknown territory. He probably won’t stick around.
Yes, my first thought. A 9 volt battery!! NO NO!! Well it’s cute, but fundamentally a waste of time and effort.
Well said Osgeld
Yep, Osgeld, GarberPark, and Severe Tire Damage are likely all the same person. Sad.
Last I checked most 9v have a pretty decent ESR already. Also, the barrel has an appreciable and tunable resistance. That’s likely more than enough if the LEDs are running low-current in series.
Did no one hug you as a child?
no, that is exactly why I am an electrical engineer
It looks like you meant to browse Buy-Things-A-Day. That, or you’re insulting people who actually did something while you yourself are incapable of doing anything at all.
The fact that he has to use a 9V battery tells me that the resistance of the conductive filament is very high. These days the usual white LED from China runs at around 3V, so 2/3 of the power from a very expensive battery is wasted.
Or it’s using undervolted green LEDs in series.
Those are 3W white leds.
Nice proof of concept!. Way to go in the direction of fully printable useful objects.
+1, exactly what I was going to point out.
Awesome stuff! This inspires me to try to see what I can do with an 18650! Thanks for the inspiration!
Best regards
I’d like to see some resistance numbers but this is definitely useful for some low current applications like switches, buttons, and some sensors.
It might have a niche.
Well the resistance numbers are right there and yeah, low power only lol.
In terms of demonstrating that conductive filament can do useful things, that’s pretty neat.
In terms of a practical torch with no added parts – I’ve seen a completely injection molded torch where the button simply pressed the LED’s leads against the coin cell battery, which I’d imagine was much more efficient, and could be replicated with a 3D printer.
Lots of stuff presented on Hackaday already exist but it shouldn’t stop someone having a go at doing different/quirky things like this because this is what makes looking at some of these projects interesting.
Yes a £1 torch exists and almost guaranteed to do a better job but same can be said of lots of projects which are done purely for FUN!
For example, why would someone create a clock where the time is drawn in sand and has to be flat on a surface. Like this project, compared to a clock it is very expensive, impractical and not very energy efficient but often referred to as being cool.
Like Dan said, it demonstrates the usefulness of conductive filament which may have been the intention.
It clearly isn’t the best way to illuminate LED’s and I highly doubt anyone including the author would argue but could potentially ignite someones creative centre so although I wont be attempting to duplicate it, it gets a thumbs up from me.
I am the original author of this project. Thanks for the really cool write up, and thanks for making me aware of this great site!
As many of you have already surmised, the intention of this project was not to make the best, brightest, cheapest or most efficient flashlight.
This was originally shared with a 3D printing community as a demonstration of the capabilities of conductive filament.
Conductive filament has been around for a while, but it’s not very conductive and there aren’t many examples of it being used successfully outside of making a stylus.
The conductive filament acts more like a resistor than wire, and the size and density of the print affect that resistance. This project was an attempt to achieve a specific resistance, and to find out what the limits are. The flashlight seemed like an easy starting point that would let me focus on the goal – essentially dialing in a specific resistance to light some LEDs.
There are some major limitations to using this filament but I also think there is some real potential in being able to print devices that are ready to go with no additional wiring.
Now that I understand the strengths and weaknesses of the filament I can take on more complex projects, learn more, and eventually I may even make something more useful. And if not, I’ve learned a lot, had some good conversations along the way, and maybe even inspired other people to create their own interesting projects.