3D Printing Your Own Triboelectric Generators

A triboelectric nanogenerator (TENG) certainly sounds like the sort of thing you’d need to graduate from Starfleet Engineering to put together, but it actually operates on the same principle that’s at work when you rub a balloon your head. Put simply, when friction is applied to the proper materials, charges can build up enough to produce a short burst of electrical energy. Do it enough, and you’re on the way to producing useful power.

In a recent paper, [Leo N.Y. Cao], [Erming Su], [Zijie Xu], and [Zhong Lin Wang] describe how a functional TENG can be produced on a standard desktop 3D printer. What’s even more impressive is that the method doesn’t appear to require anything terribly exotic — just some commercially available filaments and a bunch of PTFE beads.

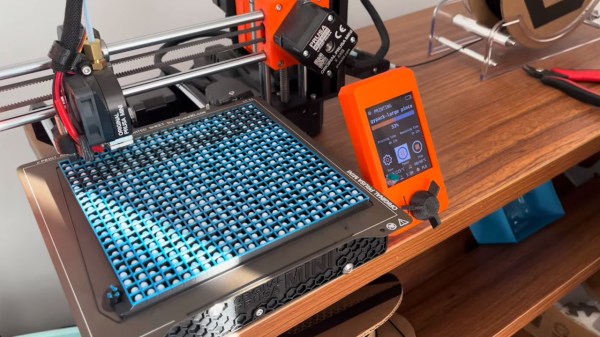
TENGs can be printed in any size or shape.

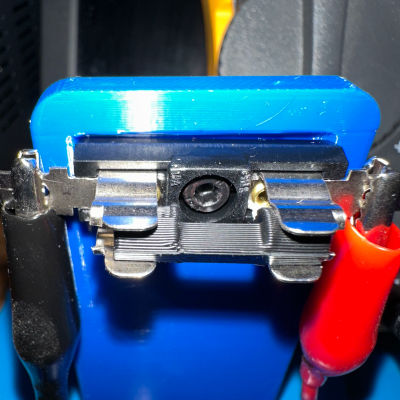
So how do your print your own TENG? First, you load up an electrically conductive PLA filament and lay down a base into which a series of channels has been designed. At around the half-way point, you pause the print to insert your PTFE beads, and then swap over to standard filament for a few layers to produce an insulator. Finally, you pause again and switch back over to the conductive filament for the rest of the print, encasing the beads inside the structure.

As [Leo N.Y. Cao] demonstrates in the video below, you then clip leads to the top and bottom of the print, and give it a good shake. If everything went right, LEDs wired up to your new high-tech maracas should flash as the PTFE beads move back and forth inside. But there’s a catch. Going back to the balloon-on-the-head example, the effect at play here produces high voltages but low current — the paper says a TENG containing 60 beads should be capable of producing pulses of up to 150 volts.

Naturally, you won’t get very far with just one of these. Like other energy harvesting concepts we’ve covered in the past, such as vibratory wind generators, it would take a bunch of these working together to generate a useful amount of power. But given how cheap and quickly these printable TENGs can be produced, that doesn’t seem like it would be too much of a challenge.

Continue reading “3D Printing Your Own Triboelectric Generators”

Secret Ingredient For 3D-Printed Circuit Traces: Electroplating

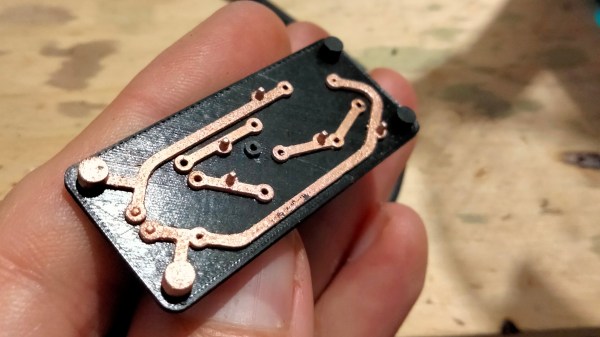
Conductive filament exists, but it takes more than that to 3D print something like a circuit board. The main issue is that traces made from conductive filament are basically resistors; they don’t act like wires. [hobochild]’s interesting way around this problem is to use electroplating to coat 3D-printed traces with metal, therefore creating a kind of 3D-printed circuit board. [hobochild] doesn’t yet have a lot of nitty-gritty detail to share, but his process seems fairly clear. (Update: good news! here’s the project page and GitHub repository with more detail.)

The usual problem with electroplating is that the object to be coated needs to be conductive. [hobochild] addresses this by using two different materials to create his test board. The base layer is printed in regular (non-conductive) plastic, and the board’s extra-thick traces are printed in conductive filament. Electroplating takes care of coating the conductive traces, resulting in a pretty good-looking 3D-printed circuit board whose conductors feature actual metal. [hobochild] used conductive filament from Proto-pasta and the board is a proof-of-concept flashing LED circuit. Soldering might be a challenge given the fact that the underlying material is still plastic, but the dual-material print is an interesting angle that even allows for plated vias and through-holes.

We have seen conductive filament used to successfully print workable electrical connections, but applications are limited due to the nature of the filament. Electroplating, a technology accessible to virtually every hacker’s workbench, continues to be applied to 3D printing in interesting ways and might be a way around these limitations.

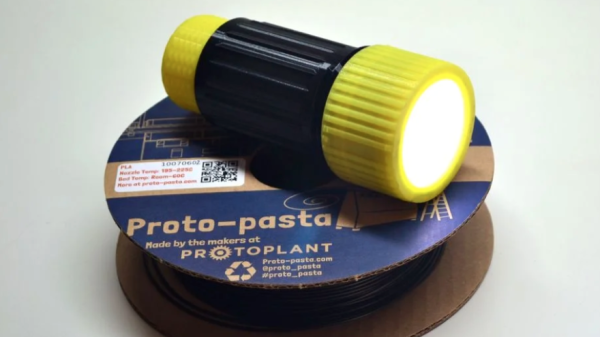
100% Printed Flashlight: Conductive Filament And Melted-in Leads

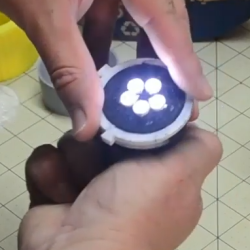
Conductive filament isn’t an ideal electrical conductor, but it’s a 3D-printable one and that’s what makes [Hercemer]’s 3D-printed flashlight using conductive filament work. Every part of the flashlight is printed except for the 9 volt battery and LEDs. Electrically speaking, the flashlight is a small number of LEDs connected in parallel to the terminals of the battery, and turning it on or off is done by twisting or loosening a cap to make or break the connection.

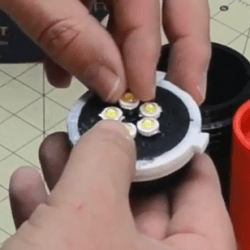
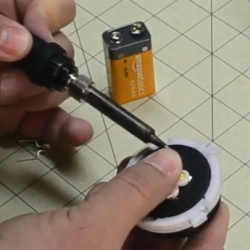
The main part of the build is a 3D-printed conductive cylinder surrounded by a printed conductive ring with an insulator between them. This disk- or pad-shaped assembly forms not only the electrical connection between the LEDs and battery terminals, but also physically holds the LEDs. To attach them, [Hercemer] simply melts them right in. He uses a soldering iron to heat up the leads, and presses them into the 3D-printed conductive block while hot. The 9 V battery’s terminals contact the bottom when the end cap is twisted, and when they touch the conductive assembly the flashlight turns on.

Anticipating everyone’s curiosity, [Hercemer] measured the resistance of his conductive block and measured roughly 350 ohms when printed at 90% infill; lower infills result in more resistance. You can see a video of the assembly and watch the flashlight in action in the video, embedded below.

Continue reading “100% Printed Flashlight: Conductive Filament And Melted-in Leads”

Busy Box Beats Baby’s Boredom

We would love to be a fly on the wall Christmas morning to see [Wilksyonreddit]’s kid tear the paper off of this adult-level busy box. Can you imagine the unbridled glee? It should certainly make the arduous six-month build worth the trouble. Here’s hoping the walls are sturdy, because we predict they will be bounced off of.

This gift that keeps on giving has an Arduino MEGA clone inside and a couple of shift registers to deal with all those buttons and switches. In addition to all the buttons, switches, and the number pad, there are two 3D-printed touch sensor pads that can detect little fingers up to four inches away. Although he’s already built a few games and activities for it, [Wilksy] posted this in r/duino looking for more ideas. There’s a lot to work with here on baby’s first nuclear missile launch console, both input- and output-wise. We humbly suggest 4D Simon, though we must admit to fantasizing about MIDI controllers.

Hidden inside this Christmas present is an Easter egg we think you’ll appreciate. Enter the right code, and the box becomes a treasure trove of Back to the Future sound effects and audio clips. Video’s after the break, McFly.

This box would make a great Kerbal Space Program controller, too, like this one.

Continue reading “Busy Box Beats Baby’s Boredom”

Printed Circuits In The Palm Of Your Hand

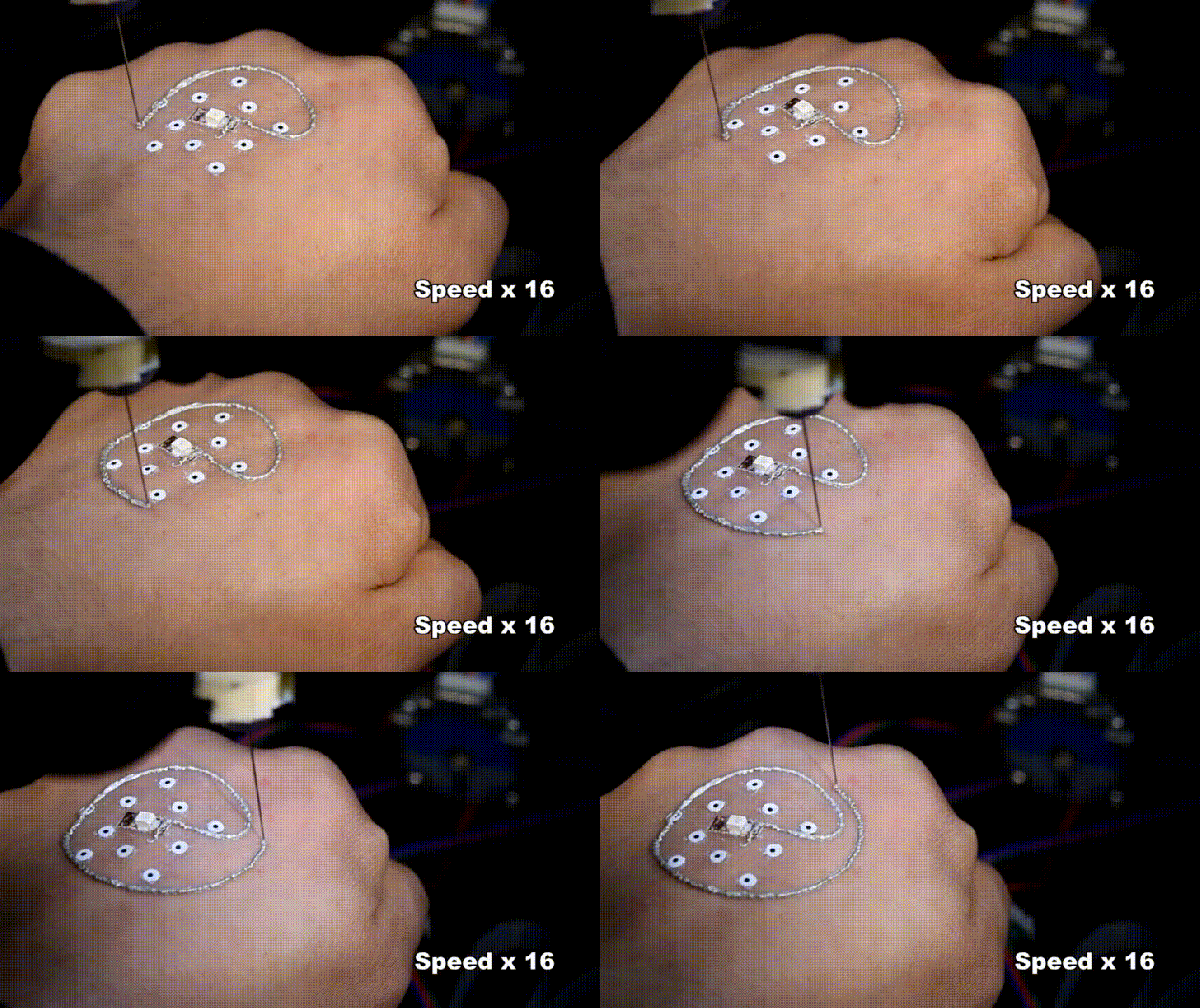
If you’ve ever wanted to more fully integrate yourself with technology, you might have to thank a team of researchers — led by [Michael McAlpine] — at the University of Minnesota in the near future. They’ve developed a technique that allows circuits to be printed directly onto your skin, with the team arguing — once the low-cost printer is modified for compact portability — it would be ideal for ‘on-the-fly’ circuit needs.

“But the hand isn’t exactly a stable print bed,” you say. We hear you, and the team is actually one step ahead — the printer can compensate for subtle movements during the printing process by tracking markers placed on the hand. The ‘filament’ is made from silver flakes — akin to conductive ink — which prints and cures at room temperatures, and can be either peeled or washed off. We should hope so, as it’s meant to be layered on human skin.

Speaking of which, it can also print cells!

It’s only been tested on a mouse so far, but the same technology that allows the printer to accurately track the hand means that it could use bio-ink to directly add cells to a wound or some other epidermal affliction to help speed the healing process.

For the circuits, though, you’ll still need the other circuit components and a compact means to power them — to say nothing about the fact that if the circuit is water-soluble, then a little perspiration would cause the ink to run. We’re excited to see where this tech goes!

[Thanks for the tip, Qes!]

Continue reading “Printed Circuits In The Palm Of Your Hand”

Simple 3D-Printed Circuitry

One of the problems encountered thus far with 3D-printing circuits with conductive filament is that it doesn’t really bond to anything, let alone solder, so how does one use it?

[mikey77] wrote an Instructable showing how to print circuit boards and create simple circuits, using shape of the plastic as a way to control the circuit. We like how he used using the flexible nature of the filament to make buttons, with two layers of conductive material coming together with the press of a finger.

He also created a linear potentiometer with a 3D-printed wiper that increases the ohms of the connection the farther it’s pushed. The filament doesn’t have the same conductivity as copper so [mikey] was able make resistors by stringing pieces of conductive plastic between two leads. There are also some hexagonal touch pads that turned out very nice.

We’ve published a lot of posts about DIY circuitry, including a previous effort of [mikey]’s, 3D-printed solderless circuits, plus another post about printing point-to-point circuits on a 3D printer.

Continue reading “Simple 3D-Printed Circuitry”