Teaching kids about robotics gives them valuable skills for their futures, and is generally pretty darn fun for all involved, too. However, teaching children often involves taking a bit of a different tack to educating college students, and more of a hand-holding approach is often needed. This robot project is an attempt to do just that, using some classic time-honored techniques and a unique method of propulsion.
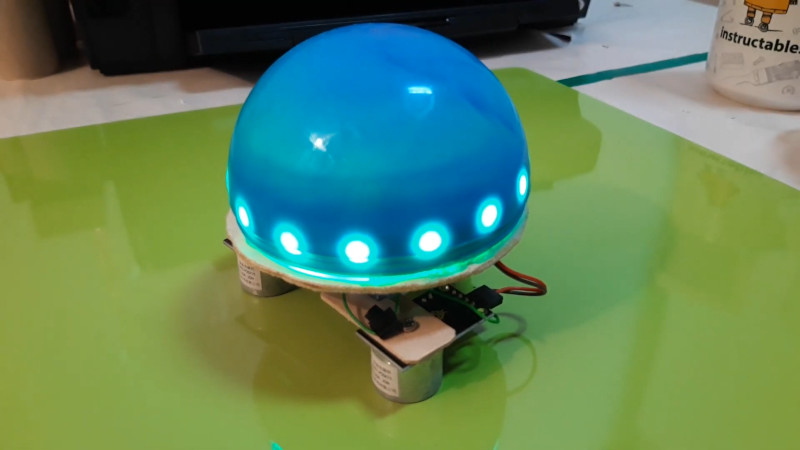
The Magnetic Motion Robot, or MMR, is very much a DIY project. Built out of hand-cut plywood and assembled by lacing together individual modules, it’s a low-cost entry into the world of educational robotics. Rather than wheels or motors, it instead uses electromagnets mounted on servo arms to get around. Switching the magnets on and off, and moving the servos in time, allows the robot to pull itself along a ferromagnetic surface.
The robot is outfitted with buzzers and LEDs, and using these features creates further programming challenges for students. Naturally, there’s also a line-following program, which is a great way to begin educating kids about autonomous robot operations. It’s all run from an Arduino Nano, programmed with Makeblock’s special building-block programming software.
While its DIY nature makes assembly a little more involved than the average off-the-shelf kit, it does present its own learning opportunities such as soldering and the integration of hardware. Educational robots will continue to be popular and fun long into the future; we’re a particular fan of sumobots ourselves. Video after the break.


I do like. Simple, cute, relatively easy build, and uses known open source programming tool Mblock. Scratch is super easy to start programming and have Python as well as Arduino C. Included some code. Awesome.
And now some gripe:
Electromagnets bit expensive. Cant find for less than 9$USD. Maybe an instructable on how to wind your own 5-12V electromagnet.?. Nah, thats impossibly complex.
Keyestudio KS0320 electromagnet module should be listed in parts along with:
LED strip isnt. Is ADAfruit Neopixel strip. KHZ-800. RGB WS2812.
Buzzer. Not going to go into the difference between a speaker and buzzer. Assumed its 16ohm diode/flyback protected mini Speaker. Often listed in kits as “passive buzzer”. Yes the “+” means something.
Where are the layout dimensions of the wood parts?
Im not partial to kids and Lipo packs. Short Protected LI-ion or NiMh. I did notice that a metal cased Nokia Lipo was used and that it was precariously looming over the the circuitry. Im sure theres double sided foamy tape to secure it from ‘ incident’.
Got more but should leave some pickings.