
When you make something, what does version one look like? What I mean is, how much thought do you put into the design? Do you try to make it look nice as you go along, or do you just build something that functions and say screw the presentation? Do you try to solve for everything upfront, or just plow through it and promise to fix your mistakes in version two? What if you never make version two?
No matter what you like to make, there’s a first time for everything. And it doesn’t seem to matter if you need the thing you’re making or just want to have it around: it’s a given that version one will probably be a bit rough around the edges. That’s just how it goes. Even if you’re well-versed in a skill, when you try a new type of project or a new pattern, it will be a new experience. For example, I’ve sewn a dozen different purses, but when I took on a new challenge I found I was only somewhat prepared to make my first backpack.
Great is the enemy of good, and perfection is the enemy of progress. Shooting for a pristine prototype on the first go steep and rocky path that never leads to finishing the build. So our goal here is to decide what makes rev1 good enough that we still love it, even if rev2 never happens.
Want vs. Need
Of course, the answers to all of the opening questions greatly depend on want versus need. When I’m making something for fun, I’m happiest while I’m still inside the project. I want it to be over so I can see the finished product, but I also don’t want the process of making it to end, because that’s the fun part. It’s like reading a really good book. With sewing projects, I’m always really excited to see how they come together. It seems like no matter how I manipulate fabric beforehand and try to visualize how something will turn out, the end result is always a little bit of a surprise.
If I need the thing I’m making, I’m more likely to work quickly and cut corners to get the thing into use. The trouble with that is if I don’t spend enough time in the design phase, I’ll probably end up annoyed at the very least, or back to square one without a viable solution. In either case, I’ll admit that I have a pretty serious case of perfectionism. It affects everything I do. I love and hate this part of myself in equal amounts, because I’ve made some things I feel fairly proud of. But I’m usually too hard on myself along the way. If I were any harder on myself, I would probably never start or finish anything. Try to reign that in by setting expectations in the design phase, with plenty of thought spent on how you’ll achieve each needed feature.
 Case in Point: The Practice Backpack
At the beginning of this year, I decided to make a backpack and document the process. I had made exactly one backpack before this one, but the designs differ enough that I decided to make a practice backpack first out of fabric I already have. This way, I can go through the pattern once and work out the kinks before buying fancy, expensive fabric — something I didn’t do with the first backpack and somewhat regret. In dressmaking, this is called making a muslin. It’s somewhat akin to a circuit made on stripboard: a functional prototype that’s more permanent than a breadboarded circuit. It may not be pretty, but it works. Ideally.
It’s not that I needed a backpack, I just wanted to practice bag-making, because I learn something from every new pattern I try. Even so, I knew I didn’t want to make any old thing. This is where my personal design conundrum begins. Yes, this is something I want to do rather than something I need to do. But I still have to consider how much time and money I’ll be investing in making the thing. I didn’t keep a clock running this time, but I would estimate that it took at least ten to fifteen solid hours of my free time. Shouldn’t I make it as pretty as possible?
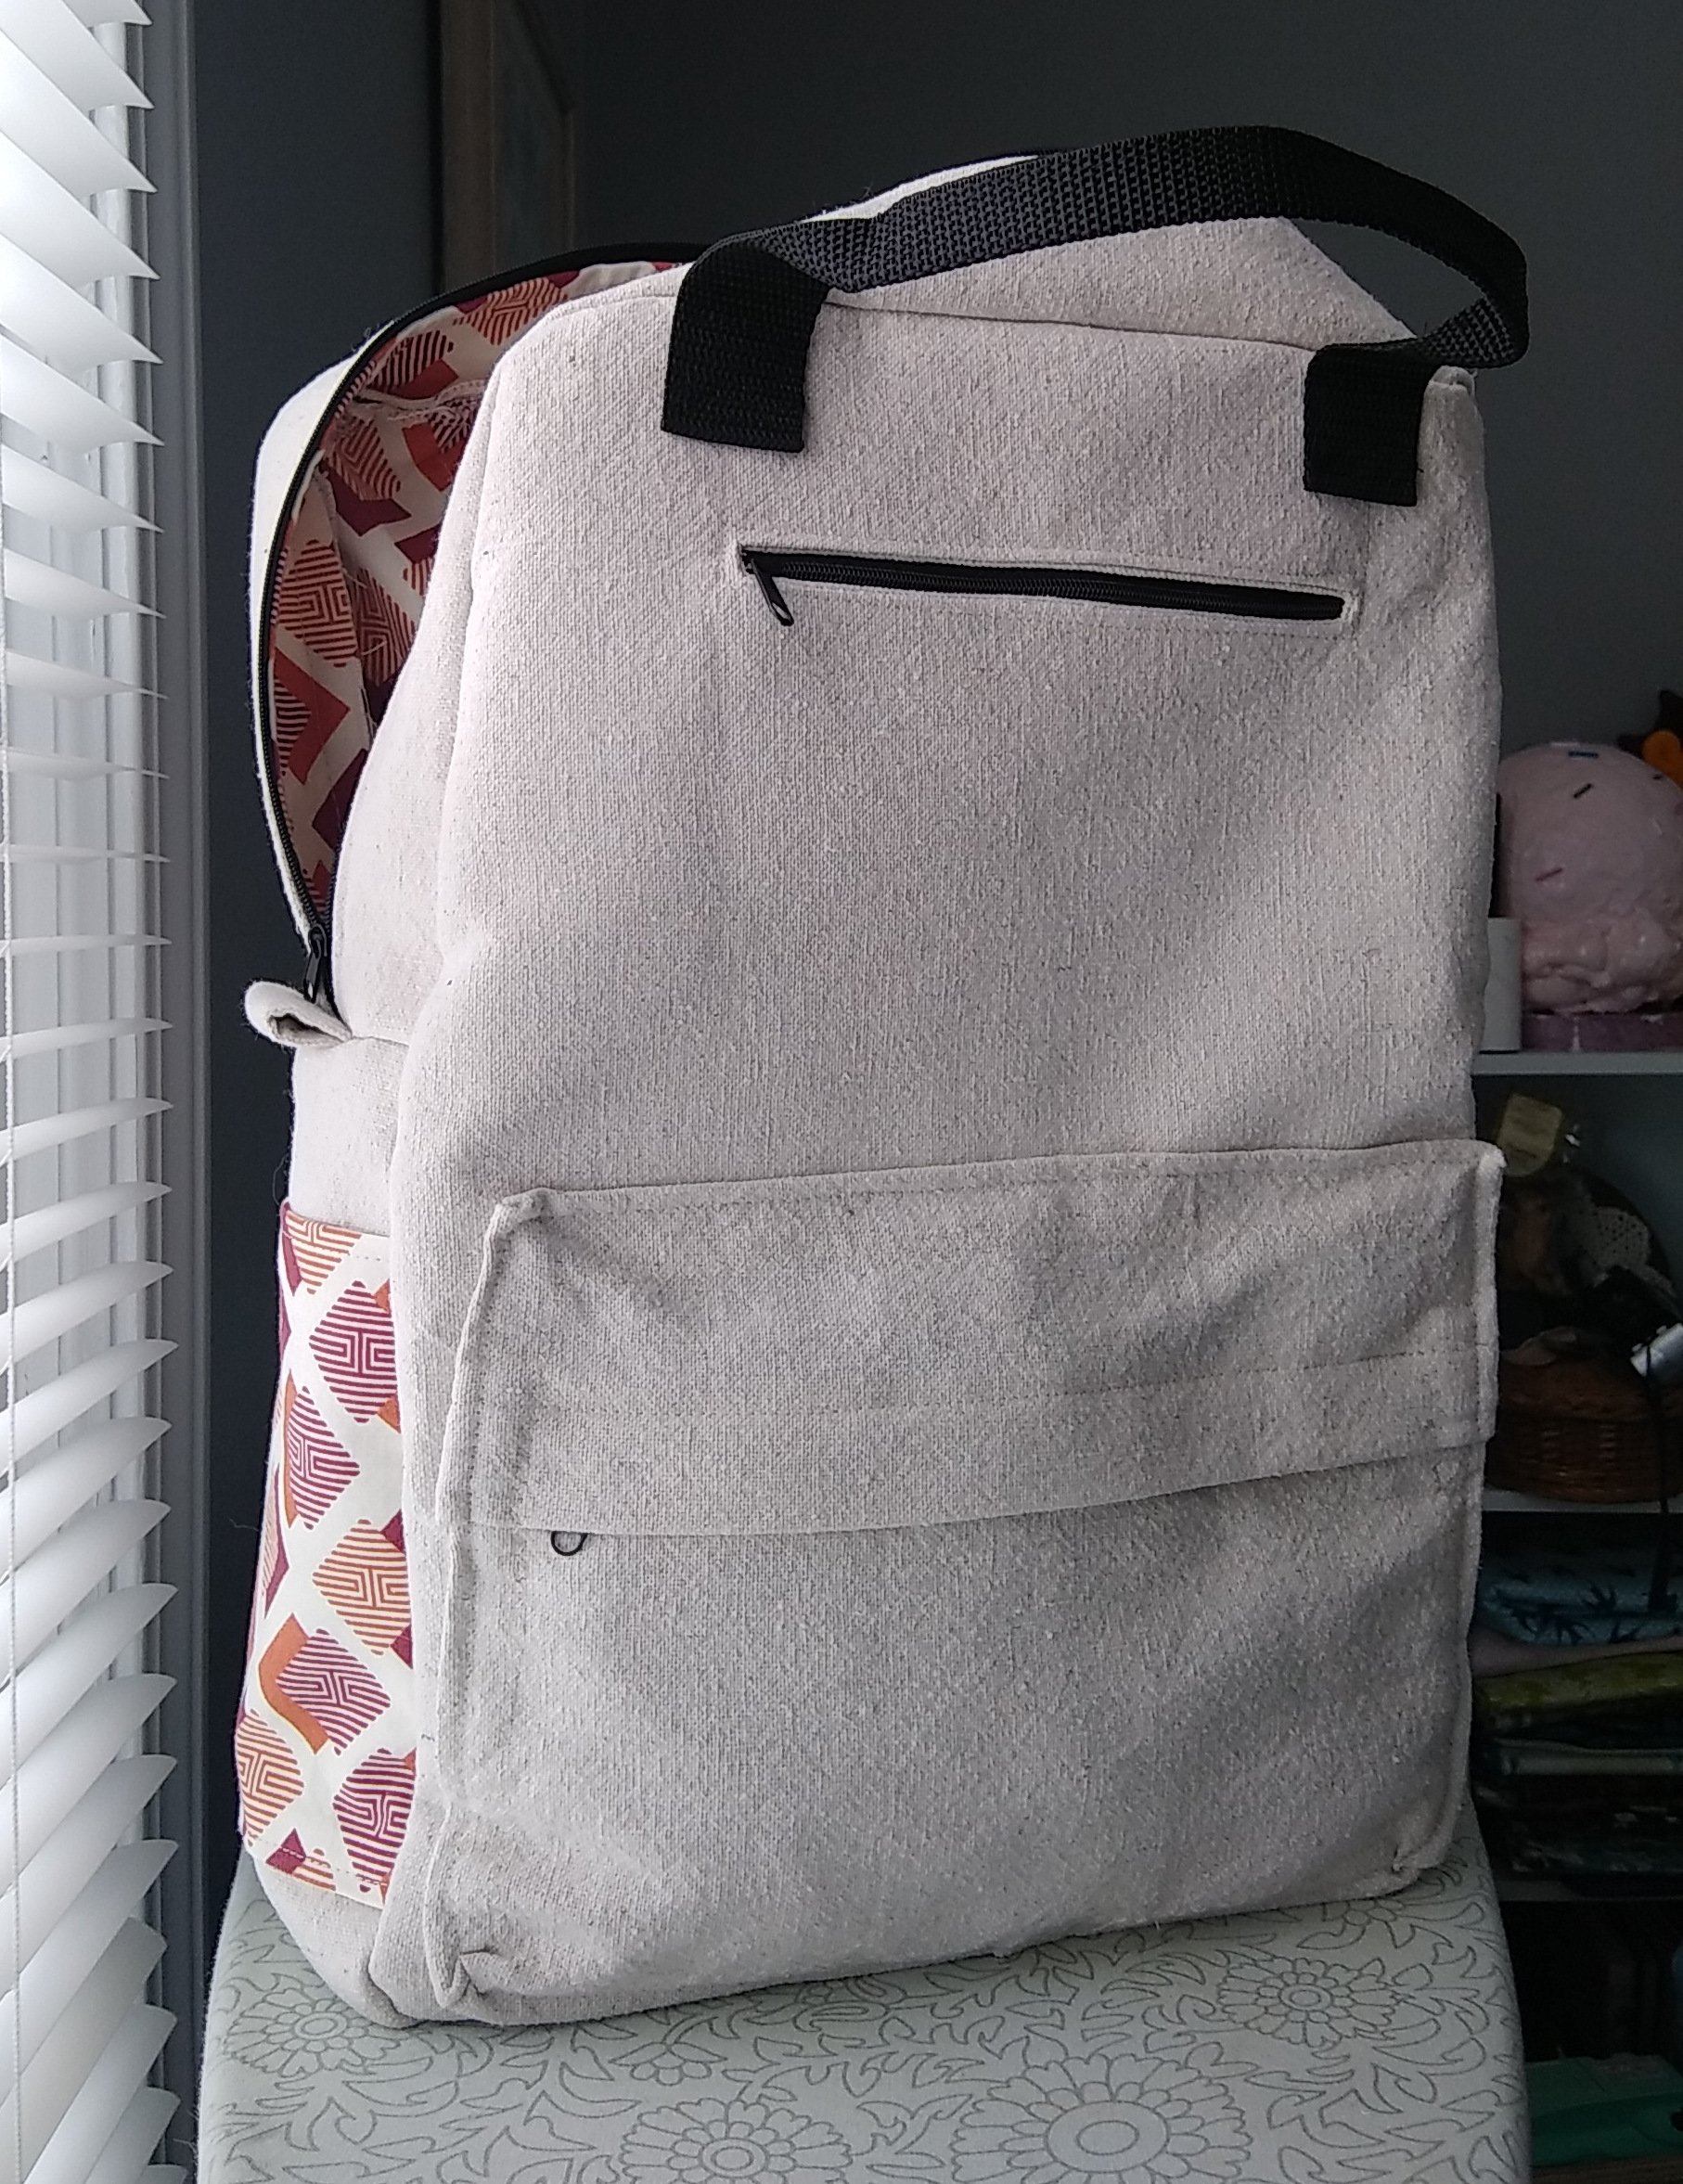
Another thing to consider is that the end product will be a backpack, a real, functional backpack. This is not a breadboarded version of a backpack full of safety pins and/or hot glue. I will be using real fabric, working zippers, and actual webbing for the handles and straps. It doesn’t have to be perfect, sure. But shouldn’t it lean toward making me proud rather than embarrassed? I say yes. Because I might want to use it, or even sell it to someone else if it turns out well enough. So this practice backpack required plenty of decisions up front, from the fabric to the zippers to the hardware.
Decisions, Decisions
First and foremost was choosing the fabrics. Fabric is expensive in general, so instead of buying new fabric, I took a long, hard look at my stash — my parts bin if you will. The more bag-making I do, the more that everything looks like usable fabric to me, especially big things like table cloths and decorative shower curtains. A few years ago, I bought an off-white canvas drop cloth to use as a photography backdrop. It has since been wadded up and forgotten, so I threw it in the wash, thrilled with the idea of sewing a bunch of bags with what feels like free fabric.

This project is a lined backpack, so it calls for an exterior fabric and an interior fabric. The first pastry-pocked backpack I made, the tiny purse-sized one, uses the same fabric inside and out — a thin quilting cotton like standard bed sheet material. In order to make it suitable for a bag, it all had to be interfaced.
Interfacing is a material that’s applied as a backing to any fabric that needs more body. I’m exaggerating a little, but you can make anything out of anything if you have the right interfacing. Think of it like a veneered cabinet door: the fabric you want to show is the veneer, and the interfacing is what lies underneath, giving it the strength and structure it needs to pass as a cabinet door. In the case of the doughnuts backpack, the exterior pieces have two types of interfacing — woven first, and then foam. The backpack is empty in the pictures above; it’s the foam interfacing that gives it all that shape.
For the lining, I turned back to the fabric stash. I have several yards of a geometric-patterned quilting cotton in a southwestern/earth-toned color palette that I think looks really good next to the drop cloth canvas. At some point early on in the project, I decided to use lining fabric for the exterior side pockets to add visual interest.
Generally speaking, the heavier a fabric is, the less interfacing you need to strengthen it. The drop cloth I used is made of a lightweight canvas, so it has enough body that I didn’t have to interface it all. (Avoiding the use of interfacing is my new favorite thing, because that stuff is stupidly expensive.) On the other hand, the lining material I used is like bed sheets — too floppy to use by itself without interfacing, even in the lining.
 Zippers vs. Zipper Tape
For both backpacks, the first step is making the zippered cargo pocket on the front, so I knew I had to make my zipper decisions early on.
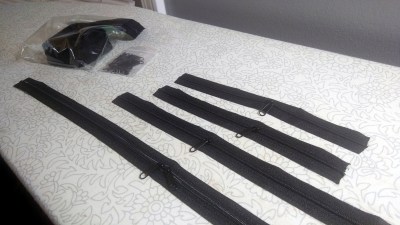
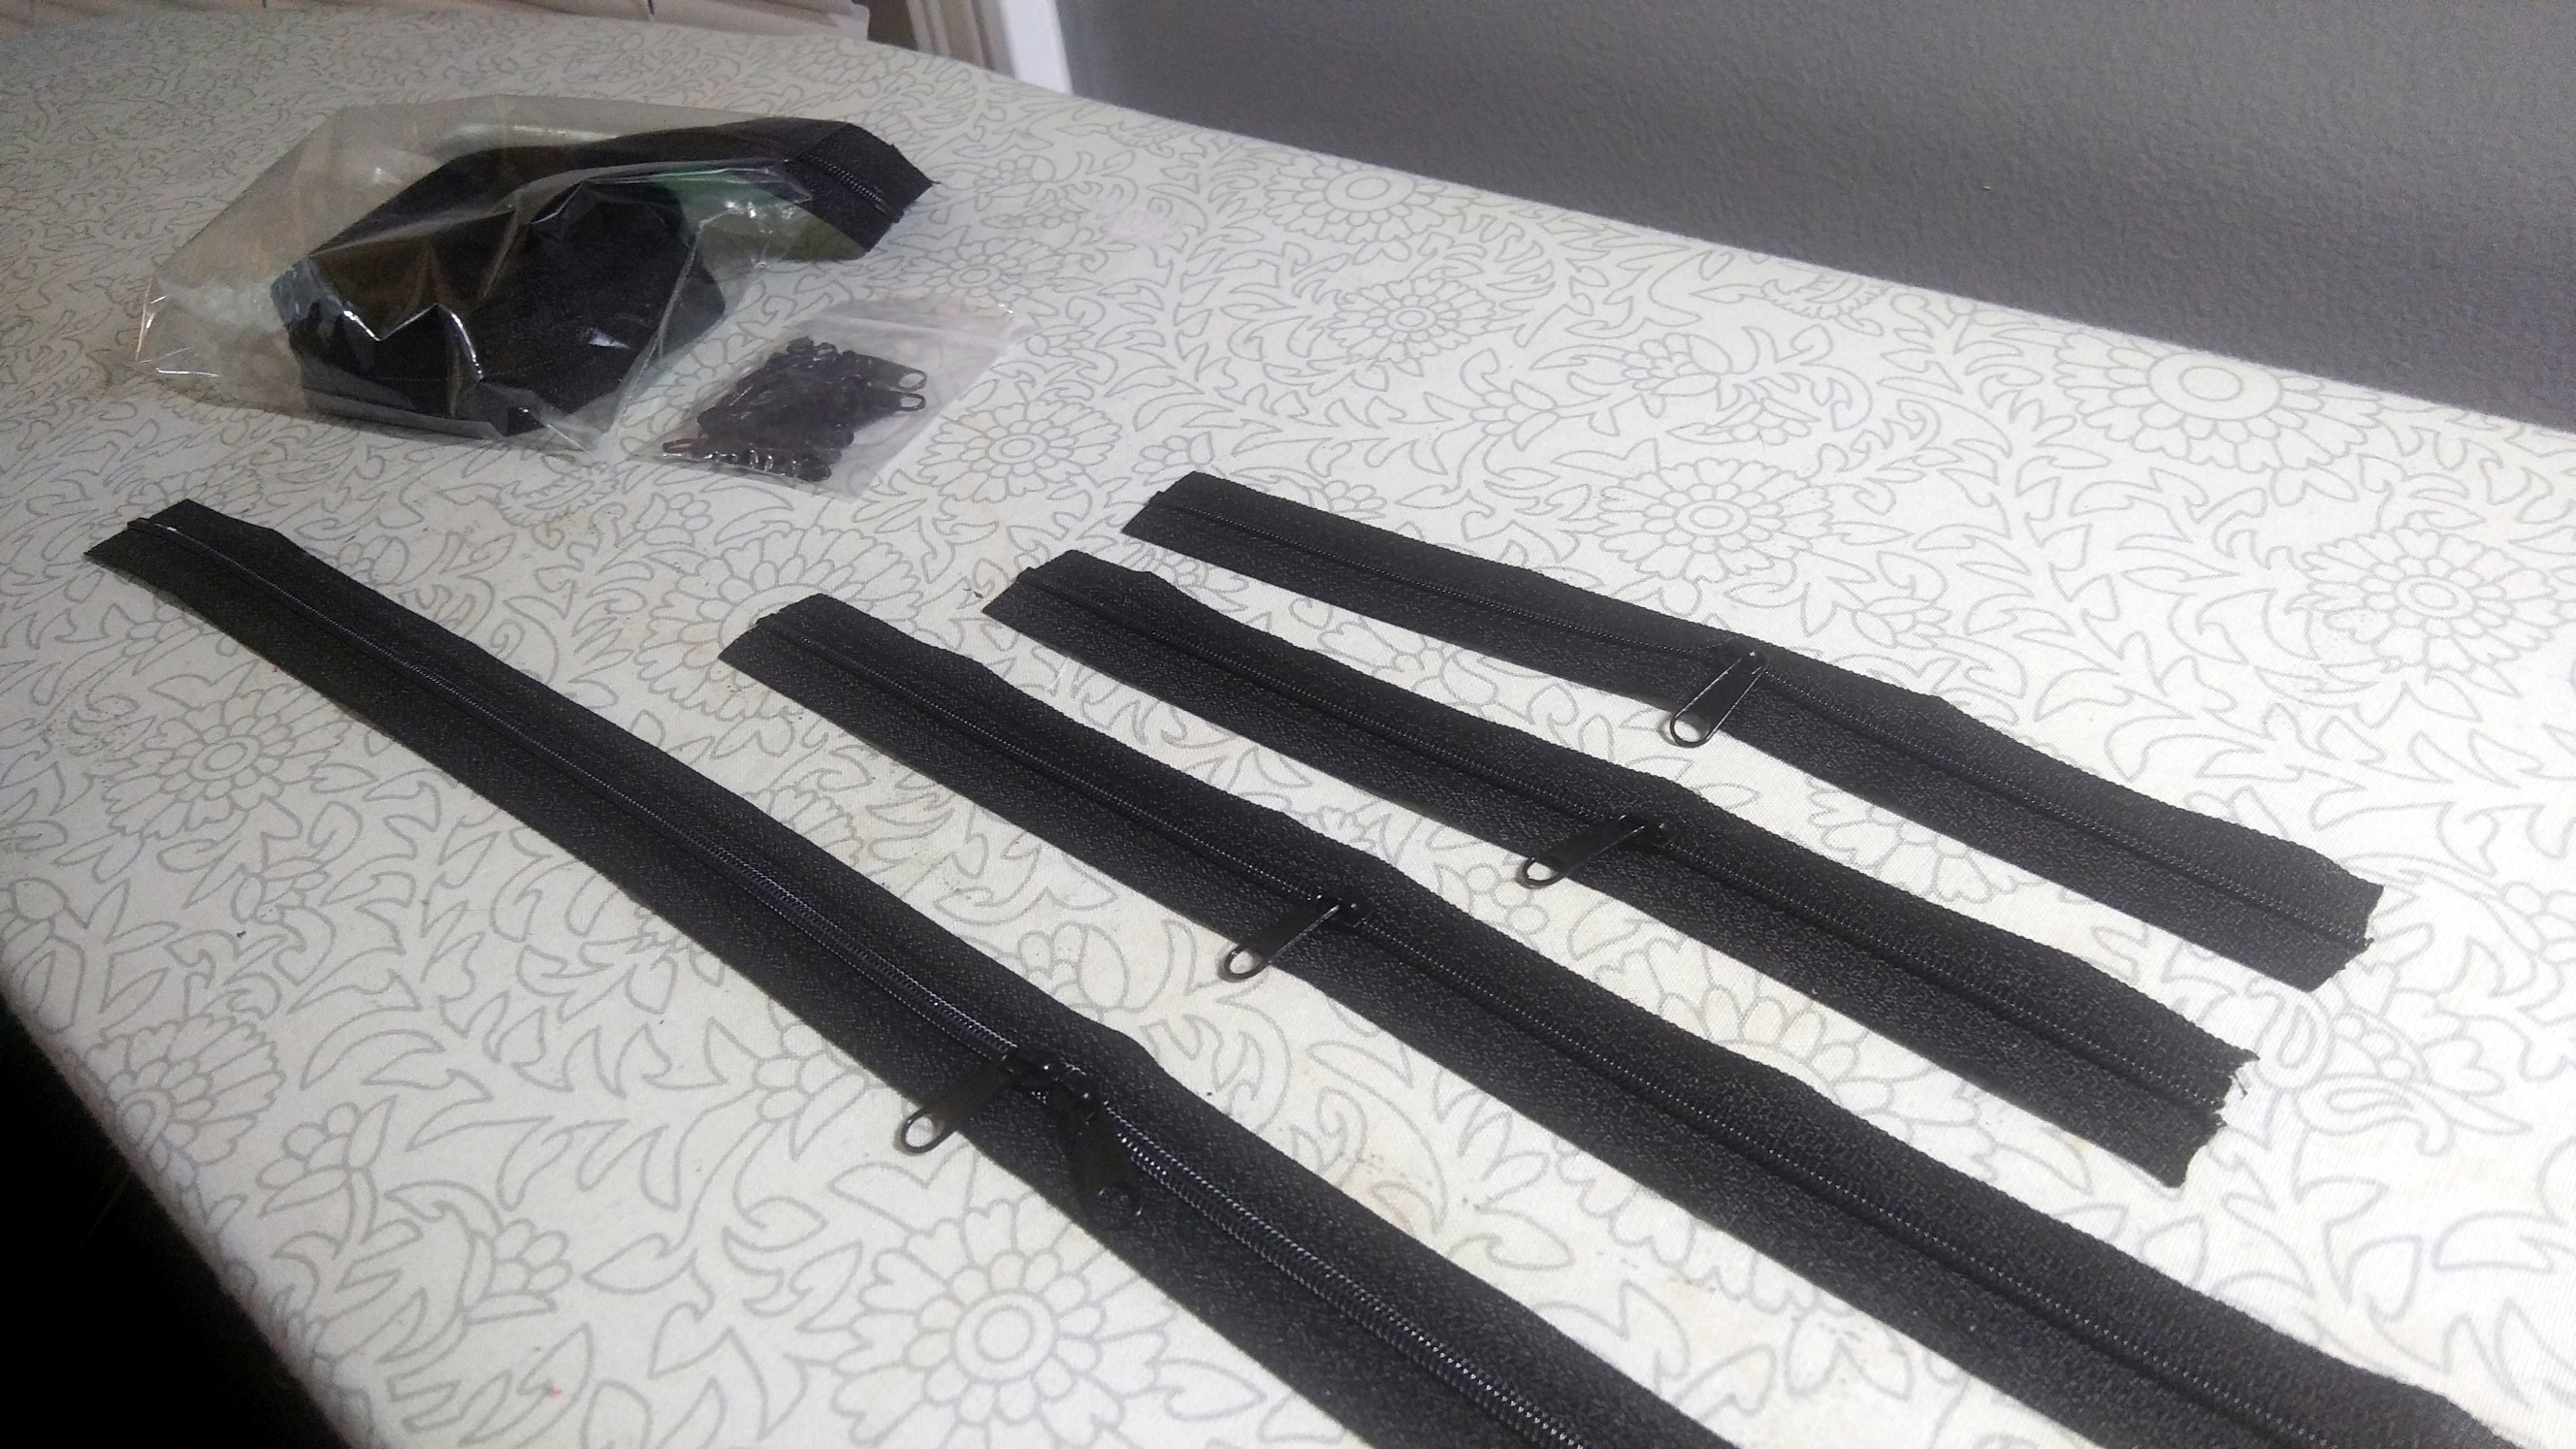
This backpack has four zippers total: one 24″ zipper with two kissing zipper pulls for the main opening, an 11″ zipper for the front patch pocket, and two 8″ zippers, one for the exterior pocket above the patch pocket, and one for the interior pocket.
Here’s the thing about zippers: buying single, pre-made zippers gets expensive fast. Although it’s certainly not easier to do it this way, it is much more economical to buy a few yards of zipper tape and some pulls and make them myself. Plus, now I have some extra black zipper tape and pulls in my stash for the next bag.
Webbing, Handles, and Hardware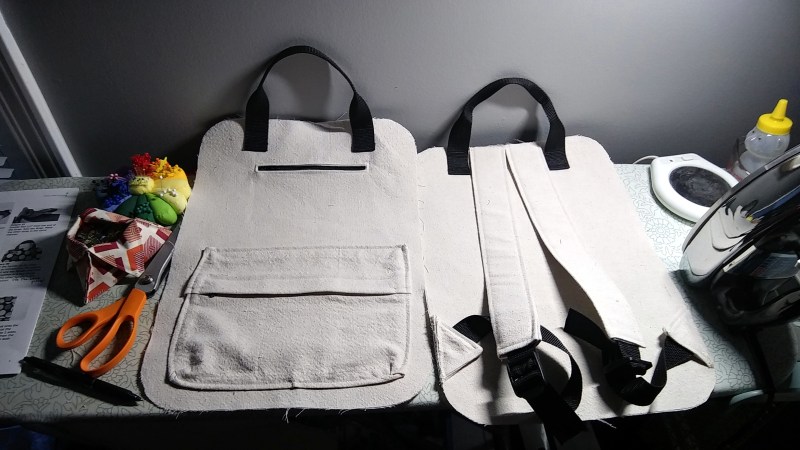

This pattern calls for ladder lock buckles, which are your standard backpack strap adjuster thingies. Standard as they may be, I didn’t have a single one on hand — only metal hardware. Much like the zippers, they are cheaper in bulk, so now I have 48 more ladder lock buckles to use in 24 more backpacks.
It’s the same with the polypropylene webbing that makes up the handles and the adjustable part of the straps. The backpack would probably look better if I found some in a fun color that matches the interior fabric, but this is version one. It’s cheaper and far more practical to buy several yards of black webbing, because black goes with almost everything. I did already have some webbing, but it’s the wrong size for the pattern. Now I have it in two sizes.
Enter the Project Conundrum
Bag-making is just like anything else — it takes materials, tools, time, and effort. I tell myself it’s cheaper in the long run to buy hardware and other things in bulk, because I’ll have them around to make more bags. I used to think that I wanted to make my own clothes, but bag-making is much more fun and practical, especially when it comes to selling them.
The problem is I now have a fully functional backpack that I merely like and don’t love because of my material decisions. I’ll be honest — I don’t know if I’ll ever make version two of this backpack. I probably will if I come across the right fabric because I don’t have any other square backpacks. I’m glad I put thought and effort into version one, but there are some things I would do differently, like adding foam padding for the laptop-sized pocket. Now that I know how it goes together, I would probably add more pockets, or maybe even hack the pattern and change the size.
So, if I had made those different decisions from the start, would I be strapping on my beloved backpack as my daily driver, or would I never have gotten the thing off the ground in the first place? That’s a tough line to walk.
And You?
So, how about you? How much effort do you put into version one of any given project? Does it really matter, as long as you finish it and move on? That question is probably worth a think piece of its own.


This is a good article and a good topic to raise for discussion.
Ultimately this is once again, all about trade-offs. But here are some thoughts.
I was doing some work yesterday on the lathe and mill. The tolerances were not critical and I could have cut corners, but I didn’t — because it forms sloppy habits. I aimed for careful precision because it forms the skills needed on other projects where it is critical.
On the flip side, I have lots of unfinished projects — and I argue against “polishing the apple”. There is a place for polish, but there is a lot to be said for getting something done in a reasonable amount of time. I write a lot of code and I always stive for neat coding style, even though I am the only one that sees most of my code. Again, it is all about habits. A lot of what we do is for ourselves — and why present yourself with sloppy work?
Another angle on version 1 and 2 is that a lot of times you simply don’t know enough to do version 1 “right”. You learn things from version 1 that teach you how to make version 2. This is true of almost every software project I work on, yet some people insist it is possible to write a requirements document that tells you everything you need to know to write version 1 and call it done. I have yet to see a project like that.
You can, but only for the smallest of projects. And when that’s the case, do you even bother writing anything down? The moment it gets to even a fractionally complex thing, there’s too many options and too many paths. And if there aren’t you’ve forgotten some stuff, for sure!
And here is another thought about sewing and fabric and materials.
First let’s talk about speaker building. At one point I did a fair bit of this and I used “cheap” drivers to build my first few speakers. Not trash cheap mind you, but I cut corners and avoided the top tier stuff. Then I proceeded to put days of work into design, cutting wood, assembly. My point is that when you are going to put all that work and energy into something, you should spend the extra money to work with the best parts you can afford.
Now I can be a cheapskate like the best of them and there is something to be admired about repurposing fabric. But again in sewing projects, the biggest investment is the time and work, so why not work with first class materials. Admittedly I don’t always do this by any means, but I see the sense in it. If you put a dollar value on your labor (which is a fiction for hobby activity admittedly) and compare it to material costs, the materials are a small fraction even if you use the best.
Sometimes you can get quality material pretty cheaply. I’ve started a new backpack from a thrifted shower curtain. It’s originally from The Company Store, so it likely cost around $80 new.
ON the other side – My daughter likes sewing for fun (and a little bit of profit) and uses mainly recycled products and turns sheets, curtains and anything she can get her hands on into shirts/dresses/bags etc. The main reason its cheap and creates an aesthetic she likes
I can largely agree with your point. But ultimately I think the important part is not what materials you are using but putting good quality parts where you really need them for the task at hand.
And those good quality parts can be repurposed bits from your junk bin, or cheap charity shop objects that happen to contain what you need – I often design around the junk I have left to get what I need done neatly – which is a cheapskate way of doing things perhaps, but very satisfying, uses up the junk that was too good to throw away. (I do of course also buy lots of new parts and stock material too – time and a place for everything, and if you don’t have a the right electronics in your junk bin to do the job at all effectively its time to source the right stuff.
But there’s also the tradeoff that you probably don’t know enough at your first attempt at something to justify “The best parts you can afford”
I’ve built lots of things where I’ve decided to splurge on the best parts, and ended up learning some stuff, and making a better “v2.0” using cheaper parts, and the knowledge I learned on the first attempt.
Really, I think for a project that’s something you’re not very experienced in, you want to aim for stuff that’s high enough quality that it won’t cause you major problems, and will still make a finished product that you’ll be happy using.
As an example, I’ve built some guitars. The first one I built, I spent quite a lot of money on really nice pickups and materials. It turned out nice, but I really don’t use it much, as it’s got some quirks that make it less good than the V2, which I built using really cheap wood, and cheap-ish components.
In hindsight, V1 should have used the parts/materials that I used on V2 (Decent quality, but inexpensive), and then spend the $$$ to build the second revision after the concept is proved, and you know where there’s most room for improvement.
If it turns out well enough that you never do a V2, then I guess that’s “mission accomplished”
“high enough quality that it won’t cause you major problems”
That’s my threshold. Don’t buy parts that will make you frustrated. +$5 for a real chip may be worth it vs hours of debugging a knockoff that reboots when power dips
All chips reboot when the power dips enough ;-)
Not all. Some chips self destruct in low power conditions.
All chips reboot on big enough power dips. :-)
This is just temporary, unless it works.
And if it works really well, my new way of doing things.
When I make custom electronic boards, I often go back and tweak the design after getting the PCB and deciding there’s a few shortcomings such as: forgot that damn 0.01uF capacitor, DC-DC converter board and other components too close, or just to add power LED.
Even if the project was originally intended to be one off for personal, I like to tweak and fix minor issues to make a more stable V2 in case I need to replace it or someone wants what I got.
I suggest, if you are doing this less than frequently, but more than once, writing a checklist for your next design. That will help ensure you don’t make the same mistakes again by simply overlooking them, allowing you to make completely new and more exciting mistakes in future.
Cannot be more right,
For few years I now use a curated checklist to apply before even exporting gerbers :
– polarity inversion
– mainstream connectors
– led signaling
– bottom test points (labeled)
– diode / transistor pinout check
– super labeled headers (especially debug)
– spare extension debug gpio
– ground stitching, teardrop, ground pane and return paths
– board edge clearance (especially capacitors)
– branding, product name, revision, date
– complete 3D modeling (every components and inside case)
– add your requirements
I find that it also helps to print a 1:1 copy of your PCB on paper. Ideally in colour so you can visualise tracks and components on both side of your PCB. This allows you to physically place components on the paper to double check footprints, physically put it inside its intended enclosure etc. It costs almost nothing and the iteration time is very fast. Much better than waiting two weeks for a PCB only to find out you made a boneheaded mistake and need to order that “version 2” IMMEDIATELY.
I make a good number of custom PCBs for random hobby projects. I silkscreen the revision on every board, and keep a list of changes needed for each revision. It makes it much easier to make sure I remember to fix the heckin’ connector footprint.
In most real-world (i.e. work) environments, their are MANY “version one’s” iterated either virtually or physically before the “real” version one in produced. The ability to make something “good enough” on the first pass requires LOTS of review cycles. Experience helps here, but also, more eyes and experiences than your own help, like in a team work environment with multiple departments, with reliance on various experts (e.g. this guy does RF, this guy does analog, this guy does micros, this guy does PCBs, etc.). Working in a good team environment, especially if you can “look over other’s shoulders” can prepare you for doing it with a smaller team or alone.
+1 on the version numbers! I also include a release date on the silscreen.
A lab notebook gets comments and a checklist from the “first build” of each board. Then I go through and clean up the checklist, marking off each change with a date.
Comments on the the revision number changes and dates go on page 1 of the schematics.
I picked up the lab notebook habit from work. I was testing a lot of other peoples work and I needed enough detail to be able to reproduce a problem before the owners would accept that something was wrong.
fix the heckin’ connector footprint
++1 Dang symbols never match connector footprints!
Version 1 (of code, an object, or a circuit), not too much unless it’s immediately intended for sale or to fill some sort of order. In which case I’m using the deliverables requirement as a hard floor. For fun I like to see where projects take me.
In example: I’m on version 4.2 (second revision of the fourth produced design) and finally have a function complete 25mm development board with integrated lithium battery circuit that can probably meet the requirements to be permanently encased and used in retail goods safely. I made about one re-design a year.
I developed a well rounded SMD/SMT workbench and set of tools, something I always wanted, over the past four and a half years and at this point the event I (recreationally) developed it for is long gone. But hey! Finally done!
Great questions. Should the first backpack have had nicer fabric? Sounds like yes. But is there a universally verifiable rule that could have predicted it from the start? Tougher.
Maybe the trick is being able to tell sketching from making. Poor students pay for expensive paints because cheap ones just won’t act the same. At some point this project moved from sketching a concept backpack to practicing bag-making, and that’s probably when it would’ve benefited from final-quality parts.
On the other hand I’ve seen projects become black holes of good material, so maybe it’s best just to remember Bob Ross, “if you learned something, you’re a winner.”
A big part of it for me is that I can’t wrap my head around a pattern all the way until I’ve worked through it once, so I’m hesitant to do it with good fabric the first time. In this case, good fabric either means a fun pattern on cotton that I’ll probably have to interface, or some nice sturdy canvas that’s going to cost more given the weight of the material, unless of course I find some at the thrift store. The donuts backpack was an expensive version one.
when i made a backpack for my kid i printed the ladder locks out of PLA :)
and i used that cheap quilters fabric because i had a load of it sitting around. i guess i’m not to the advanced part of that hobby where i would use interfacing. to give it a little shape and durability, in all the corner-seams i sewed in this coarse nylon webbing i found as street litter. i got more than a hundred yards of it, stretched halfway down the block!
and i used a skirt zipper because it was handy, and the zipper broke after a year and the kid professed he didn’t want a brightly colored backpack anymore so that was that. anyways, it was a preschool backpack for a preschool-sized kid, barely able to hold a folder without bending the corners. once he was big enough a bigger backpack was a no-brainer.
if the prototype uses consumables (as opposed to breadboard which is reusable), i always intend it to be used. how long it’s used for is the test! i just keep throwing prototypes at it until one day i realize the thing’s been in use for years.
but a lot of things that were experiments at the start turned out to just be maintenance once looked at with hindsight. for example, i seem to be on a lifelong journey of replacing zippers, and not because the prototype was no good but because zippers don’t last nearly as well as a square yard of ripstop nylon does. but the technique for replacing zippers and installing patches! i haven’t outgrown the surface-sewing approach i started with as a kid. if it’s not gonna fray, i don’t bother hiding the seam or hem in a repair (new construction is different though).
..waiting for TeX-4.0 and METAFONT-3.0…
I’ve never had any interest in sewing before, but now it sounds like making myself a custom bagpack is the best idea ever. Damned. As if I didn’t have enough projects already.
Very nice explanations for people who don’t sew!
Always wash new fabric to remove the sizing from the fabric (a couple drops of synthrapol works wonders) Otherwise some fabric may shrink after you sew your pattern and end up with weird bunchiness.
If you want the lining to be stiff for sewing but soft once it’s finished, use spray starch. It’s way cheaper than interfacing. (There’s also several types of interfacing: sew on, iron on, water soluble..)
It depends on a lot of things but generally I like to try to add something new to the old/known. That incremental way of working makes it easier to get a result that’s more complete with v1.
If I start something completely new, a new technique or technology, I set myself some milestones to pass along the way. Mistakes will be made but the journey is more important than the end result. Hence, many versions will ensue.
An example of incremental development was my thermometer, build using a pic microcontroller and 4x 7 segment led display. The first version was housed in a piece of wood, carved out by hand and a dremel. The PIC got warm enough to skew the temperature so hacked the sensor to be external. But the display was unreadable in sunlight.
v2. was 3D printed, I got into 3D printing so that was the new added tech. And I used an LDR as light sensor and measured the intensity using the ADC, varying the display brightness depending on light levels.
Next version I’ve machined using a cnc, added SMD components instead of through hole. Switched to a newer PIC with on board voltage reference and the opamp was replaced with the on board one. Reducing the necessary components by a lot and making it much easier to reproduce. Calibration was fully in firmware. Used resin to make a flush front.
Next version was even smaller, with a PCB made in China (made the PCBs myself until this point). Created a switch in firmware to switch from common cathode to common anode, depending on the display I got. More thorough averaging making the temperature display more stable.
Same goes for building loudspeakers. I knew next to nothing about it when I started. As I learned along the way I’ve make quite a few improvements. The first one I’ve made vineer on the bandsaw but it was too rough and getting the glossy finish was difficult. Next version was with plywood, much easier to build. Driver selection was improved, the stock crossover filter adjusted. Measuring mike to get the SPL graph and calibrate/measure where the problem areas are etc.
Same with a hardware synth chip VGM player using a PIC microcontroller to quickly test and develop firmware and get the best sound from the chips (a lot of digital noise and DAC noise etc). Every added chip (now 5) had it’s own quirks to be worked out. It can now play SCC, YM2413, YM3812, AY-3-8910 and will also do SID and YM2151 and throw in a DAC for PWM sample playback. I’m now eyeing an audio DSP to add reverb and do some mixing/panning. Probably going to add Amiga mod playback at some point. It can play stand alone or via USB. Making it a midi device is also possible.
All the above is build up out of skills I’ve gained from previous projects. I love the journey as much as finishing and using the end result, especially the loudspeakers which are used daily.
As long as the journey is the goal as much as the end result, you can’t go wrong being a maker :)
Great to see this article, I have had version after version of [insert brand name] backpacks over the 25 years I have been “adjacent” to our local university (as part-time student and now research support). Every one of them has had details I didn’t like, and the one that came closest to ideal internal arrangement was the most butt-ugly fabric color that wore through in mission-critical spots. (Versions aren’t always limited to things you make yourself, I guess, and even the pack with the MOLLE ladders all over has less than ideal internal arrangement for hauling 2 laptops and electronics. But I love the extra small pouches I was able to add…)
So last fall I bit the bullet and bought 600D-1000D Cordura in colors I liked, but have been afraid to use up “perfect” fabric in my first version. My epiphany, after reading this, is that I can give myself permission to build a prototype or a version 1 in some similar weight cheap canvas that I have. And someone else will be the recipient of the bag when I make v2.
I’ve felt this way up to buying to Cordura. I couldn’t quite commit myself to the task. I’ve also felt this way about tents and hiking gear in general. I’ve gotten so close to sewing my own tent, but buying the material was the project killer. I’m just too inexperienced to put so much money into material when I’ll probably just screw it all up. Maybe I need to build a prototype out of the cheapest stuff I can find.
I have so many version 1’s that never took off, that I could give you a tour of my shop focusing on version 1’s that went nowhere and you’d think my business was a failure.
My first point is version 1 is never complete or maybe not even functional. But it’s just a starting point that could evolve into a great design!
My second point is Engineers and Designers fall into a trap where they believe a product has to be perfect before it’s launched. This is absolutely not true! And even worse, if a project must be perfect before it’s launched then it will never be a sellable product!
I’m 61 and I’ve run into many very smart Engineers with pet projects that never got off the ground, and EVERY ONE OF THEM fell into this trap.
The flip side to that is that there are hundreds of IoT devices out there that are exposing millions of people to a really bad day, because someone took prototype code that “just worked” and stuffed it onto an RPi and sold it as a finished product. Whilst perfect is the enemy of good enough, please define what “good enough” is before mass production.
Every successful project reaches ‘good enough’ steps. In design we call these milestones, and some are releasable and sellable.
This is completely different from someone building and attempting to sell a unstable or even dangerous project. But this activity isn’t just caused by individuals. A lot of Chinese manufactures are shoving products into the US economy that are unsafe. But you can’t blame them. The Chinese manufacture and sell this c%#p only because we are willing to buy it.
“Perfect is the enemy of good enough” can lead to inferior products. I have tweaked the phrase to be “perfect is the enemy of excellent.” Perfection is hard (impossible?) to achieve, but if your product truly is excellent, then maybe it IS ready for release. As stated above, though, you do first have to put some time into defining goals.
I’ve been considering doing this for ages – there is no backpack that suits what I want. I’m no fabric artist though! Indeed, I’ve just finished a project for a new product that uses webbing strap and those sidebar buckle things, and that’s only my second project to ever use anything even related to fabric, beyond “I need to patch a tent”!
I love the work you’ve done and the clarity of your prose. Thanks.
I don’t know about the thinking process of others, but as for me, my “conception” of a project is never an instantaneous, fully-formed concept, but it’s very evolutionary. I starts often with a trigger event — I see a knew part, uC board, etc. and then my mind starts racing through my mental warehouse of items I have either literally “in stock” or in my mental pantry. I go through this expansive list (it gets bigger the older you get and I’m 69) of learned concepts, direct and indirect experiences, articles and images of all sorts. I just find it amazing that I ever complete anything, since the design process is so dynamic. I just went through the process now. It’s just scary sometimes.
Amazing, I do the same thing.
Me too! Plus, version 3 is where it’s at.
This is basically what I do, too. I found a fully functional record player on the street in the garbage last year or so, and I picked it up to play with. I had fun playing some records I picked up for a couple bucks second hand, and then it just sat unused. Fast forward to earlier this month and I thought, what could I do with that? What would be better than having a record player? Having a record player that can rip records without being connected to a computer? Having a record player that can play ripped records without a computer? Have a record player that can do both? So I decided on a project, then had to decide on how to go about it. I wanted it to be simple, resistant to failure, and not require vast amounts of power, so I decided on a arduino shield with a vs-1053b that can record to and playback from an SD card. Fast boot, no huge OS to deal with, and should be small enough to fit with little effort. Swap out the arduino for an esp32, and I have control from my phone. Once everything is buildable in my head, I start hacking and building; course correcting along the way.
I usually build only a version 1, but it really depends on how robust and useful the device is. My version 1 plant watering system had some failure points that are being removed incrementally, and it is waiting for version 3 at the moment. For me, aesthetics are usually an after thought, but sometimes I build projects around an aesthetic concept, such as my custom laptop/cyberdeck.
The downside is that sometimes I build something so completely in my head first that I lose motivation to actually build it physically. This is especially true with projects for fun that don’t require learning something new.
I am totally off the other end of the scale on this. When I come up with a project idea, I design the living hell out of it. Several versions of it, in fact, as I discover that there is something critically wrong with it. I even order parts. Different parts for the different versions, of course, which explains the number of brand-new never-used parts in my junk box. Boxes. And when I start to build it, I realize there are even more things wrong with it, and I will either restart from scratch, or just throw it together imperfectly, if it’s something I actually need. Because I am cursed with the Vision of What Will Go Wrong.
Fortunately this applies only to things I build for myself. When I’ve built things I was being paid for, I’ve come up with the imperfect prototype by the deadline, knowing it was imperfect. Knowing there WAS going to be a “version 2”. Which sometimes there was.
My point is, if you put off actually building a thing until it’s perfect on screen, you can miss the opportunity altogether. Yeah, most times there IS no version 2, but at least you have version 1 and the experience that building version 1 gave you.
I used to work for Tektronix. Great, great place. While I was there, they produced one of the most iconic pieces of test equipment ever, the 465 oscilloscope. But let me tell you, the 465 was an absolute DOG to calibrate. In the adjustments for step response, they had all kinds of ripple on the top of the waveform, an overshoot on the leading edge you couldn’t get rid of without destroying everything else, and more. You could spend half an hour on that, and still not be happy with it. I learned to be okay with what I could get out of it in 10-15 minutes, knowing it wasn’t going to get any better. And then a few years later they came out with the 465A, and this was a vast improvement, because they had redesigned the whole vertical amplifier, from scratch. And THEN a few years later, they came out with the 465B – which was still virtually indistinguishable from the original 465 from the outside – and the step response adjustment typically took about a minute, and was absolutely perfect, every time.
Did the original engineers fret over getting it right the first time? Probably, but they shipped it anyway, and even those quirky and imperfect instruments were the best you could get in their day. And they were far superior to the model they replaced, the 453A, which as you might guess, was itself far superior to the original 453.
So my advice to ME is, build it. You’ll know what you did wrong, and maybe you’ll get a chance to fix it. But build it.
Oh, and by the way, my Vision of What Will Go Wrong is far from perfect. So no matter how many times I redesign something before building it, version 1 is still going to be imperfect. So there’s that, as well.
How to be the slimmest person in the room: wear a backpack that makes everybody ELSE hungry.
LOL!
I like Zach Freedman’s advice on finishing projects: https://www.youtube.com/watch?v=L1j93RnIxEo
I tend towards scope creep in my rev1 designs. What if I need to hook up an extra sensor? What if I want to reuse this fairy light control board as a mechanical keyboard controller? Etc. I frequently start designing things as general purpose devices, with the fantasy that when I open source them lots of other people will find them useful. I’ve been combating this recently by considering the enjoyment I get out of working on the project as the end goal of the project.
For example, I’m working on a hanging pen plotter. I’m doing a few things that are slightly novel, but for the most part, I’m just designing it from scratch because I want to learn mechanical design, and I was excited about it. Whenever I consider adding a new feature or improving something, rather than asking myself whether it’ll be generally useful, I ask whether I’ll enjoy doing the work.
I do think the drive to share what I’m working on and make it useful to other people is good. But, without careful planning and research on what other people’s needs are, it’s easy to build to a non-existent use case. I’ve been trying to channel this drive into making the thing that I need right now, and documenting it well. This benefits me, too – how many times have I came back to an old project and had no idea what I was thinking when I designed something, or forgotten how to build it?
For code, version 1 is where you learn what kind of program you were trying to write. For projects, version 1 is where you learn what you were trying to make.
A project isn’t ‘an idea’. It’s a hundred ideas that all work together. Most of therm depend on some of the others, and all of them have to serve the way you use the final product.
If you know all of that before you start, you’re building something that’s already been made and refined multiple times. If you’re doing something new, version 1’s job is to help you find the things you don’t know yet. In most cases, it’s impossible to discover those unknowns until you have enough structure to see what’s missing or causing problems.
Version 2, as Fred Brooks said in “The Mythical Man-Month”, is the most dangerous project you’ll ever make. You have a pile of half-ideas about problems, modifications, and improvements, and you want to try them all. If version 1 mostly worked, you also have a lot of confidence. Together, those can lead you to sink a huge amount of enthusiasm and resources in a hairball that can’t possibly work. Worse yet, you get so attached to the pieces that you can’t bear to chop any out to make things work.
The process that works is to deal with one problem or idea at a time. Ideally version 2 will solve all the problems in version 1 without adding any new ideas or creating any new problems. Then version 3 will add some new ideas and find out what breaks. Version 4 will fix those problems, version 5 will add some more new ideas, and so on.
If you try to merge the ‘fix the problems’ even versions with the following ‘add something new’ version, you’ll probably end up with the Microsoft software development cycle: each new release adds as many new bugs as it fixes. That makes it easy to keep postponing the problems that are hardest to solve.
This really irks me when it comes to software. Something works exactly as it should but people will drop it like a hot rock because it doesn’t get updates. You see this with phone apps now all the time – no fixes, just a version change to “stay relevant”
The ONLY time I feel that way with software is early access games. Otherwise, I prefer things that don’t need to be manually updated constantly (looking at you Filezilla!) or that require internet access to function (everything by Adobe).
It does give more of a sense of confidence that if there are security issues they get fixed, or that they’re at least keeping an eye out for any biggies if they’re still engaged. Something not updated for 5 years feels like “run at risk of becoming part of a botnet” abandonware.
Like my Galaxy S5
Agree with Erik. I have software I wrote fifteen years ago that I still use, and if I wanted to, I could use the version of Orcad I downloaded over twenty years ago. But anything that ever touches the Internet has to be treated like a living thing. Even if all it uses the Internet for is to update itself!
The Tamagotchi Principle. Feed it or it dies
Versions 1? Version 2?
I’m not sure my own project experience is very applicable to sewing projects. Ripping up seams and re-sewing over and over would probably take a toll on the fabric and I haven’t seen anyone un-cut a piece of cloth yet.
Most of my projects don’t have well defined versions. “Version 1”, if there is such a thing is just that point at which it becomes functional enough that I start using it. At that point some things are probably hacked together, hanging off by jumper wires or tape! Remember the law of the kludge, permanent is 6 months, temporary is 12 years.
But I keep making incremental changes so there’s no real obvious point where it becomes version 2. There might be a second device but it’s not a “Version 2”, it’s a throwback. After doing the same thing long enough it’s eventually like grandfather’s axe and I can re-assemble some prior iteration with the discarded pieces.
Sometimes I just need to get version 0.1 out of my head and into the world as fast as humanly possible. Rush everything, cut every single corner and check nothing. I’m almost always rewarded with something hideous and (if I’m lucky) half as functional as I initially envisioned. But for some reason that let’s me clear my head and do the real one the right way, methodical and exact. The next one is better. Never perfect, but almost always acceptable.
Finding out where the alligators live on rev 0.1.
When something is far outside my experience, just build one and see how it goes together and find out what you don’t know. I have a number of these floating around in my shop.
I recall a quote from a successful software entrepreneur which went something like “If you’re not embarrassed by your first public version, you waited too long to release.”
Many of my hardware projects are one-off and I’m the only customer, so I often just use prototype measures – perfboard, point-to-point, shameless reuse of salvaged subassemblies and components. But I don’t like to scrimp on usability or functionality, and I like to have the project nicely cased, and I put in a bit of effort on good physical design. Many such projects have continued to earn their keep for a decade or two, which is more than I can say for some of our store-bought appliances (80% of which i’ve had to fix).
I do enjoy the whole project process, and sometimes the journey is as at least as interesting as the destination, so I’m often working slowly and revising as I move forward, and this has often produced finished results that are both functional and pleasing from an aesthetic and design perspective. And there are some projects which I have come back to and rebuilt (v2.0), even as long as 10 years after v1.0. And of course, old projects are sometimes cannibalized for newer projects.(anyone here seen the movie “Seconds”?)
Great description of chalanges to expet. My question is is there a forum here to submitt ideas to knowing I am not able to buil it and hope one of you Hackers would do it? I have ideas for electronic and purely mechanical pin ball accelerators. Any takers? Thanks, Jim in Western Kansas
Personally, It soley depends on how well version one worked, if at all. If it functions without any major issues then I don’t continue improving it. I don’t tend to consider version one done until it does what it’s supposed to do. Till then it’s 0.x. On occasions where I intend to make more than one, then I will usually make better versions as I go, and if the later versions are sufficiently better I’ll replace the older ones as time permits.
Bottom line for me is there are no version 2s unless there needs to be.
Stopping when something functions is stopping short unless you are only building one for yourself and you are happy with the results. If you design something to sell or even to share there is so much more to do.
The most obvious is to reduce cost without reducing quality. For example, the PWM controller board I designed for our stir plate started out as a through hole board. It did not take long for the board to evolve to a mostly surface mount design. The surface mount board function exactly the same as the through hole version but moving to surface mount allowed us to produce more boards faster and the change greatly reduced our field failure rate.
Then there is ongoing quality improvement which leads directly to more cost savings. I needed a PWM controller for our boil, BIAB and HERMS controllers. We started building these products with potentiometer controlled SSVR’s but it did not take long to figure out that SSVR’s had an unreasonably high failure rate in the field. They just run too hot. So a redesigned of these three controllers from SSVRs to PWM controlled SSRs led me to make another change to our stir plate PWM controller. Instead of coming up with a second PWM controller I modified the stir plate controller so that it could control either product with just a part change. Then there were the temperature sensors, another part that worked well enough. But as other failures fell away sensor failures moved to the number one spot. Our issue with the sensors was centered around using thermocouples. The thermocouples themselves weren’t the issue. The connections, because of the way they were made at the controller end of the sensor cable were a problem. So I changed the design to use three wire PT-100 sensors that could be reliably soldered at both ends. And then we went further with a sensor cable design that can be unplugged from either end.
All of these changes were not necessary in your world but the result of all of these and additional changes I didn’t document here is line of products that rarely fails in the field today.
Yeah that’s the difference, I almost never sell/give to other people. All the stuff I build or create generally stays in house. I also tend to over engineer things, so my design phase is generally longer than the build phase, but the upside is I tend to work out 99% of the issues before I start physically building.
There is nothing be more permanent then temporary solution.
I’ve got so many projects stuck in version 0.00 or version 0.01 because I’m too much of a perfectionist and I’m trying in my mind to get the perfect final version before I get started.