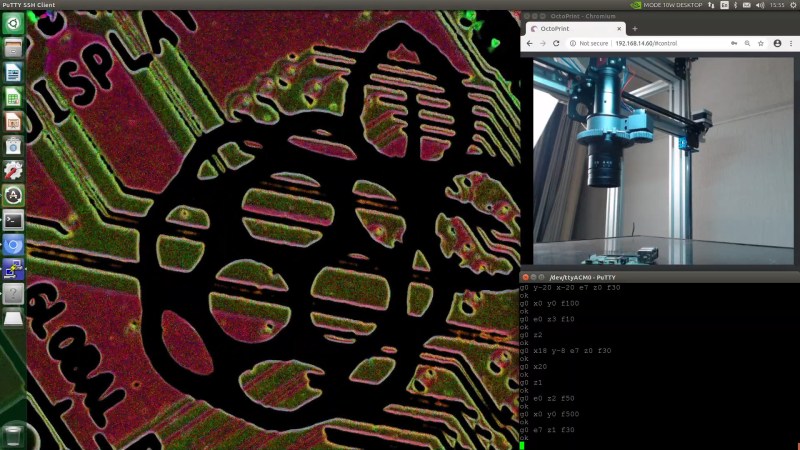
Look past the melty plastic bits, and your average 3D printer is just a handy 3-axis Cartesian motion platform. This makes them useful for all kinds of things, and as [E/S Pronk] shows us, they can easily be modified into an automated polarimetric microscope!
The microscope build actually took two forms. One, a regular digital microscope any of us may be familiar with, using a C-mount microscope lens fitted to a Raspberry Pi HQ camera. The other, a polarimetric microscope, using an Allied Vision Mako G-508B POL polarimetric camera instead, with the same microscope lens. The polarimetric camera takes stunning false-color images, where the color values correspond to the polarization of the light bouncing off an object. It’s incredibly specialized hardware with a matching price tag, but [E/S Pronk] hopes to build a cheaper DIY version down the line, too.
3D printers make excellent microscopes, as they’re designed to make small precise movements and are easily controlled via G-Code. We’ve seen them used for other delicate purposes too – such as this one modified to become a soldering robot. Video after the break.


Well, a 3D printer doesn’t really make a good microscope. It makes a good microscope stand.
I’m not even sure I would call it good. Good enough for some purposes. Versatile certainly, and computer controllable, but for high quality micro photography more mass and stiffness are required.
But the results are here to see. Are you saying these results are not good enough for your purposes? Or are you accusing someone of faking them?
Short of that I don’t get why people argue reasons something won’t work after being shown pictures of it working.
I’ll grant you this, the mass and stiffness of 3d printers do vary. Too many 3d printers don’t have enough mass or stiffness to be good 3d printer either! But that doesn’t mean the better ones won’t work.
The optics needed for the microscope are not part of the 3D printer. Rather, the printer just holds/moves the optics. This is similar to turning a 3D printer into a laser cutter.
I don’t understand why people argue when the point is valid.
You can literally say almost anything makes a great microscope if you attach a fscking microscope to it!
STD said: “but for high quality micro photography more mass and stiffness are required.”
Even though there was some pretty good looking examples right there in the article. I didn’t see any wobble problems, did you?
What, you and cmboggs thought I was talking about his other point, the trivial semantic argument? That’s dumb. He turned it into a microscope by adding optics. Or he turned it into a microscope stand by adding a microscope. You say po-tay-toe, I say po-tah-toe, who cares?
If I intended to argue about trivial semantics I would have written about trivial semantics.
Are you sure? My relatively low end printer after fine tuning, squaring, plumbing and tramming it in is capable of repeatedly bringing the nozzle to 1/100th of a mm. Incredibly useful for any microscope work that requires repeated monitoring from an accurate reference frame.
You don’t need to do ANY fine tuning to move the nozzle accurately other than levelling the bed. The accuracy and repeatability comes from the drive system
That depends on the drive style – you can need to calibrate the head moves with some setups to get anything like accuracy, Delta designs are terrible for precision based on the kinematics alone, and even simpler mechanisms for real precision can need calibration as the gear ratio are not perfect, there is signifiant backlash etc.. Also any lack of squareness in the frame can theoretically at least be mapped and corrected for to gain better accuracy too.
This type of thing would be great when tied in with image detection. You could set it to follow a microbe for its entire life using the Z axis for zoom.
I thought the same thing. Also, it could be used to scan a large area for something really small. Start it and come back two days later, just like a 3D print.
Looks great! So much waiting to be done with 3D printers for macro/microphotography.
Use it with a camera to capture precise sequential images for focus stacking.
For targets like this where high frame rate video is not needed you can easily create these polarization images using 4 frames shot with a polarizing filter at angles of 0,45,90,135. It would be simple to add a motor to automate moving a polarizer. I used this technique to create this https://www.youtube.com/watch?v=LBVfBJml-Ic
Hm, it would be cool to mount a far infrared sensor. You could then measure how warm PCBs get, measure your hotbed, …
I’ve done that too see https://github.com/OpenThermal/libseek-thermal