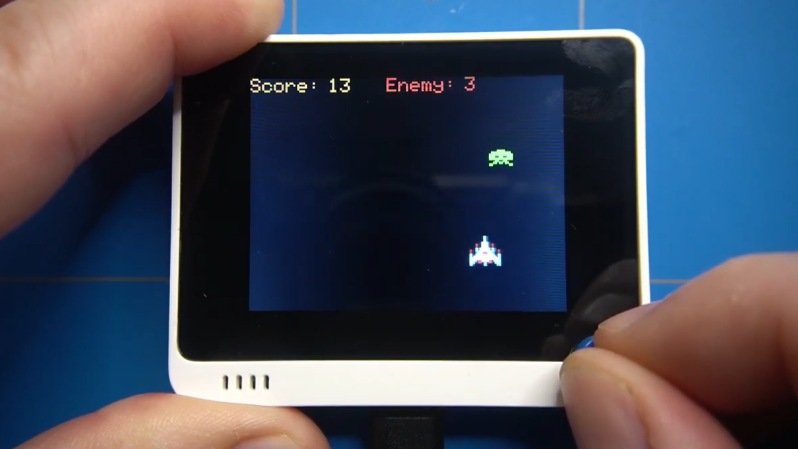
Sometimes, it’s really useful to watch a project’s parts come together one piece at a time in order to get a complete understanding and mental picture of the whole, and we found that to be the case with this simple, retro-inspired sample game from [ezContents]. (Video, embedded below.) The code is on GitHub but if you’re at all interested in what goes on behind the scenes in a game like that, don’t miss the video.
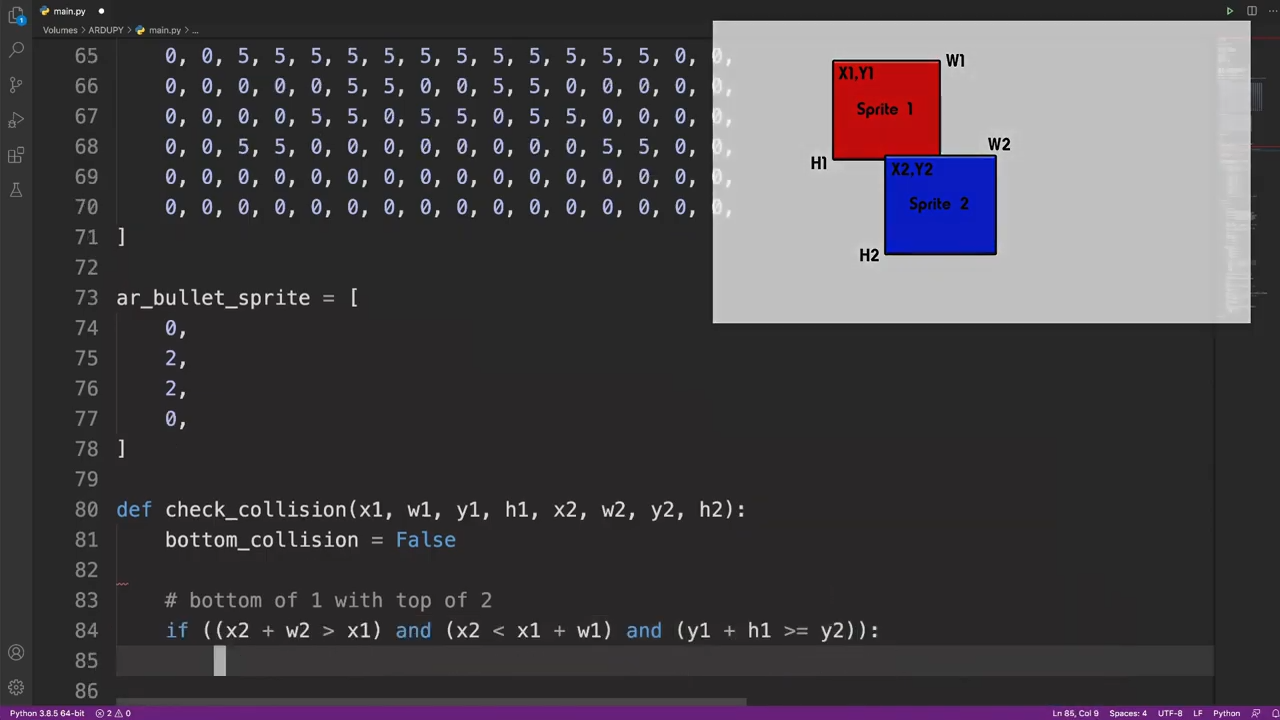
These sprite-based games are mostly about moving a small graphical object (a sprite) around a screen in response to user input, and managing what happens when collisions are detected between the player’s sprite and other sprites like enemies, projectiles, and so forth. The development process is wonderfully documented and demonstrated in a video, as each separate part of functionality gets built and explained one piece at a time.
The simple game is made using ArduPy (which is MicroPython combined with Arduino APIs) using Seeed Studios’ Wio Terminal, a small microcontroller development board with integrated screen, sensors, and button inputs including a little directional clicker that [ezContents] uses as a joystick.
The video of the whole process is embedded below; give it a watch and you’ll maybe come away with inspiration, but you’ll definitely have a much better understanding of how these types of games are developed, even if you’re not using the same hardware or development environment.
Like what you see, but wish to go even smaller than the Wio Terminal? No problem, the Arduboy Nano pushes “tiny” to the limits.


If only I could do this on a computer I already own instead of investing in yet more junk
Surely you have an LCD screen, a microcontroller capable of running micropython, and some buttons?
Actually no I don’t (well I have some buttons and maybe a 16×2 text display)
Then you must do it. You have everything to build a rocket. But i am sorry bro. You are missing the engine
I think the logic would port very easily to the PC already sat in front of you if it just used graphics.py or something like that.
A lot of these guides jump to “Learn to do X on a Raspberry pi!” or similar, using no real GPIO, without pointing out that you could do it just as easily and learn just as much by using the device you’re already sat in front of.
Why are you even here!? If the project isn’t for you move on to the next article. Would you rather they had written a guide on how to do this on a computer? No, becuase there’s plenty of those guides out there already. So they did something fun and wrote up a guide on it. That should be encourage, we’d be running on PDP systems still if nobody went out of their way to try other things even if only for fun.
Excellent! Clear! Complete! Nice piece of Work!
I do ultrasound medical imaging R&D and ‘focus’ on AI ML-based signal analysis. In my Lab, I use all-sorts-of (open-source OTS) devices (Arduino-RPi-INTEL-NVIDIA , …)
Your entertaining article put on one-page inference from dozens of most-recent literature citations. I like this kind of “cross-cut” technical look framed in easy-to-read context, literally to put the HACK into HACKADAY!
Keep up the good work, Please.
Regards, raildoc, Dallas, TX