When you’re working with PCBs and making single units to knock out in those Chinese fabs, going from layout to manufacturable Gerber files is just a few button presses, no matter what PCB layout tool you prefer. But, once you get into producing sets of PCBs that form a larger system, or are making multiple copies for efficient manufacturing, then you’re not going to get far without delving into the art of PCB panelization. We’ve seen a few options over the years, and here’s yet another one that’s looking quite promising — hm-panelizer by [halfmarble] is a cross platform Python GUI application, which leverages Kivy, so it should run on pretty well on most major platforms without too much hassle. The tool is early in development, so is restricted to handling only straight PCB edges, with horizontal mouse-bites for now, but we’re sure it will quickly grow more general purpose capabilities given time and support.
In an ideal world, open source tools like KiCAD would have a built-in panelizer, but for now we can dream and hm-panelizer might just be good enough for some people. For more choices on panelizing, checkout our guide to making it easy, and just to muddy the waters here’s another way to do it.


> In an ideal world, open source tools like KiCAD would have a built-in panelizer
Hopefully the improved scripting in future releases will allow building more complex UIs like this possible.
hopefully it will get better, much like autoroute I rather do it by hand, like in the example above it has side rails, but nothing is basicly connected to them, the little PCB’s will just bounce in a pick n place machine and if your doing it by other methods, you don’t really need the rails … there’s a BUNCH of other sins just in that picture but I will let it rest
Looks like the tool only supports horizontal mouse bites, as specified by the github README, which makes it a bit useless for now… So uh, let’s keep waiting, I suppose.
But this is a start, and a much needed one!
One would think that panelization isn’t too tough to do, since you only need to shift and merge gerbers, then apply the mousebites. But getting it right will take a bit more motivation ^^’
The tool will only benefit from a constructive criticism, so I’d love to get any feedback.
I’ve always used the Panelizer from the Windows-only suite GerberTools https://github.com/ThisIsNotRocketScience/GerberTools
I gotta check this new one out sometime.
You can actually run this (or an older version at least, I haven’t used the latest) using mono on Linux.
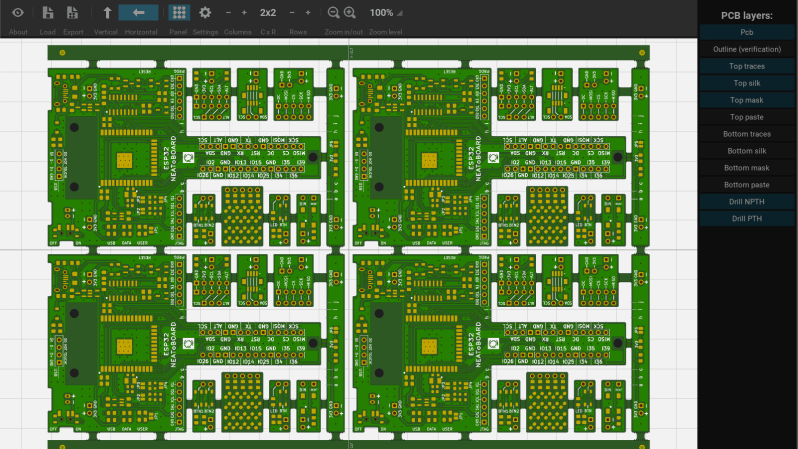
Since it only does horizontal mouse bites and rectangular boards, is it safe to assume it didn’t panelize the example image?
When you look closely, it is only a panel of 4 board. The design is break-away devel kit. So most of what looks like cool panel is actually hand-drawn.
I’m halfmarble and I wrote this tool.
Nothing is hand drawn, the DEMO board is my NEAToBOARD’s intermediate representation rendered as png images based off actual gerber files produced by KiCad.
Rendering from the gerber files takes a few seconds, and I wanted the users to have something immediate to tinker with, so I skipped that internal step for the DEMO and included only the pre-rendered files, but those get normally rendered by the tool itself if you point it to your gerber files.
I think the confusion here is that the write-up says it only does “horizontal mouse bites”, but the image shows both horizontal and vertical ones.
Maybe you mean something different by “horizontal”?
Oh, I see now. You are correct – the NEAToBOARD itself has a few mini-panels around the main panel, and those are connected using hand drawn vertical mouse bites.
The tool lays out the 4 panels using horizontal mouse bites that are generated by the tool.
When I look at your NEAToBOARD (https://www.halfmarble.com/neatoboard) – it is a design consisting of multiple break away boards.
The confusion is:
– the demo is a panel of 4 hand-drawn multiboards, or
– a panel of 4×9 boards and evertyhing is designed in your tool?
– Or is there a third option, that you first took 9 designs, turn them into panel and then created the panel of 4?
The first one.
Since I designed NEAToBOARD a while ago I’ve been looking at it as a single panel and it didn’t even cross my mind that it might be confusing to others to figure out which mouse-bites were created by the tool itself and which ones are part of the hand designed panel.
I agree that the single screenshot of 4×4 panels, without the context of seeing the single panel on its own, is confusing.
EasyEDA does panelizing of one design per board.