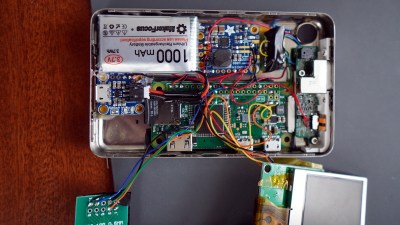
The 2022 Hackaday Prize continues to hurtle along, with two of the five Challenges already in the rear-view mirror. While we’re naturally excited about every phase of this year’s contest, we’ve got particularly high hopes for what the community can do with this third Challenge: Hack it Back.
It’s a simple formula: find some outdated and disused piece of gear, spruce it up, and keep it out of the landfill. But extending the lifetime of consumer hardware is only one side of the coin, by upgrading and modifying something instead of buying an off-the-shelf replacement, you also turn the mundane into something unique and personal. But of course, we hardly have to explain the benefits to you fine folk — this is the sort of bespoke engineering we see on a nearly daily basis here at Hackaday. The difference now is that there’s cash prizes on the line.

So if there’s an old iPod collecting dust in your desk, perhaps now is the time to replace its guts with some modern silicon and teach it a few new tricks. Sure a brand-new robotic vacuum might be nice, but you could save yourself some money by picking up a second-hand Roomba and tucking an ESP8266 onboard. Got a nice piece of test equipment that predates the handy data export functions we take for granted these days? You might need to use the nuclear option and skim the desired data right off the unit’s LCD controller. We could spend all day pulling examples from the archives, but you get the picture.
What’s that you say? You aren’t the type to be seduced by shiny new features? Happy to keep things local while others ship it all off to the cloud? You’ll get no complaints from us, and that’s why the Hack it Back Challenge also recognizes repairs that simply put a piece of gear back into service. But don’t be fooled, as fixing something can often be harder than rebuilding it from scratch.
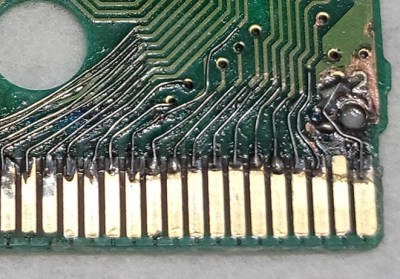
 When you’ve got to crack out the x-ray machine to find all the damaged traces on a decades-old PCB, only to then tediously replace them all with microscopic bits of wire, you may find yourself wondering what you’ve done to anger the Keeper of the Magic Smoke. On the other hand, plenty a gadget has been disabled due to nothing more exotic than a single bad solder joint. In either event, there’s a certain sense of satisfaction when you can return a literal piece of history to working condition.
Ready to put your hardware-reviving skills on display? Just head over to Hackaday.io, make a new project page, and get hacking. But don’t wait too long, you’ve only got until July 24th to enter the Hack it Back Challenge and stake your claim on one of the ten $500 awards up for grabs.


Bought an Amiga A1000 once on a fancy fair. According to the seller, it was complete but working. Well, he couldn’t demonstrate that it was working and it looked brand-new but also missing the floppy drive button. So I haggled the price down to close to pocket money.
Came home, found that the floppy drive was still in there, just missing the button. But of course it didn’t work.
So, I started checking everything, starting with the clock signal and the address and data bus. Well, clock was there, but hey, address bus floating… Ok, let’s check /reset. And lo and behold, /reset floating. Checked the reset circuit, and it was pulsing fine. Checked continuity between reset circuit and cpu: nope, no continuity.
Traced the reset line. And about halfway between the reset circuit and the CPU, the continuity broke. But even with a magnifying glass, I couldn’t see anything wrong. But when I connected the reet circuitry to the CPU with a wire, the machine booted just fine.
So, seems to have been a manufacturing defect. Fixed the whole A1000 with a half inch piece of wire. Didn’t take more than half an hour. :) It was harder to find a new button for the disk drive than to get this computer running.
Ok. Just wanted to share this story. The computer is long sold to someone else, so I can’t enter it into this contest. But it was one of my greatest Hack it Back wins. :)
Heh, yeah I had to replace a lost floppy drive button with a bit of wood whittled to size back in the day.
I suppose this question is worth tossing out to the group to see if anyone has ideas. Did anyone ever work with Cypress M8 USB host chips or have any particular go-to cheap/free software that they like to use when they need to extract firmware from Some Weirdo Chip and program a new one? I have a TouchStream LP keyboard that I love but fried while attempting to repair. I have been able to source and solder replacement IC chips but before the Fingerworks Touchstream firmware update utility will flash the device it needs to recognize that the device is actually a Touchstream. Probably by checking the USB Vendor ID. The USB host is a CY7C66013 and the datasheet doesn’t say anything about it having native support for DFU mode. It appears that the way they programmed these chips was to buy a Cypress programmer plus an adapter to fit the chip’s SSOP 48 pin package. The actual programmer software was called “cystart”. Neither cystart nor the hardware programmer look to be available. I DO have another working device that I can try to extract the firmware from, so I’m kinda thinking my options would be:
1. Find the Mother Of All DFU mode programs that is able to somehow talk to this chip to extract firmware via USB from the working device and flash it onto the blank chip I’ve soldered onto the damaged device.
2. Build some kind of harness with pogo pins and figure out if this chip does firmware updates via I2C or HAPI or something else then I guess either try to use some kind of modern programmer like a TL866II or by hooking up to the GPIO pins of a raspberry pi.
Anybody have any suggestions for alternatives that I should look into? I feel like I’m *this* close on this one.