[Drew Pilcher] needed durable, custom-wound coils with no core, and perfectly flat sides. Coils can be wound by hand, of course, but reliably creating perfect coils with thin wire and lots of layers requires some additional help. Happily, [Drew] shares his method for doing exactly that. Perhaps coming as no surprise, the key to repeatable, high-quality coils is good preparation and tools.
The most important part is the ability to rotate a spool for winding without having to take one’s hands off the workpiece. To accomplish this, a cheap, no-name power drill and foot pedal (made from the harvested trigger unit of the drill) forms the basis of [Drew]’s DIY winder. To make coils with precision, one must also count the number of turns. Thankfully, there is a simple solution for this; [Drew] used a cheap digital turn counter from Amazon. This economical device uses a magnet and sensor, so [Drew] simply stuck the magnet on the side of the drill’s chuck.
The spool is what the wire gets wound around to form the coil, and it will need to be removed from the coil afterwards. To accomplish this, [Drew] uses a brass shaft, metal washers, and some plastic spacers. A light coating of grease on the spool surfaces helps ensure things come apart properly in the end.
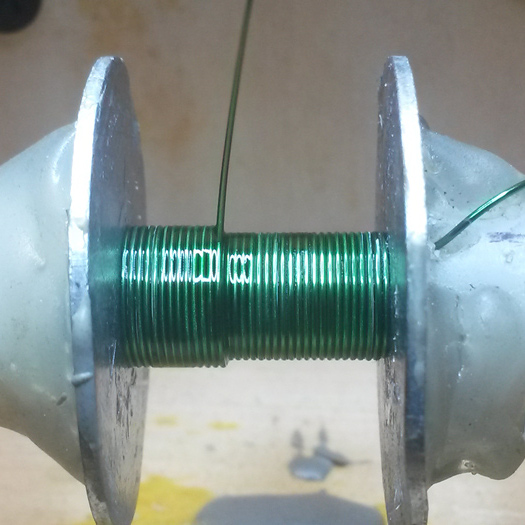
To actually make the coil, [Drew] recommends some means of magnification, and a supply of CA glue. Wind the wire as cleanly and closely as possible, and apply CA glue during the process to secure things. It takes some practice, but really clean windings are possible if done correctly.
For thick coils with a lot of layers, the CA glue will hold things together well enough, but for smaller coils [Drew] likes to give them a final coating of two-part epoxy. After things are completely set, the spool is disassembled and the inner core is pushed out as gently as possible.
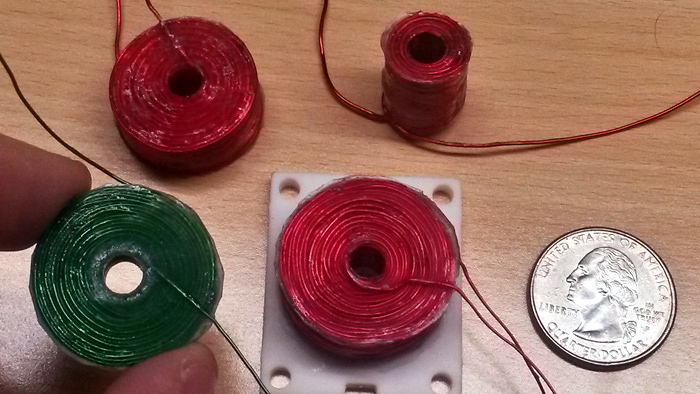
The result? A tightly-wound, durable coil with perfectly flat sides. It’s exactly the thing [Drew] needs for his upcoming coil gun project. How’s that work, you wonder? You can see the basics covered right here.


While in this case I could see a video demo being good too its so nice to see a proper article format guide, that gives you that really perfect close up of all the tools and key moments and lets you search the text if you want to get back to a detail, gives you decent still images of the important jigs and work.
I wish more content creators that do the video format would also show the decent still image and static labeled diagram guids like this on a webpage…
Will add I wonder how well those coils will really work for their goals, cooling could be an issue.
They’re coilgun coils so although the peak power is extremely high, they have plenty of time to cool between shots.
Nice idea. Recently made a huge mess of the garage turning PVC stock down for inductor bobbins.
That sounds like a lot of wasted material, how about 3D printing the bobbins in 2 pieces, to prevent lots of support material? You could either have one half (sidewall + tube) slide into the other, or print the tube on one sidewall and glue the other sidewall on.
How many henries are these coils?
Depends on the wire gauge and number of winds. If you want me to check one for you I can, but they’re air core so probably fairly close to what an online calculator would tell you.
@Tim said: “How many henries are these coils?”
At [1] you will find a nice online multilayer coil calculator. Guessing, I’ll bet the larger of [Drew]’s coil examples are in the 100’s of millihenrys. A simple formula for multilayer coil inductance is shown at [2].
1. Multi-Layer Coil Inductance Calculator
http://electronbunker.ca/eb/InductanceCalcML.html
2. Inductance Formulas
https://en.wikipedia.org/wiki/Inductor#Inductance_formulas
If you really want flat and compact coils consider using square magnet wire. It isn’t beneficial if you’re just doing a random or unguided coil, but if you are going through the effort already you might and aiming for max performance, might as well they consider it.
These coils and some lime scooter batteries….
The images aren’t extremely clear (also reading from a 11″ laptop screen on a bar table) however it seems the layers are wound alternated, that is, for example one left to right, then another in the opposite direction; that would mostly cancel the EM field severely reducing the overall inductance and coil performance. The correct way of winding multi layered coils is to wind one layer, then when the opposite side is reached, return immediately to the side the first layer started and wind the second one, return again and repeat. In other words all windings should always go from-to the same direction.
Wow, thanks for the guide. I never do a coil n been eager to do one for a side project thus why I’ve been interested in this article though never thought of that. Thanks again;
Really? I thought it didn’t matter as long as it all went the same direction (e.g. clockwise) so that the current flows in the same direction.
I’ve not done anh winding, but no wonder I’ve seen online does what you described.
ytrewq is mistaken. Tim is correct.