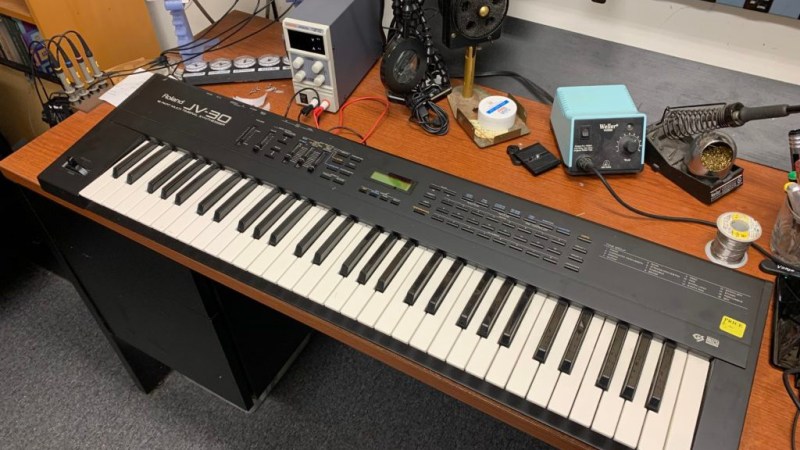
[D. Scott Williamson] paid $5 for a Roland JV-30 synthesizer at a garage sale. Score! There was only one catch: it didn’t work and didn’t include the power supply. Luckily, restoring it was made easier by breaking out a thermal camera.
As mentioned, the keyboard was missing a 9 VDC power supply (rated 800 mA) with a center-negative barrel connector. Slightly oddball, but nothing an enterprising hacker can’t deal with. After supplying power with a bench supply, not only did the keyboard not come to life, but the power supply clamped the current draw at 1.5 A! Something was definitely not right.
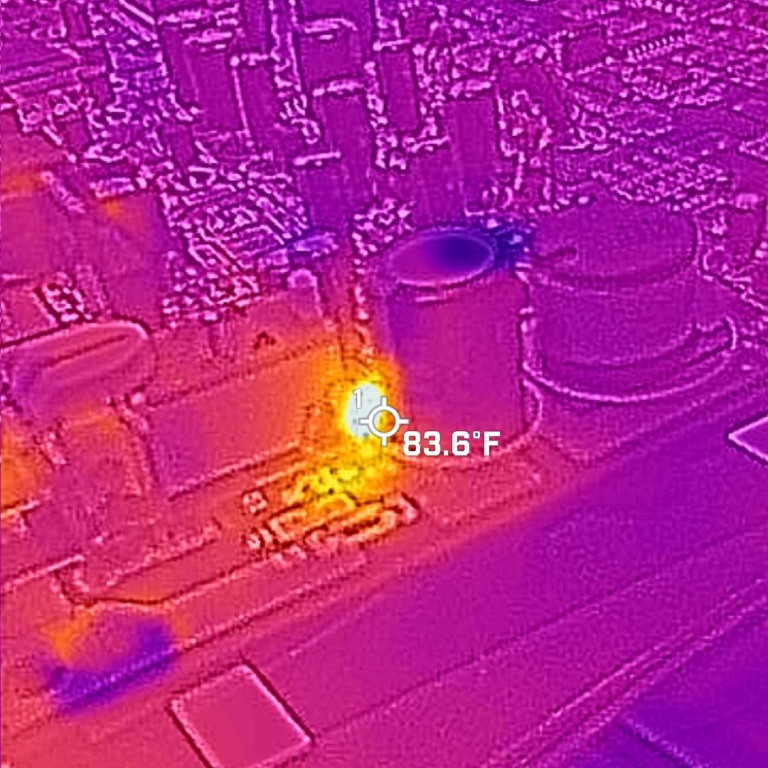
Inside, there was no visible (or olfactory) sign of damage, but looking closer revealed that a little SMT capacitor by the power connector was cracked in two. Fixing that didn’t bring the keyboard to life, so it was time to break out the thermal imager. Something was soaking up all that current, and it’s a fair bet that something is getting hot in the process.
The culprit? The reverse polarity protection diode was shorted, probably as a result of damage by an inappropriate power supply or a surge of some kind. Replacing it resulted in a working keyboard! Not bad at all for $5, a diode, an SMT cap, and a little workbench time. The finishing touch was replacing a missing slider knob, which took some work in OpenSCAD and a 3D printer. Overall, not bad!
Thermal imaging used to be the stuff of staggering price tags, but it’s downright accessible these days, and makes it easy to spot things that are hot when they shouldn’t be. And if a thermal camera’s lens isn’t what you think it should be? It’s even possible for a sufficiently motivated and knowledgeable hacker to modify those.


Hot Hack!
Well that’s pretty cool. For those who lack the thermal imaging, you can sometimes do a similar thing with a finger or with an upside down can of canned air, which will spray a very chilled liquid. The hot component will “thaw” first and highlight itself, apparently.
Old timer trick was Isopropanol with barbershop spray. And yes, all windows open.
Center-negative power supply connectors are what nearly all guitar effects pedals use, so it’s not that oddball.
Sounds like a Sega Genesis power supply would work (10vdc, 1.2A, center negative). Just don’t use an NES power supply, it outputs AC!
At least the NES power supply would be the correct polarity half the time (regardless of center negative or positive)
At least the manufacturers mostly have the courtesy to print that it’s tip-negative most of the time. Better put a shottky bridge rectifier in my circuits in the future just in case
My Dymo handheld printing labelled is centre negative, I suppose most people would fork out for their power supply or run it on batteries. I opened it up and squeezed in another barrel jack socket centre positive that I use with an old camcorder supply.
I have two synths right next to each other, one center negative, one center positive. Same size/shape barrel jack.
I’ve labelled them well, but I keep waiting for the day I test out the protection diode by accident.
(The maker confirmed that they were just following the guitar pedal standard.)
86F, not hot enough to easily feel. Math says about 1 watt. Not enough on old school boards to tell if good. When it gets to 2 or more watts then the finger will tell and not get burned.
So I’d use a gentle brute force of whatever elicits not smoke but some heat. I have a hoverboard someone gave me it’s charge port is a dead short as far as my reg power supply goes. Large surface mount components.
pretty good deal on that Roland JV-30 synthesizer!!
My dad once had a huge flashlight with integrated charger which refused to charge. Took me 30 seconds to find one dry solder joint, and 30 seconds to reflow it.
My dad thought it was magic.
Not patting my own back here, just pointing out sometimes you can really get a good deal by just taking the gable and fixing something.
Please be aware that canned “air” isn’t really air but usually some highly flammable gas. I don’t think it will ignite on a hot component but yeah, be careful. You can get special (and more expensive) refrigeration spray (no idea how this is really called) that is not flammable though.
This was a reply to a comment above. Please HaD, fix your system.
A quick google image search shows that you would have blown that diode too. The Sega Genesis uses a center positive power supply.
I really hate center-negative power supplies. I found a cheap toy-tier “guitar amp” that needed one, so I opened it up and stuck a bridge rectifier in there. They also do that with P-touch label printers, but the one time I tried to rewire one, I found that it would not be so trivial because of how it interacted with the battery compartment.
Thanks, WordPress, I was replying to Mike up there and again you throw it to the bottom.
I’m risking another reply falling off to point out that I was looking at a model 2 (yellow tip) power supply. The model 1 is center-negative! All I remembered was that it was opposite of the Atari 5200 polarity.
Every “musical thing” I’ve ever seen runs on 9 volts, center negative. Probably has to do with the first guitar effect with a 9V battery.
But learning it to play is super hard.
I have a broken synth here that had a glass of beer spilled in it!
Alas the same problem, tried to repair but just too badly damaged.
One day I might obtain a thermal imager and try to locate the bad parts.
It did turn on (briefly) but sounded very bad and most of the keys didn’t work.