If you’re getting PCBs professionally made, silkscreen usually comes free as part of the package. However, if you’re making your own, the job is on you. [Tony Goacher] makes his own PCBs on a CNC router, so he’s not getting any silkscreening as part of that bargain. But he wondered—could he do something analogous with a laser cutter?
The answer is yes. The silkscreen layer was first exported from DesignSpark, with the file then sent to LightBurn to prep it for laser cutting. The board outline layer was first engraved on to a piece of scrap as an alignment aid. Then, the board was placed in the laser cutter, with the silkscreen scorched directly on to the fiberglass.
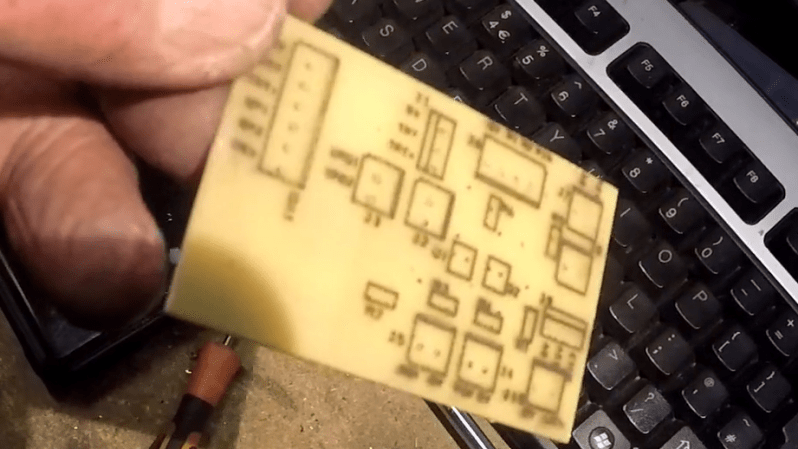
The results are encouraging, if imperfect. [Tony] says he ran at “quite fast speed at quite high power.” The markings are all there, but they’re a little melty and difficult to read. He noted at lower speeds and lower power, the results were a bit more readable.
PCBs aren’t really an ideal engraving or laser marking material, but this technique could be servicable for some basic markings on DIY PCBs. We look forward to seeing how [Tony] improves the process in future. Video after the break.


Far from my area of expertise but I wonder if you could coat the PCB with… something… and laser engrave the coating for a higher definition result?
Could try laser printer/photocopier toner. Use the laser to melt it on and brush the rest off. Yellow powder is readily available.
Possibly you could use powder-coat powder. Available in white and a huge range of other colours.
I used to coat the copper with black spray paint and remove it with a fiber laser to etch PCBs at work.
It worked well enough for copper. Should work fine for silkscreen too.
With a standard XY laser machine it would take ages, tho.
Yes. This works well with various materials.
Kapton tape will burn into the substrate and allow you to cut things that you normally wouldn’t be able to cut – such as copper plated boards. It doesn’t work well enough to make PCBs, but the technique works for other non-cuttable things.
The best way to silkscreen with a laser is to cover the board with vinyl transfer tape (a paper tape with light adhesive, like post-it-note adhesives), etch through the paper, spray paint through the etched pattern, and remove the paper tape leaving the sprayed pattern. Masking tape will work, but is a complete PITA to remove afterwards. Really, really nice results can be had this way.
You can also spray paint the board and then remove everything that is *not* the pattern – this also works. Be sure that the spray paint is very well dried – bake in an oven for a few tens of minutes. There will be specks of “castoff” on the board that will wash off with alcohol.
You can also try “dry moly” lubricant from a spray can, available at the local auto parts store. The laser will sinter the moly into a metal substrate, such as steel, and this can be used to mark metal objects that you fab. I haven’t tested this on PCB substrate boards, but I strongly think this would work as well.
And of course if you try things and find that they work, please post to HAD for us.
Some good ideas here. Gonna try them next time. Thanks!
Damn I really want to try that “dry moly” technique on a metal instrument panel! Does anyone have a link to more info?
There are plenty of good guides if you do a simple keyword search. There’s also this note of caution: https://enduramark.com/blogs/blog/stay_away_from_molylube
see LightScribe CD-Rs
Been doing this at part of class projects at our college for a couple years. From the design software we print to a PDF. Then use the laser cutters software and raster print it. Can quite clearly read 1mm text. The dot size of our cutter is just under 1/100 of an inch. Took a little playing around with speed and power to get a nice black burn on the material. Been very happy with the results.
Hi, I have some concerns about engraving PCBs with a laser. Burned PCB material can become conductive sometimes.
Interesting point..though in this case PCB is single sided.
The burned areas around component lead holes may be an issue for sensitive circuits as they may be partially conductive, due to carbonisation of the epoxy.
Worth noting that professionally made PCBs with all bells and whistles are dirt cheap if you order from China. Economy shipping time is a bummer though – easily takes 3+ weeks, so I understand that someone might want to do entire thing in a day if you happen to have CNC and laser cutter in your garage.