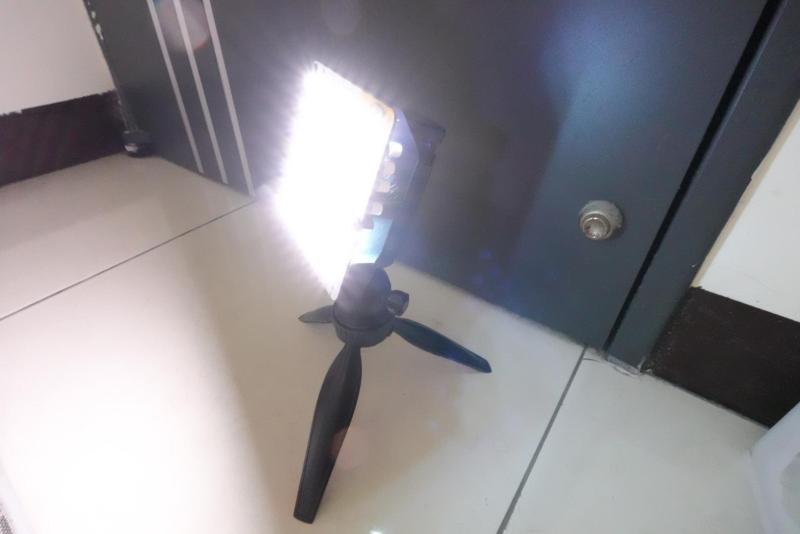
Photography is all about light, and capturing it for posterity. As any experienced photographer will tell you, getting the right lighting is key to getting a good shot. To help in that regard, you might like to have a fill light. If you follow [tobychui]’s example, you can build your own!
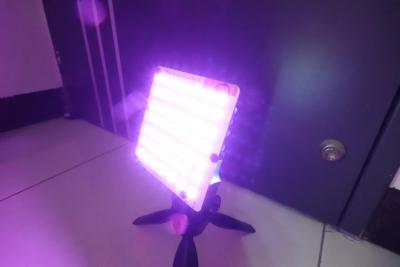
The build relies on addressable WS2812B LEDs as the core of the design. While they’re not necessarily the fanciest LEDs for balanced light output, they are RGB LEDs, so they can put out a ton of different colors for different stylistic effects. The LEDs are under the command of a Wemos D1, which provides a WiFI connection for wireless control of the light.
[tobychui] did a nice job of building a PCB for the project, including heatsinking to keep the array of 49 LEDs nice and cool. The whole assembly is all put together inside a 3D printed housing to keep it neat and tidy. Control is either via onboard buttons or over the WiFi connection.
Files are on GitHub if you’re seeking inspiration or want to duplicate the build for yourself. We’ve seen some other similar builds before, too. Meanwhile, if you’re cooking up your own rad photography hacks, don’t hesitate to let us know!


What’s the point of using addressable LEDs if you drive them all with the same color?
Mass availability at a low price, and they’re trivially simple to drive. For one-offs, it’s often quicker and easier to go with what you know than to optimise for dollar cost
You don’t need a driver, duh.
But you get a shitty color rendering index…
The shitty color index comes from using one of the cheapest RGB LEDs, not from using addressable LEDs. Had he used the cheapest non-addressable LEDs, the result would be as bad. But it’s Hackaday, it’s a hack, so it checks out ;-)
I’m by no means a professional photographer, but the quasi-professional fill lights I’ve used usually aren’t all one static color. You can run cool white, warm white, or mix/match cold and warm for desired effect. Using addressable LEDs with the appropriate controller, this could easily be done and wouldn’t just be limited to white light.
I assume (?) that what @Andrzej meant was, “why use addressable RGBs instead of a dumb RGB strip?” Or that would be my question anyway.
The point of WS2812Bs is that you can separately control the color of each individual module on a strip, and you just need to provide a single 5V rail to power them all. Which is great for displays, where most of the LEDs are off most of the time. But for lighting, it becomes a significant drawback because you’re supplying several watts at 5V, which wastes power, creates heat, and/or requires more complicated power arrangements.
“Dumb” RGBLEDs require three sets of (simple) driver circuitry at the end of the strip, but the LEDs are grouped to use 12V or 24V, so you can run much longer strips at full power. Also, they’re widely available in RGBW arrangements including a “true” white LED, allowing for a better spectrum than RGB can achieve. They’re also much cheaper, and there’s abundant info on using them in arduino projects.
AFAIAA, there is no reason to use large numbers of WS2812Bs unless you’re making a display.
“so they can put out a ton of different colors for different stylistic effects”
Really Great Backlight.
I see what you did there.
I’ve had a friends commercial lights need new connectors and I made a ATX supply run them both because of funky power supplies and plugs just for 12V. I noticed they need a diffuser as they cast stippled effects in closeups. Broken TV to the rescue, one that was bashed clean through the plastic behind the LCD.
These steel flat boxes with all the white reflective stuff inside and the amazing optics in the diffusing and then aiming going on in those 3 or so sheets behind the broken screen are the perfect place for these kind of lighting projects. Wasn’t there for plasma won’t be there for OLED. Get ’em while you can.
You should have said ‘for Youtube scrubs’ instead of ‘for photography’.