Build Your Own RGB Fill Light For Photography

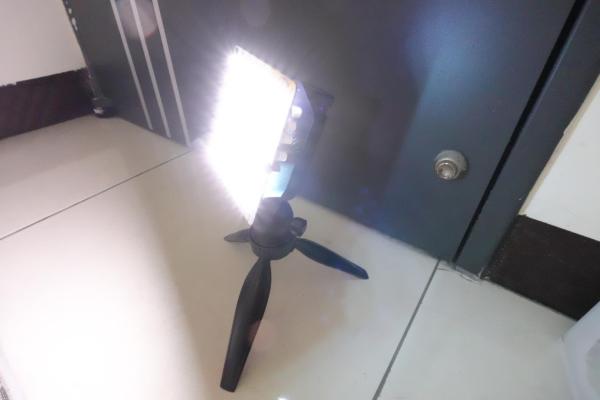
Photography is all about light, and capturing it for posterity. As any experienced photographer will tell you, getting the right lighting is key to getting a good shot. To help in that regard, you might like to have a fill light. If you follow [tobychui]’s example, you can build your own!
Colors!

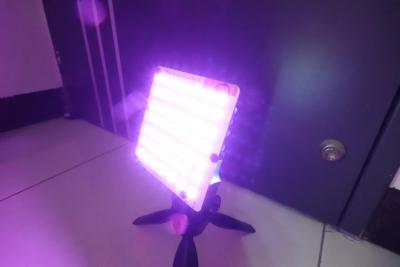
The build relies on addressable WS2812B LEDs as the core of the design. While they’re not necessarily the fanciest LEDs for balanced light output, they are RGB LEDs, so they can put out a ton of different colors for different stylistic effects. The LEDs are under the command of a Wemos D1, which provides a WiFI connection for wireless control of the light.

[tobychui] did a nice job of building a PCB for the project, including heatsinking to keep the array of 49 LEDs nice and cool. The whole assembly is all put together inside a 3D printed housing to keep it neat and tidy. Control is either via onboard buttons or over the WiFi connection.

Files are on GitHub if you’re seeking inspiration or want to duplicate the build for yourself. We’ve seen some other similar builds before, too. Meanwhile, if you’re cooking up your own rad photography hacks, don’t hesitate to let us know!

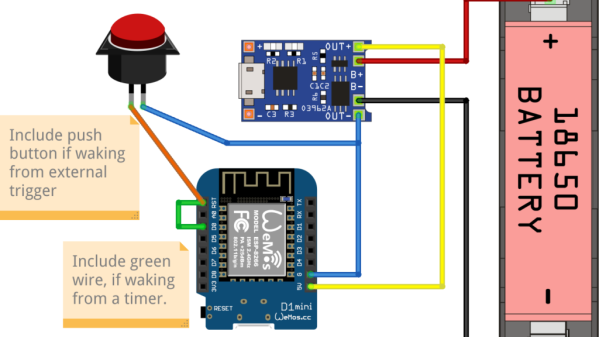
Fritzing diagram of connections between the Wemos D1 board, the TP4056 board, the pushbutton and the LiIon battery

Battery-Powered ESP8266 Sensor? Never Been Simpler

Say, you’re starting your electronics journey with a few projects in mind. You have an ESP8266 board like the Wemos D1, a Li-Ion battery, you want to build a small battery-powered sensor that wakes up every few minutes to do something, and you don’t want to delve into hardware too much for now. Well then, does [Mads Chr. Olesen] have a tutorial for you! Here, you’ll learn the quick and easy way to get your sensor up and running, learn a few tricks for doing sleep Arduino environment, and even calculate how long your specific battery could last. Continue reading “Battery-Powered ESP8266 Sensor? Never Been Simpler”

Slap This Big Red Button For An Instant Social Media Detox

Dangerous machines, like ones that can quickly reduce you to a fine red mist or a smoking cinder, tend to have a Big Red Button™ to immediately stop whatever the threat is. Well, if a more dangerous machine than social media has ever been invented, we’re not sure what it would be, which is why we’re glad this social media kill switch exists.

The idea behind [Gunter Froman]’s creation is to provide a physical interface to SocialsDetox, a service that blocks or throttles connectivity to certain apps and websites. SocialDetox blocks access using either DNS over HTTPS (DoH) or, for particularly pesky and addictive apps, a service-specific VPN. The service does require a subscription, the cost of which varies by the number of devices you want to protect, but the charges honestly seem pretty reasonable.

While SocialsDetox can be set up to block access on a regular schedule, say if you want to make the family dinner a social-free time, there may be occasions where killing social access needs to happen right now. This is where the Big Red Button comes into it, which is attached to a Wemos D1 Mini. Pressing the kill switch sends an API request to either enable or disable the service, giving you a likely much-needed break from the swirling vortex of hate and envy that we all can’t seem to live without. Except for Hackaday, of course — it’s totally not like that here.

The irony of using an IoT appliance to restrict access to social media is not lost on us, but you work with the tools you’ve got. And besides, we like the physical interface here, which sort of reminds us this fitting enclosure for a PiHole.

Remote MQTT Temperature Sensor Shows How It’s Done

First of all, there are definitely simpler ways to monitor remote temperatures, but [Mike]’s remote MQTT temperature sensor and display project is useful in a few ways. Not only does it lay out how to roll such a system from scratch, but it also showcases system features like solar power.

After all, if one simply wants to monitor temperature that’s easily done, but once one wishes to log those temperatures and use them to trigger other things, then rolling one’s own solution starts to get more attractive. That’s where using someone else’s project as a design reference can come in handy.

[Mike’s] solution uses two Wemos D1 boards: one with a DS18B20 temperature sensor for outdoors, and one with a small OLED screen for an interior display. The external sensor relies on a rechargeable 18650 cell and a solar panel for a hassle-free power supply, and the internal sensor (of which there can be many) has a cute enclosure and is powered by USB. On the back end, a Raspberry Pi running an MQTT gateway and Node Red takes care of the operational side of things. The whole system has been happily running for over two years.

What is MQTT? It is essentially a messaging protocol, and takes care of the whole business of reliably communicating data back and forth between IoT devices. It scales very well and doesn’t need to be hard or intimidating; our own [Elliot Williams] can tell you all about implementing it.

Slack Off From Home With A Networked Jam Session

Those of you who were regular office dwellers before the pandemic: do you miss being with your coworkers at all? Maybe just a couple of them? There’s only so much fun you can have through a chat window or a videoconference. Even if you all happen to be musicians with instruments at the ready, your jam will likely be soured by latency issues.

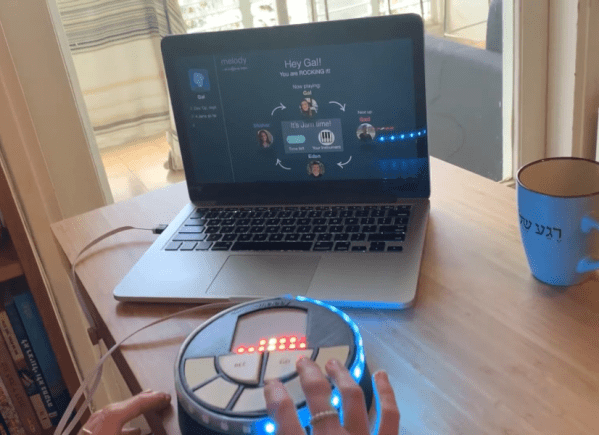
[Eden Bar-Tov] and some fellow students had a better idea for breaking up the work-from-home monotony — a collaborative sequencer built for 2020 and beyond. Instead of everyone mashing buttons at once and hoping for the best, the group takes turns building up a melody. Each person is assigned a random instrument at the beginning, and the first to go is responsible for laying down the beat.

Inside each music box is an ESP8266 that communicates with a NodeRed server over MQTT, sending each melody as a string of digits. Before each person’s turn begins, the LED matrix shows a three second countdown, and then scrolls the current state of the song. Your turn is over when the LED strip around the edge goes crazy.

Music can be frustrating if you don’t know what you’re doing, but this instrument is built with the non-musician in mind. There are only five possible notes to play, and they’re always from the same scale to avoid dissonance. Loops are always in 4/4, which makes things easy. Players don’t even have to worry about staying in time, because their contributions are automatically matched to the beat. Check it out after the break.

Tired of sitting indoors all day, but still want to make music? Build a modular synth into a bike and you’ve solved two problems.

Continue reading “Slack Off From Home With A Networked Jam Session”

Reactive Pixel Lamps Create Colourful Vibes On Command

Phillips Ambilight technology is a curious thing, never quite catching on in the mainstream due to its proprietary nature. Consisting of an LED array that sits behind a television screen, it projects colours relevant to the content on screen to create a greater feeling of ambience. [Ed Chamberlain]’s reactive pixel lamps aim to do much the same thing in a more distributed way.

Each pixel lamp consists of a Wemos D1 controller fitted with an old-school 4-wire RGB LED. The components are placed in a 3D printed translucent cube, which serves as an attractive enclosure and diffuser. With WiFi connectivity on board, it’s possible to connect the individual cubes up to a Raspberry Pi serving as a Phillips Hue bridge thanks to DIYHue. Once setup, the lights can be configured as an Ambilight system within the Phillips Hue app.

It’s an impressive way to give a room reactive lighting on a budget, without resorting to costly off-the-shelf solutions. We’d love to see this expanded further, as we’re sure a room full of reactive lights would be truly a sight to behold. Other methods to recreate the Ambilight technology are possible, too. Video after the break.

Continue reading “Reactive Pixel Lamps Create Colourful Vibes On Command”

LoRa Tutorials For The DIY Masses

LoRa is the go-to tech for low power, long range wireless sensor networks. Designing with off-the-shelf modules can be a boon or a bane depending on the documentation and support. Luckily, [Renzo] has prepared a set of tutorials to get you started.
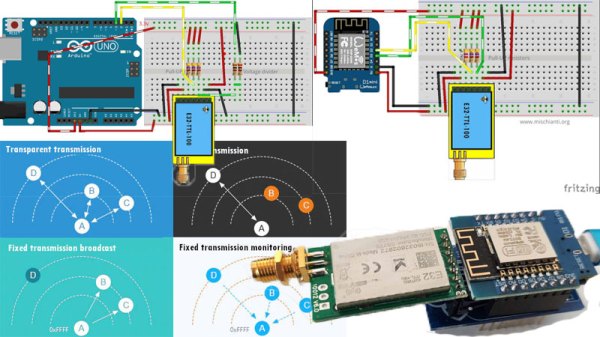
In his seven part series of write-ups, [Renzo] starts by connecting the E32 module from AliExpress to an Arduino as well as an ESP8266 to demonstrate essential communications. Then he discusses the configuration options and the library he created to make like a bit easier. Following that is a series of posts discussing transmission types as well as power saving methods including sleep modes and wake-on-radio.
The information will be extremely handy for someone starting off with the SX1276/SX1278 Wireless Modules which are relatively inexpensive as opposed to more standardized development kits. We love the abundance of fritzing diagrams, arduino code and helper library and hope someone will build on it. You can get the library from Github for your tinkering pleasure.
If you are looking for ideas for this newly discovered skill, have a look at LoRa Enabled Mailbox as well as Electric Fence Monitoring with The Things Network for a bit of IoT action.