[Fraens] has been re-making industrial machines in fantastic 3D-printable versions for a few years now, and we’ve loved watching his creations get progressively more intricate. But with this nearly completely 3D-printable needle loom, he’s pushing right up against the edge of the possible.
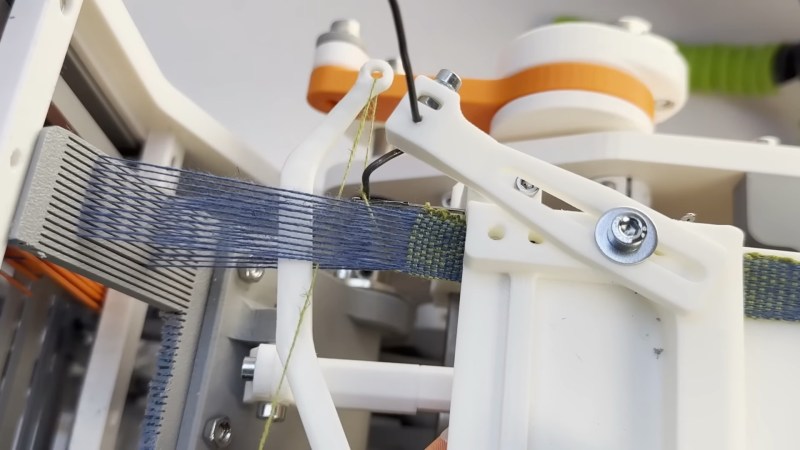
The needle loom is a lot like the flying shuttle loom that started the Industrial Revolution, except for making belts or ribbons. It’s certainly among the most complex 3D-printed machines that we’ve ever seen, and [Fraens] himself says that it is pushing the limits of what’s doable in plastic — for more consistent webbing, he’d make some parts out of metal. But that’s quibbling; this thing is amazing.
 There are mechanical details galore here. For instance, check out the cam-chain that raises, holds, and lowers arms to make the pattern. Equally important are the adjustable friction brakes on the rollers that hold the warp, that create a controlled constant tension on the strings. (Don’t ask us, we had to Wikipedia it!) We can see that design coming in handy in some of our own projects.
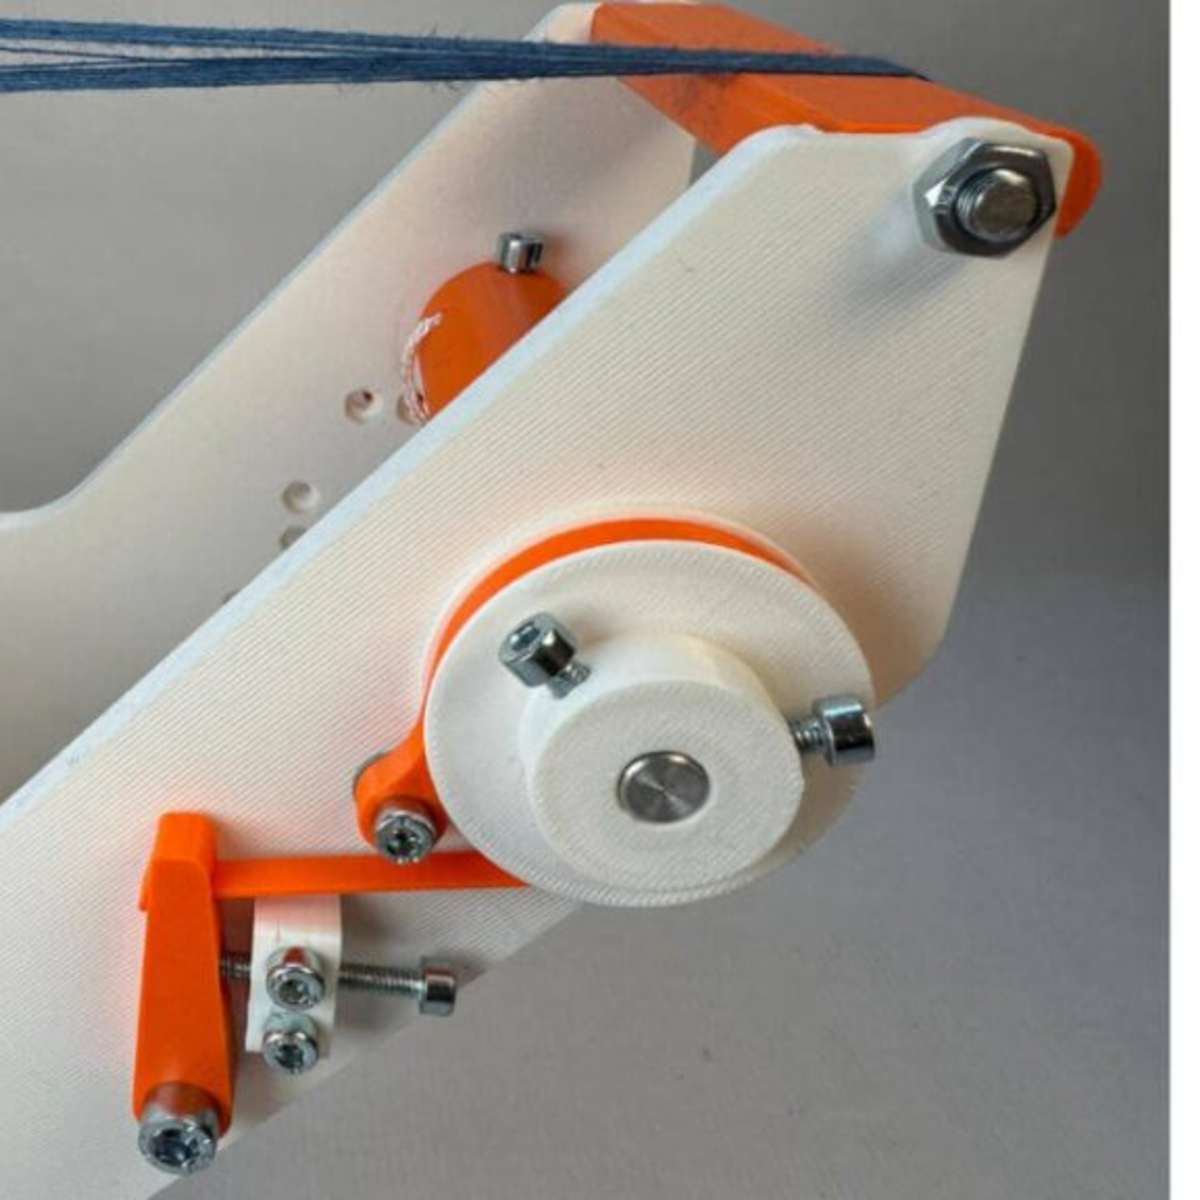
On the aesthetic front, the simple but consistent choice of three colors for gears, arms, and frame make the build look super tidy. And the accents of two-color printing on the end caps is just the cherry on the top.
This is no small project, with eight-beds-worth of printed parts, plus all the screws, bearings, washers, etc. The models are for pay, but if you’re going to actually make this, that’s just a tiny fraction of the investment, and we think it’s going to a good home.
We are still thinking of making [Fraens]’s vibratory rock tumbler design, but check out all of his work if you’re interested in nice 3D-printed mechanical designs.


That is really cool! I love visiting industrial musea and looms and other textile machines are amongst the most complex machines to see and understand.
However, there is a LOT of wear going on in all those repeated movements. I hope there was rich application of oil holes or more modern, lithium grease.
Where is the link to the rest of his stuff that you suggest we might be interested in looking at?
Good call! Will put an explicit link in to his projects page.
Select the link above, then in the loom info page, select the 3 line menu at top right, and then select projects…he has several different designs, and sells 3d STL files for the different projects in his Etsy store. It too is linked off his different projects pages , I have purchased one that he upgraded to a Dobby version, so now I have to decide if I continue with the manual design, or upgrade to the Dobby version, lol
since i just bought a new printer, i’m inundated through non-hackaday channels with 3d printing content. and once i tuned out all the people making “mando armor” i am still continually astonished by people using fdm plastic in bulk. i’m still reeling from a guy who seemed to be using his 3d printer to create something with the geometry of a stick of 80/20 extrusion. and here is this project??
if it’s big or it needs strength, i am always looking for a place to use a bit of dowel rod or sheet steel or plywood or what-have-you. i save 3d printing for parts with interesting geometry. if it’s shaped like a rod, gee, i already have rod.
not sure if i’m being a stick in the mud. i mean, i do know that newer printers are faster, right? but it just seems like the expense of the filament, the long duration of the print, and the mechanical properties of giant sheets of PLA all strongly point away from this style of design.
hahaha i want to add a hack.
so, my machine shop skills are pretty lacking. if i have a sheet of some material, and i want to put a pattern of holes in it…i always consider just printing like a single 0.5mm layer of PLA to use as an alignment template. but what i actually do is i drill the holes by hand, stacking sheets to make sure the two sides are at least nominally identical…and i accept whatever error happens, and then i measure the holes and use that measurement to design the 3d printed parts!
I have printed a fair number of alignment jigs. They’re super handy and while it feels like overkill when I’m designing it in CAD, I’m always happy I did it.
Same here, particularly since I can draw an element, tell the computer to create an array, extrude it, send it through the slicer and to the printer, in about 10 minutes, and then go do something else, and when I come back, there’s my jig and it’s basically perfect, within 0.2mm. It saves so much time to have repeatable feature alignment and not have to fettle things.