We used to say that fixing something was easier than bringing up a design for the first time. After all, the thing you are fixing, presumably, worked at one time or another. These days, that’s not always true as fixing modern gear can be quite a challenge. Watching [Ken’s] repair of an old 1955 Silvertone radio reminded us of a simpler time. You can watch the action on the video below.
If you’ve never had the pleasure of working on an AM radio, you should definitely try it. Some people would use an amplifier to find where the signal dies out. Others will inject a signal into the radio to find where it stops. A good strategy is to start at the volume control and decide if it is before or after that. Then split the apparently bad section roughly in half and test that portion—sort of a hardware binary search. Of course, your first step should probably be to verify power, but after that, the hunt is on.
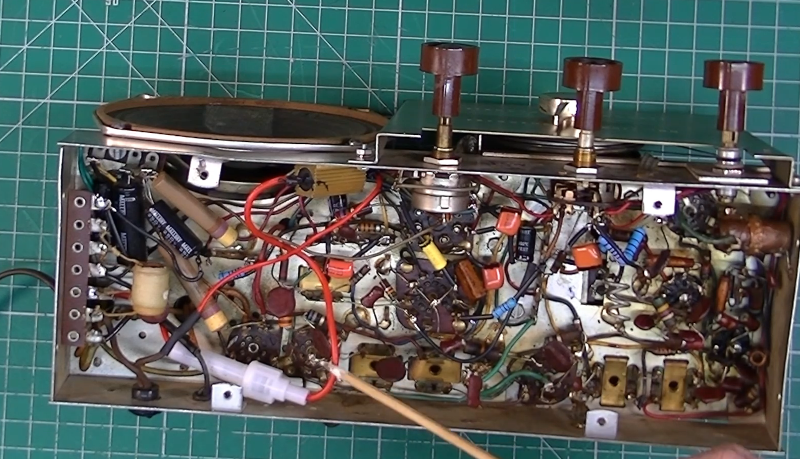
There’s something very satisfying about taking a dead radio and then hearing it come to life on your bench. In this case, some of the problems were from a previous repair.
Troubleshooting is an art all by itself. Restoring old radios is also great fun.


(Let’s try again. It didn’t post the first time.)
“Of course, your first step should probably be to verify power”
If by that, you mean power it on, you are most definitely wrong. You should at least replace the filter caps in the power supply, or risk burning out the transformer (or worse). Even then, you should use either a variac or a “dim bulb tester” to initially power on old tube gear.
After many decades, the electrolytic caps are certainly dried out, and the paper/beeswax caps have changed in value. It is standard practice to replace all caps. The exception being silver-mica, as they almost never go bad.
The old resistors usually drift high in value. Often, the tubes are just fine. Sometimes, the insulation on the wiring has deteriorated.
The radio in the video has a conventional transformer power supply. Many tube radios were of the “All American Five” (AA5) variety, which didn’t have an expensive transformer. The filaments of all five tubes were in series, to drop the 110-120 VAC. The chassis of an AA5 is live, so an isolation transformer is recommended.
Schematics and radio servicing data:
https://archive.org/details/riders_202008/Index%2001-15/
https://archive.org/details/zenith-vol-1/Zenith%20Vol%201/
https://archive.org/details/philco-radio-1928-1937
https://archive.org/details/aligning-philco-receivers-by-john-f-rider
https://archive.org/details/radio-diagrams-1951
I meant “test the power supply” before you turn it on and then verify the voltages before you start other troubleshooting procedures. Didn’t say “turn it on.”
The issue here may be a poor choice of wording on your part. As an EE, if a tech tells me they “tested a power supply,” the implication is that they energized it, verified expected voltages at the output, and might additionally have verified those voltages under load. By this definition your advice, as articulated, is not good.
Joe’s point is that in old equipment with vintage caps, the very act of “testing’ the power supply could destroy it for good. As caps are relatively cheap and available, while custom transformers are neither, the first thing I do on a radio-restore/fix is replace the PS filter caps (if not done already), and add a line fuse. Then, troubleshooting commences with me bringing up the rig on a variac.
I suspect what you meant to say was, “start by testing power supply components,” which I would not disagree with, so long as “testing” them didn’t involve turning the radio on.
The thing is, why bother testing a 75 year old filter cap that, even if “good,” could literally smoke your unobtanium transformer when it fails next week? Better to replace it/them before proceeding with any further work.
I think you can safely assume knowledge about the dangers of old capacitors ’round these parts
High school electronics practical exam in the 1960s was troubleshooting AM tube radios. There were a number of radios that had intentional faults such as shorted signal wires, inoperative power supplies, faulty tubes, and phantom wires that were soldered in place but the middle of the wire was missing. We also built cat’s whisker radios , AM tube radios, simple transistor radios, and VOMs to take home. The take home projects cost a few days of lunch money.
The teacher knew which set had which defects, I came up with the bad part and he said after a delay that’s not supposed to be bad but good work. Then I found the bogus part and won.
I used to fix all American 5 radios that had bad electrolytics. I also wired a diode (1N540) across the power switch so the filaments ran at half power. That gave it an instant-on superpower: about 3 seconds. No B+ powered the radio in the standby state because it was reversed biased. The tubes were barely warm so they lasted just as long.
That is a neat little trick… Might have to remember that one. Of course you lose your “no semiconductors” cred but that’s okay with me!