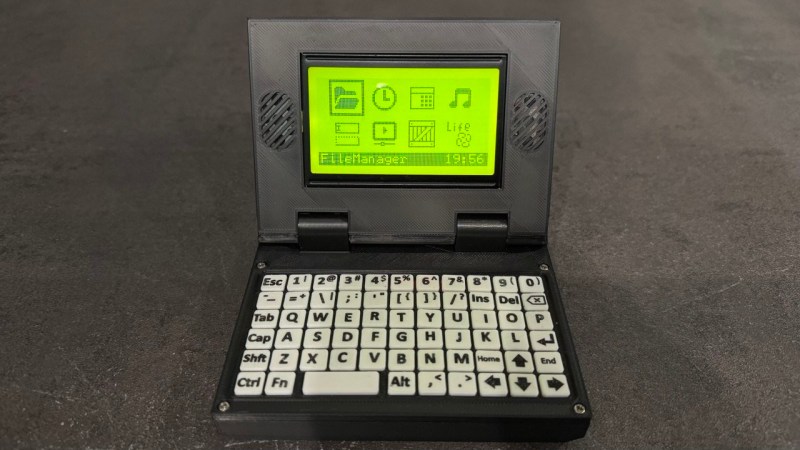
If you saw a device that had a laptop form factor playing sound and video, alt-tabbing over to play a game or take some notes, then back to the video — well, that’s normal; that’s what laptops do. If you learned the heart of this machine was an Arduino-compatible AVR microcontroller board, you’d probably do the same spit-take we did. Well, put down your coffee, because [Vladimir]’s AVR Laptop project really is that impressive.
The micro at the heart of this amazing laptop is an ATmega2560. That’s a pretty powerful chip by 8-bit microcontroller standards, but it’s still an 8-bit microcontroller, so getting the FreeRTOS-based system and all of the functions he wants onboard took some careful coding. The ST7920 128×64 monochrome LCD isn’t being driven by any standard library, for example — [Vladimir] built his own driver that does only what he wants. Even in 1-bit color, getting 24 fps video playback was a challenge, especially with sound, and the write-up gets into how that was accomplished.
The code is pending review before release, but we do look forward to seeing how he pulled it all off. In the meantime, we can at least watch it in action in the demo video embedded below.
The vibe of making an 8-bit machine do things you don’t expect to fit in 8 bits reminds us of SymbOS for the Z80. For the sysadmins out there, we’ve also seen an AVR web server.