PiMagic RaspPi to Arduino Shield Interface

Adding I/O To The Rasberry Pi Models A & B

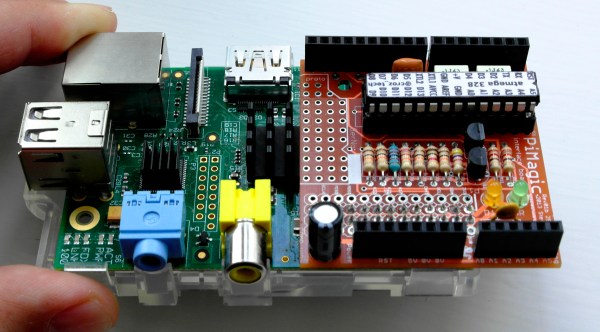
The Raspberry Pi has been the basis for many cool projects. Even so, Models A and B have been criticized for having only a handful of GPIO pins available. Sure, the new Model B+ has a 40-pin GPIO header but what if you want to use your old RaspPi with a bunch of in and outputs? [Steve] is one of those guys and has done something about it by creating a pretty neat solution he calls the PiMagic. It’s a Pi Plate that has an on board ATMEGA328 running an Arduino bootloader. The RaspPi and the Arduino communicate via UART as [Steve] felt it was a bit simpler than going the SPI or I2C route.

The RaspPi GPIO’s run on 3.3v and the ATMEGA328’s like 5v. To solve this, the PiMagic has a Level Shifter that keeps the I/O of the two boards happy. Older Pi’s had a problem burning out PCB traces when supplying too much current on the 5v supply line. [Steve] threw in a fuse that will burn out before the Pi does to ensure that no Pi’s were harmed in the making of this project.

Now that a bunch of I/O are available, how do you physically access them? Well, the PiMagic has female headers in the typical Arduino layout. This way any Arduino Shield will plug right in. [Steve] made all his source files available for those who want to make one themselves. Find an assembly video after the break.

Continue reading “Adding I/O To The Rasberry Pi Models A & B”

The Proper Way To Put An Arduino In A Raspberry Pi

For all their hoopla, the GPIO pins on the Raspberry Pi aren’t terribly useful on their own. Sure, you can output digital data, but our world is analog and there just isn’t any ADCs or DACs on these magical Raspi pins.

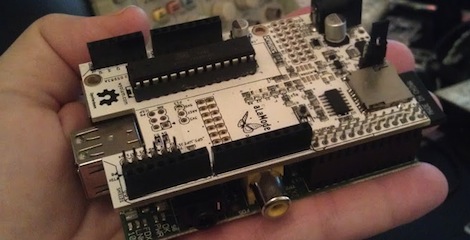
The AlaMode, a project designed by [Kevin], [Anool], and [Justin] over at the Wyolum OSHW collaborative aims to fix this. They developed a stackable Arduino-compatable board for the Raspberry Pi.

Right off the bat, the AlaMode plugs directly into the GPIO pins of the Raspberry Pi. From there, communication with the ATMega of the Arduino is enabled, allowing you to send and receive data just as you would with an Arduino. There’s a real-time clock, servo headers, plenty of ways to power the board, and even a breakout for this GPS module.

A lot of unnecessary cruft is done away with in the AlaMode; There’s no USB port, but it can be programmed directly over the GPIO pins of the Raspberry Pi. Pretty neat, and we can’t wait to grab one for our Raspi.

Raspberry Pi Prototyping Boards Available At Adafruit

If you’re one of the lucky few with a Raspberry Pi, adafruit has two things you might be interested in if you’re into GPIO hacking.

First up is the Pi Cobbler kit. It’s a 2×13 ribbon cable with a breakout PCB ready to attach to a solderless breadboard; perfect for playing around with (or cobbling together… get it?) the GPIO pins on your Raspi.

Next up is the Pi Plate kit that comes complete with enough perfboard space, screw terminals, and female headers to kill a yak. All the GPIO, I2C, and SPI pins are broken out on the Pi Plate, making it very easy to prototype a semi-permanent Raspi circuit.

They might be just prototyping boards now, but we expect these Pi Plates to quickly evolve into a truly useful device with the addition of a few level shifters, port expanders and a few ADCs and DAC thrown in for good measure. If you’re still on the fence and thinking about buying a Raspi, I ordered one last week from element14 and now have an expected ship date of November 5th. These things must be really popular.