Cutting A Record… On A CD

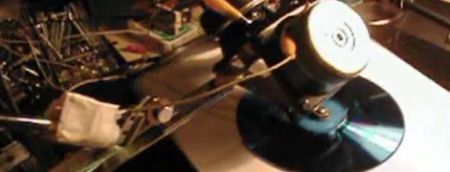
Vinyl records are an amazingly simple technology, but surprisingly we haven’t seen many builds to capitalize on the ease of recording music onto a vinyl disk. [Seringson] made his own vinyl polycarbonate cutter to record his own records at home. The impressive thing is he did this with parts just lying around.

Just like the professional and obsolete record cutters of yore, [Seringson]’s build uses two speaker drivers mounted at a 45° angle to reproduce a stereo audio track. Each of these drivers reproduce the left and right audio track by carving them into the polycarbonate of a CD with an extremely sharp needle. From the video, the audio quality of [Seringson]’s record cutter is pretty good – more than enough to recreate the sound of a 1940’s 78 RPM record, but not quite up to the task of reproducing something produced and mastered recently.

We’re extremely impressed that [Seringson] was able to a record cutter out of scraps he had lying around. Now we’ll wait patiently until a combination record/CD is released.

Tip ‘o the billycock to [Gervais] for sending this one in.

Continue reading “Cutting A Record… On A CD”

The Proper Way To Put An Arduino In A Raspberry Pi

For all their hoopla, the GPIO pins on the Raspberry Pi aren’t terribly useful on their own. Sure, you can output digital data, but our world is analog and there just isn’t any ADCs or DACs on these magical Raspi pins.

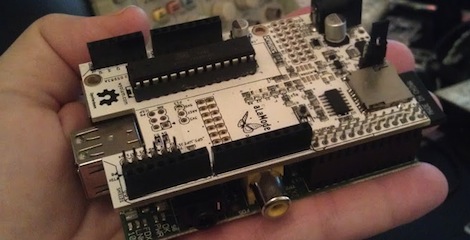
The AlaMode, a project designed by [Kevin], [Anool], and [Justin] over at the Wyolum OSHW collaborative aims to fix this. They developed a stackable Arduino-compatable board for the Raspberry Pi.

Right off the bat, the AlaMode plugs directly into the GPIO pins of the Raspberry Pi. From there, communication with the ATMega of the Arduino is enabled, allowing you to send and receive data just as you would with an Arduino. There’s a real-time clock, servo headers, plenty of ways to power the board, and even a breakout for this GPS module.

A lot of unnecessary cruft is done away with in the AlaMode; There’s no USB port, but it can be programmed directly over the GPIO pins of the Raspberry Pi. Pretty neat, and we can’t wait to grab one for our Raspi.

Growerbot Turns Gardening Into A Science

A backyard vegetable garden can be a hit-or-miss game. You’re really not sure if your crops are getting enough sun, shade, or water until it’s time for harvest and you see the results of a season of hard work. Growerbot, a hardware project by [Luke] that’s up on Kickstarter now, hopes to change that. This box will pull down how much sun and water your crops should get, and is smart enough to correct any deficiencies.

On board the Growerbot is a soil moisture sensor, light, temperature, and humidity sensors, as well as WiFi connectivity and a few relays to run pumps and turn on grow lights. The idea is to learn from mistakes and achieve optimal growth for everything connected to the Growerbot. If you’re trying to grow some heirloom tomatoes in the midwest, you can go online and get the growth profile for your area and precisely control environmental variables for the perfect crop.

As of now, there are settings for in-ground gardens, raised beds, and hydroponic setups. There’s not much in the way of ideal growing conditions aside from what is available from the USDA, but once Growerbot is released we expect the data to start flowing in.


Blinkenwall Controlled By A C64

Looking for a dual monitor setup for your Commodore 64? Look no further than the C64 controlled Blinkenwall put together over at Metalab.

The Blinkenwall is 45 glass blocks serving as a partition between the main room and the library over at Metalab in Vienna. Previously, the Blinkenwall was illuminated by 45 ShiftBrite RGB LED boards controlled by an Arduino connected to a Fonera router over a serial port. The Metalab guys have an awesome web interface that allows them (and you) to compose 45-pixel animations and play them on the Blinkenwall.

The new hardware update includes a Commodore 64, a Final Cartridge III, and the ever popular Commodore tape drive. now, instead of sending animation patterns over the Internet to an Arduino, the folks at Metalab can write their animations as 6510 assembly and save it on a cassette.

Yes, this may be a bit of an anachronism, but think of the possibilities: Prince of Persia on a 9×5 display, or just a light show to go along with some SID tunes. You can check out the video after the break.

Continue reading “Blinkenwall Controlled By A C64”

So You Want To Run A Kickstarter?

Earlier this year, [Anthony Clay] wanted to test the waters of Kickstarter with a low-risk project. The idea he came up with was a series of EE reference posters we featured in a Hackaday links post. Now that [Anthony]’s project is over, he decided to write about the whole ordeal of putting together a Kickstarter, giving all the gory details of putting on your own crowd-sourced project.

We’ve got to give [Anthony] credit for doing his homework. Even before he designed his first poster, he looked over unsuccessful Kickstarter campaigns to see what they did wrong. Once he knew what he was going to offer, [Anthony] put on his project manager hat and made sure he knew exactly what everything was going to cost, had contingency plans in place, and knew what his Kickstarter was before he spread the word.

The best laid schemes of mice and men ‘oft go awry, so of course [Anthony] hit a few snags in his Kickstarter. In his microcontroller quicknotes poster, a few weird underlines made it into the final draft of the voltage characteristics section. Everyone he showed this to thought it was no big deal, but this is something that should have been caught in proofing. Keeping in mind that [Anthony] was only doing a poster and not an electronics project, we think this is a valuable lesson for future Kickstartees.

If you’re wondering what the one thing that [Anthony] credits for the success of his Kickstarter, it’s actually the small blurb we featured in a links post. Once that happened, word started to spread and the funding picked up. To be honest, we’re impressed by that fact, and we’ll try to wield our powers carefully in the future.

Hacked ARM Dev Board Gives You Two For The Price Of One!

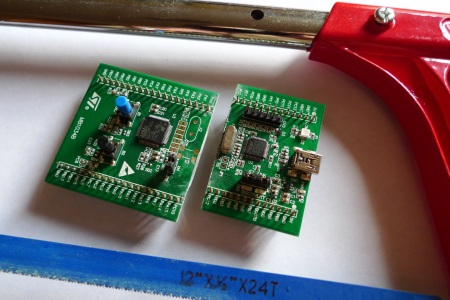
[Matt Evans] took a closer look at the popular (and cheap) STM32F0 Discovery development board and realized he could get a second board out of the deal.

The Discovery board is designed to advertise ST Microntroller’s STM32F0 microchip; which with 8k RAM, 64K Flash, a bunch of peripherals,  48MHz clock, and a low price is a great chip. Though, they needed a way to program the STM32F0. To do this they added a second, more powerful, chip to the board as an interface. The STM32F103, with 20k RAM, 64K flash, and a 72MHz clock speed. [Matt] summoned genius, and simply sawed the board in half using a hacksaw.

Of course the caveat to all this is that you need a working Discovery board, or at least a working ST-LINK programmer, at the end of the day, to get any use out of your creation. Since the boards are so cheap though, it shouldn’t be a problem to buy two.

Real Life Subtitle Glasses

[Will Powell] sent in his real-time subtitle glasses project. Inspired by the ever cool Google Project Glass, he decided he would experiment with his own version.

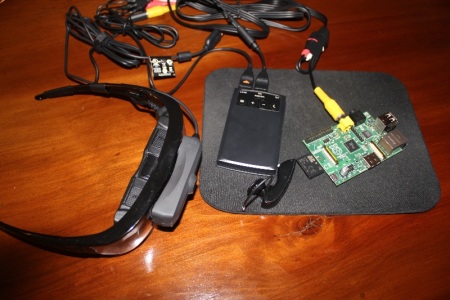
He used two Raspberry Pi’s running Debian squeeze, vuzix glasses, microphones, a tv, ipad, and iphone as the hardware components. The flow of data is kind of strange in this project. The audio first gets picked up by a bluetooth microphone and streamed through a smart device to a server on the network. Once it’s on the server it gets parsed through Microsoft’s translation API. After that the translated message is sent back to a Raspberry Pi where it’s displayed as subtitles on the glasses.

Of course this is far from a universal translation device as seen in Star Trek. The person being translated has to talk clearly into a microphone, and there is a huge layer of complexity. Though, as far as tech demos go it is pretty cool and you can see him playing a game of chess using the system after the break.

Continue reading “Real Life Subtitle Glasses”