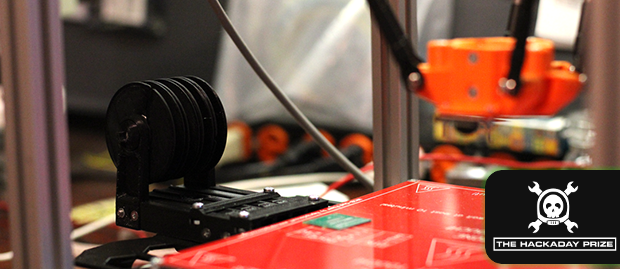
With the advent of cheap PCB fabrication, (relatively) easy to use layout tools, and a whole host of prototypes for nearly any device imaginable, the age of custom circuits is upon us. The tools to make these custom circuits, though, are usually hilariously expensive or simply unavailable to all but the most resourceful hackerspace. It would be great if every workshop in the country had a pick and place machine, and the $300 Pick and Place / 3D printer would be a great way to introduce this tech to millions of electronic tinkerers around the world. It also makes for a great entry to The Hackaday Prize.
The basic design of this machine is a delta bot. This is a wonderful choice over a Cartesian bot; deltas are faster and can have higher acceleration, a great thing to have if you want to throw together a few boards quickly. Although the configuration looks a little inverted as compared to other 3D printer delta bots, there’s a reason for this: the design was simulated with evolutionary algorithms and statistical tests to find the best geometry for the machine. The completed machine should be able to place 0201 components; anything smaller would be called dust.
The software hits all the marks, using OpenCV for image processing, ARM boards for motor control and computational tasks, and a good bit of mechanical and pneumatic work to suck up the parts. They’re even working on a 3D printed tape feeders. Now a component often overlooked when looking at the total cost of pick and place equipment is essentially free.
It’s awesome work, and even if they don’t win The Hackaday Prize, it’s still something every hackerspace should have. Now if someone would only crack the through-hole plating problem…
![]() The project featured in this post is an entry in The Hackaday Prize. Build something awesome and win a trip to space or hundreds of other prizes.
The project featured in this post is an entry in The Hackaday Prize. Build something awesome and win a trip to space or hundreds of other prizes.


Homemade PCBS? I can have a pro do it for under $100, soldermask silkscreen and all. A single board machine assembled? Hard pressed to find it under 1000. This should be a really neat project.
I like this project, or more-so, the idea that manufacturing is eventually going to be highly localized. It’s obviously not for super high volume products, but might help garage makers learn more about the automated production process. The one thing I thought, is that you still need to have a stencil made and apply the paste. Getting the stencil made isn’t hard, nor is applying the paste, but it is another physical step. I wonder if you could add a solder paste extruder to the machine. It would probably be a huge pain in the ass to tune a solder paste extruder though, and I don’t think it would really work for fine pitched ICs, probably just draw a line across all the pads and then come back after with a wick to do clean up, which defeats the purpose of eliminating the stencil in the first place. Hrm. Pointless rambling thoughts. )
If you can get reliable manufacturing close enough, you don’t need high volume processes. Imagine buying a component on Amazon and instead of 2-day shipping having it listed as available in 4 hours from your own device, or selecting a place with the proper automated manufacturing for pickup.
We do plan on offering solder paste dispense. Furthermore, we expect our system to work a bit better than attempts in the past, because of our computer vision system. We will be able to background subtraction and blob detection (size and position) for each solder blob, which closes the loop and at the very least, report errors to the user. Our vision system API works through regular blocks of ASCII text in JSON notation. So it’s all super high-level stuff that will be easy to write, when the time comes :)
We do plan on offering a solder paste dispense attachment, that fits in our auto tool changer. We expect it to work better than previous attempts at solder dispense, because we will be coupling it to our computer vision API. Via simple text blocks in JSON notation, the solder paste dispense application can do background subtraction and blob detection, and return a JSON structure containing the size and position of the dispensed blobs. This closes the loop, and at the very least, will alert the user if the blobs do not come out within the required tolerance specified. We will be offering other attachments for our auto-tool-change system like hot air rework system (also capable of soldering a few parts here and there), and a pogo-pin Atmel AVR 6-pin programmer, that allows an Arduino-compatible pcb to be programmed quickly without building a fixture or needing a connector.
Please disregard the double-post… I hadn’t logged in a long time and the first post didn’t show up for 15 minutes after I posted it :-/
You don’t need a stencil.
Using a hand-operated paste dispenser, you can populate a medium size board with solder paste in no time. I’ve done it several times.
Is he promising to sell it for $300 or just that the parts cost $300?
Right now we have a BOM at just over $300, which is the retail prices of buying the parts from well-known suppliers. We are hoping that by getting suppliers in China, that we can get the BOM down to the point where we can sell kits at $300, and not go broke doing it. We’ll also sell fully-built machines with and without support, but that will be a bit more. However it will still be a great deal compared to the competition, e.g. NeoDen TM-220A which sells for more and does less.
Groan, another thing you can’t look at without joining something else. Getting like Microsoft and Google is this and I stopped using them when they started telling me what I wanted to do.
I didn’t join anything, and therefore won’t get automatic updates, but I can look at everything. The link in the article shows a lot of images and more in formation, including links to the project page (which is a bit empty), and the GIT source files, etc. Did I miss anything?
Hmm, well I must have. Last night all I could get was the invite to sign up, that is all I have been able to get for ever, since the site opened I think but this morning I can scroll down and see things. :o
“All through an intuitive web GUI running on a Raspberry Pi”
Sounds like it would be easy to operate this remotely through the web, instead of just locally through a browser based interface. Better play it safe and license everything under the AGPL instead of just the GPL or some other open hardware license.
Speaking of licensing, I don’t see any info. I know the Hackaday Terms Of Service require everything to be licensed to HaD or something. (or is everything cc-licensed?) Does anyone know what the deal is?
> Speaking of licensing, I don’t see any info. I know the Hackaday Terms Of Service require everything to be licensed to HaD
Incorrect. You give HaD the rights to display, distribute, and all the other things that make a project hosting site possible. Other than that, it’s yours.
The summary was a bit misleading. We’re using a Node.js web server running on a Raspberry Pi. The GUI is provided on any HTML5 web browser, including tablets and phones. We do not intend at this time for there to be an LCD display with GUI on the machine itself. We’re going more the ‘internet of things’ route with this project.
As for licensing, I’ve read the hackaday.io fine print. The use the term licensing in the context of open-source licensing, and also in the context of licensing the content, videos, etc. on their site for publicity purposes. We don’t really have any concerns about either.
While I do appreciate attempts to reduce BOM cost, not everything needs to be a bargain basement price. Given the cost of PCBs and components, I’d much rather pay $2000 for a machine that works precisely, reliably and is convenient, than one that is cheap.
This is a tool geared toward turning out pcbs in volumes and will never be worthwhile for onesies and twosies. At some point very quickly, you’re going to realize that you want to turn out $500 in components on a single run, and the machine you’ve selected to do the placement is powered by a hamster running on a wheel because you were too cheap to pay for electricity from the wall.
We will absolutely have a higher-priced machine, targeted towards small businesses, Hackerspaces, and Makerspaces. But our Hackaday.io project will be focused on a $300 version for end-users and hobbyists :)
But if you normally need tens of pcb’s, which you would normally solder by hand, than it would be great to have this machine.
What I’m more curious about is the solenoid/vacuum system… I’ve been tinkering around with my own PnP design, and ensuring the tubing, vacuum pressure, solenoid valves, vacuum reservoirs, flow valves, multiple nozzle sizes, o-rings, and positive pressure release systems that must be implemented are appropriate and sufficient is no easy task… especially at this target price point. I’ve mostly been toying with aquarium line tubing and have a system that works pretty well with a PVC vacuum reservoir (though finding a reasonably priced vacuum pump has been a pain), but sourcing the appropriate check valves, solenoids and hose barbs can be quite problematic. I see most of the BOM has been geared towards the electronics, frame and movement pieces; what’s the price overhead for the PnP-specific parts – or the 3D printer parts, for that matter?
(though finding a reasonably priced vacuum pump has been a pain)
Since you are already toying with aquarium line tubing, perhaps you could convert an aquarium pump into vacuum … err, sub-atmospheric pressure pump?
I found this on Instructables:
http://www.instructables.com/id/Electric-Vacuum-Pen-From-Aquarium-Air-Pump/
We’re using a very minimalist approach for the $300 pick and place. It currently uses a simple diaphragm pump (available on Sparkfun for $15 USD, or direct from China for much less), a cheap solenoid with 3D printed housing, some tubing, a hollow shaft stepper motor, and Luer Lock syringe tips. We’re also hopeful that our Murata Microblower system will have enough suction to completely eliminate the diaphragm pump, solenoid, and tubing. The microblowers are cool, they’re piezo element diaphragm pumps that weigh a few grams, so we can mount it right beside the nozzle. We think this will work great for small parts (<1206) but unfortunately does not have the suction for large parts. But a combination of the two (microblower with small nozzle) and the big pump with a big nozzle is a great way to cover different part sizes without a complicated array of expensive solenoids, valves, air dryers, filters, pumps, and venturi's. We solved the interchangable nozzle problem by interchanging the tool head (that would mean you can put any size nozzle on the vacuum nozzle tool, but you would need two or three vacuum nozzle tool heads with stepper motor, bearings, luer lock male fitting, etc, to do a full range of sizes. The BOM cost isn't too bad for each of the tool heads though). Oh, and we're solving the problem of luer lock tip misalignment with computer vision. Rotate to four quadrants, locate the tip, extrapolate, and use these calculations when placing components.
This is very exciting!
I did some quick searching around for open source pick and place. The most viable option (that actually “shipped”) was in November 2013 for over 6k (USD):
http://makerflux.com/diy-smd-pick-and-place-machine-project/
Various other projects/wiki pages etc exist at various forms of completion.
It seems like the comments are mostly positive. As for the price comment (rather pay 2k for something that’s “perfect”) I can see that. However it seems to me that this $300.00 will be a base unit and folks will have various accessories and such to do things as needed. Those will have various price/performance mixes.
A great project, much needed.
I will definitely buy one :) It looks great!
Neil, I wish you good luck dude. If you can make a pickNplace + 3D printer at that price point you are my hero.