You know how sometimes you just can’t resist collecting old hardware, so you promise yourself that you will get around to working on it some day? [Danny] actually followed through on one of those promises after discovering an old Radio Shack TRS-80 TP-10 thermal printer in one of his boxes of old gear. It looks similar to a receipt printer you might see printing receipts at any brick and mortar store today. The original printer worked well enough, but [Danny] wasn’t satisfied with its 32 character per line limitation. He also wanted to be able to print more complex graphics. To accomplish this goal, he realized he was going to have to give this printer a brain transplant.
First, [Danny] wanted to find new paper for the printer. He only had one half of a roll left and it was 30 years old. He quickly realized that he could buy thermal paper for fax machines, but it would be too wide at 8.5 inches. Luckily, he was able to use a neighbor’s saw to cut the paper down to the right size. After a test run, he knew he was in business. The new fax paper actually looked better than the old stuff.
The next step was to figure out exactly how this printer works. If he was going to replace the CPU, he was going to need to know exactly how it functioned. He started by looking at the PCB to determine the various primary functions of the printer. He needed to know which functions were controlled by which CPU pins. After some Google-Fu, [Danny] was able to find the original manual for the printer. He was lucky in that the manual contained the schematic for the circuit.
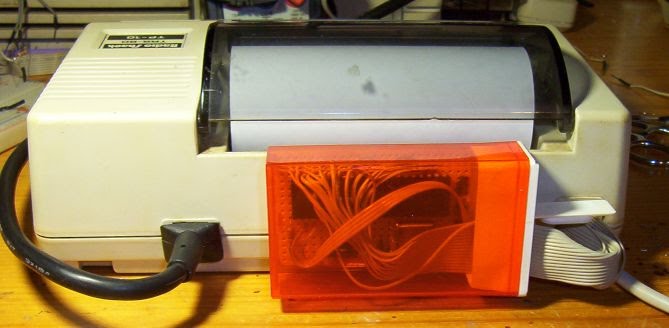
Once he knew how everything was hooked up, [Danny] realized that he would need to learn how the CPU controlled all of the various functions. A logic analyzer would make his work much easier, but he didn’t happen to have one lying around. [Danny] he did what any skilled hacker would do. He built his own!
He built the analyzer around an ATMega664. It can sample eight signals every three microseconds. He claims it will fill its 64k of memory in about one fifth of a second. He got his new analyzer hooked up to the printer and then got to work coding his own logic visualization software. This visualization would provide him with a window to the inner workings of the circuit.
Now that he was able to see exactly how the printer functioned, [Danny] knew he would be able to code new software into a bigger and badder CPU. He chose to use another ATMega microcontroller. After a fair bit of trial and error, [Danny] ended up with working firmware. The new firmware can print up to 80 characters per line, which is more than double the original amount. It is also capable of printing simple black and white graphics.
[Danny] has published the source code and schematics for all of his circuits and utilities. You can find them at the bottom of his project page. Also, be sure to catch the demonstration video below.


Azu-Nyan! <3
That’s awesome!
BTW, do you have details on the DIY logic analyzer?
The logic analyzer and the accompanying X11 visualizer utility and all sources are downloadable on the project website, at the very bottom of the page.
Word of warning, it’s nowhere near a professional analyzer. It was just a quick one-off to grab some signals at a low rate. At its fastest it can sample 8 signals in about 3us, so any signal > 100Khz is not going to be reliably sampled.
For my project it worked wonderfully.
Totally wasn’t paying full attention, interpreted title as “3D printer” and thought someone was laying down some wetware.
-slightly disappointed, but this is still really cool.
1-bit catgirl prints. That’s a good enough reason to do this hack.
One does not to have to have a reason, although thats a good one :) This piece of work is avesome!
It wasn’t really “luck” that the schematics were in the manual — Radio Shack did that for all of their gear, back in the day. It’s too bad they stopped doing this.
Hey RS, since you’re heading back to your roots to save the brand, how about re-starting this idea?
How easy would it be to add “real” greyscale support? The final demo video makes it clear there’s something, but I can’t quite tell what?)
Also, might there be a way to use the existing µPD8049 footprint to hold the ATMega?