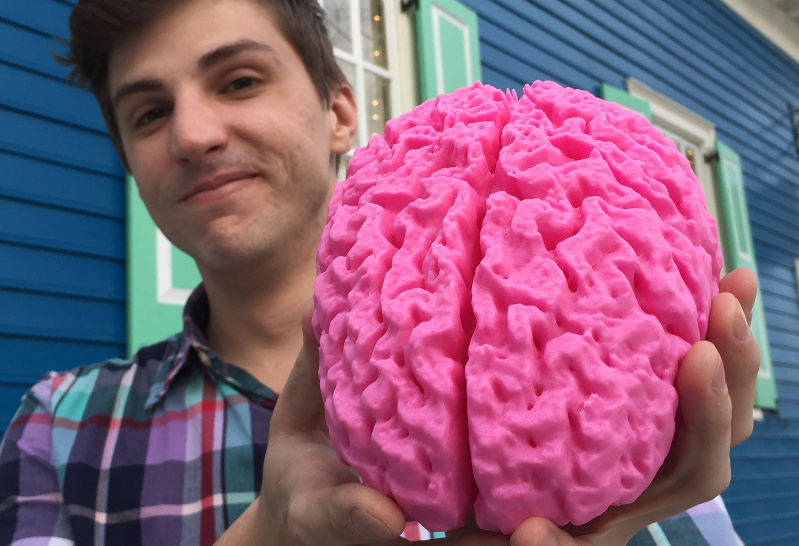
This hack is a strange mixture of awesome and ghoulish. [Andrew Sink] created a 3D printed version of his brain. He received a CD from an MRI session that contained the data obtained by the scan. Not knowing what to do with it he created a model of his brain.
Out of a number of images, some missing various parts of his head, he selected the one that was most complete. This image he brought into OisriX, a Mac program for handling DICOM files. He worked on the image for an hour dissecting away his own eyes, skull, and skin. An STL file containing his brain was brought over to NetFabb to see how it looked. There was still more dissection needed so [Andrew] turned to Blender. More bits and pieces of his skull’s anatomy were dissected to pare it down to just the brain. But there were some lesions at the base of the brain that needed to be filled. With the help of [Cindy Raggio] these were filled in to complete the 3D image.
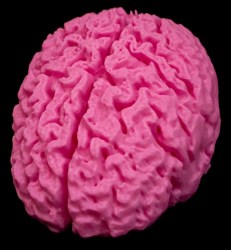
The usual steps sent it to the 3D printer to be produced at 0.2 mm resolution. It only took 49 hours to print at full-size. This brain was printed for fun, but we’ve seen other 3D printed brain hacks which were used to save lives. How many people do you know that have a spare brain sitting around?


“But there were some lesions at the base of the brain… !!” Surely you mean gaps in the MRI image. Other than that I see a potential little business here.
Why not using it as a case for a computer running a neural network?
Is there any 3D printer that can print with wax ?
I was thinking print it double sized in wax, cover that in plaster of paris. evaporate the wax, and fill the mold with metal.
With all that surface area it would make a good cooling cooling system for a mini-ITX/nano-ITX/pico-ITX board.
If you print it double-sized and cast it in metal it’s going to weigh over 100 pounds.
Which metal are you filling it with ? I was picturing Aluminium and 3D printing the wax in two parts to allow a sand core, or else bore it hollow afterwards.
Brain volume (average male) 1260cm^3
Aluminium
Density near r.t. 2.70 g/cm^3
when liquid, at m.p. 2.375 g/cm^3
Double sized would be 8x the volume, so 10080cm3 and if was filled with Aluminium that would weigh 23.940kg (52.8 lb). The weight could be boosted up higher if it was filled with lead 107.4528 kg (236.9lb) :)
ref:
https://en.wikipedia.org/wiki/Brain_size
https://en.wikipedia.org/wiki/Aluminium
You can burnout a mold with PLA just like you can with wax casting
There are also specialty filaments, including wax.
@truth – USe PLA as a model for Pewter metal – http://hackaday.com/2015/12/27/pewter-casting-with-pla/
looks like the resolution could be improved, but very nice
You can do much better than that.. (it’s still nice to see some printed brains ^^) Did one too. First I would use something like Invesalius or if accessible: Amira. Then there’s alot more that can be done to preprocess the DICOM files (depending on the program used) The problem is always the MRI resolution and the Image Type (shoud be T1 weighted) http://imgur.com/a/U4AoJ First pic. is a very badly done low res segmentation. 2nd Pic is a cast silicone model made from a high res segmentation. 3rd pic is a part of the cast. If somebody is really interested I could also write a tutorial how to make a high quality high res. brain made of silicone.
Still, good work andrew!
Would love to get a detailed step by step on that. I’m mostly interested in the preparation of the STL-file. I’ve been sitting on some DICOM data of myself that I’ve been wanting to print for ages. I’ve wanted to print out my hip with attached spinal column (it’s a scan of my midsection so that’s what I’ve got to work with). I’ve managed to extract a model or two of it but it’s usually riddled with holes (either take away too much bone or get left with too much soft tissue and make it “lumpy”).
Or maybe the scan itself simply isn’t hi-res enough to extract what I want. It was just one of a few scans to check for kidney stones/check stent/check if I was “clean” afterwards.
Leave a comment on my website so I have your e-mail address. I can probably give you some help…
Freesurfer is an automated surface extraction tool for T1 weighted structural MRI images. And it comes with a handy converter to output STL files from the calculated surface meshes. That’s what I used when I wanted to get a brain model printed for a friend of mine.
There was still some cleanup work necessary on the STL file, but pretty much all of the extraneous tissue gets stripped away automatically.
I tried freesurfer as well and the result was just awful, especially for the amount of time it takes to get everything running. Try invesalius instead, it’s also free and much much more convenient to work with.
(talking about the first pic)
That looks very uneven, branches are too thin and exaggerated. This is a common issue I see with printed MRIs, especially from those that don’t have much experience with them. What is the apparatus in the second picture, are you trying to measure the resistance of the silicone brain?
I’ve got some old MRIs (age 13 or so) and think it would be awesome to compare the actual changes in my brain over the course of ten years or so. Just have to get another MRI somehow…
http://imgur.com/a/AGsid Some other pictures. The high res. stl. file is about 200MB. The brian is still a liitle bit distorted because it was a post mortem MRI. Unfortunately there was no pre mortem data available.
I am currently developing a model for training purposes. I will fit an aneurysm in the brain that will be filled with liquid (with a pump). Then a craniotomy will be performed on the plasic skull to get an entrance to the brain/aneurysm. The the surgeons/students can then train the clipping of the aneurysm.
The skull is sitting in a mayfield clamp. (Those are also used during brian surgery). Next to it is a power supply for the pump. No measurements.
Apparently this was covered recently in Instrutables:
http://www.instructables.com/id/3D-print-your-own-brain/
This is something I’d like to tray. However I’d print of each slice to be assembled to make model of the full brain. Only if the see where the scar tissue is can one fully understand what happened to me.
Dark.
Personally I hope I never need to get an MRI brain scan done for any reason but if I did, 3D printing my brain would be cool :)
I did the same thing! Some of the terms in this article are way wrong “square mileage” haha. It was a ton of fun! If anyone has MRI data, I would be happy to give them an STL they could print. I’ve done it for several people now and have the process down :) http://thedailyharoldblog.tumblr.com/post/82409057450/print-your-brains-out
Hi Ryan, I have some MRI data and would be very interested if you would be happy to help me with an STL.
How should I get the data to you?
He should use the printed brain to make a silicone mold, every Halloween fill it with jello and let people eat your brain!
Awesome idea!
Super cool idea.