Tiny Morse Code USB Keyboard

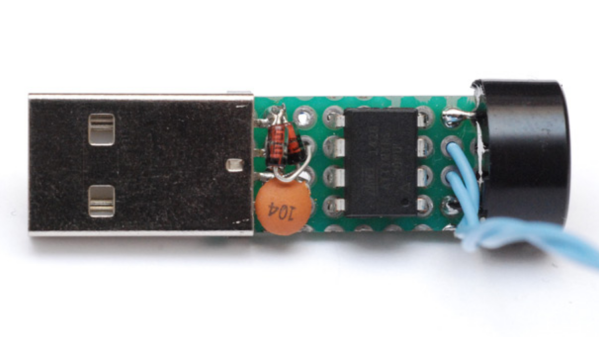
We’ve featured quite a few of [mitxela]’s projects here in the past, and many of them have the propensity to be labelled “smallest”. His Morse Code USB Keyboard Mk II adds to that list. It’s a Saturday afternoon project, with a few parts slapped onto a piece of perf-board, that allows using a Morse key as a USB keyboard. This project isn’t new or fresh, but we stumbled across it while trying to figure out a use for a Morse key lying in the author’s bin of parts. You can practise transmitting, by reading text and typing it out on the key, and then look it up on your computer to see if you made any mistakes. Or you can practise receiving, by asking a friend to punch it out for you. Either way, it’s a great way to hone your skills and prepare for your radio operators license exam.

The project is a follow up to his earlier one where he hooked up the Morse key via a RS-232 — USB converter directly to a computer and let the code do all the work. That turned out to be a very resource hungry, impractical project and made him do it right the next time around. The hardware is dead simple. An ATtiny85, a piezo buzzer, some decoupling capacitors, and a few resistors and zeners to allow a safe USB interface. The design accommodates a straight key, but there is one spare pin left over in the ATtiny to allow for iambic or sideswiper keys too. There is no speed adjustment, which is hardcoded at the moment. That isn’t very user friendly, and [mitxela] suggests adding a speed potentiometer to that last remaining pin on the ATtiny. This would prevent use of iambic/sideswiper keys. Or, you could use the RST pin on the ATtiny as a (weak) IO. The RST pin can read analog values between 5V and 2.5V, and will reset when voltage falls below 2.2V. Or just use another microcontroller as a last resort.

For the USB interface, [mitxela] is using the V-USB library after wasting some time trying to reinvent the wheel. And since this is designed to work as a HID, there are no drivers required – plug it in, and the OS detects it as a keyboard. He’s borrowed code from the EasyLogger project to use the internal oscillator and help free up the IO pins. And to detect the characters being typed, his code uses a long string of compare statements instead of a dictionary lookup. Writing that code was tedious, but it makes the identification quicker, since most characters can be identified in less that five comparisons (one dit = E, two dits = I, three dits = S and so on). This “tree” makes it easier to figure it out.

If you’d like to look up some of his other “tiny” projects, check out The smallest MIDI synthesizer, Smallest MIDI synth, again! and the ATtiny MIDI plug synth.

Continue reading “Tiny Morse Code USB Keyboard”

Using A Touch Sensor As A Telegraph Key

[Sebastian] is learning Morse code and CW radio, and of course he needed a telegraph key. Instead of using the terribly unergonomic paddle style key, he built a capacitive touch iambic key over the course of a few evenings.

An iambic key usually has two switches. When one switch is closed, it will transmit a ‘dit’. When the other switch is closed, it will transmit a ‘dah’. Instead of using mechanical paddles, [Sebastian] brought his iambic key into the 21st century by using a touch sensor. An ATtiny45 measures the time it takes for a single metal plate to fully charge. It’s the same idea behind the wonderful Arduino CapSense library.

This isn’t the first capacitive-touch iambic key we’ve seen; this little guy is just a pair of metal contacts and resistors that plug right into an Arduino. With an ATtiny45, [Sebastian]’s build is a full-blown iambic telegraph key that plugs right into his CW rig. You can check out the walk through of the project along with [Sebastian] trying out his iambic key after the break.

Continue reading “Using A Touch Sensor As A Telegraph Key”

Doing It Right With A Morse Code Keyboard

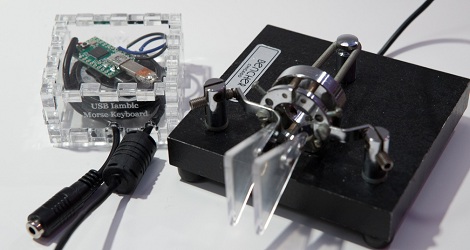
Hackaday has seen dozens of Morse code keyboards over the years, but [Hudson] at NYC Resistor finally managed to give that idea the justice it deserves. He built a USB Morse code keyboard with the same type of telegraph key the pros use.

For his project, [Hudson] got his hands on a wonderful iambic paddle that is usually hooked up to CW rigs. Unlike previous Morse keyboards we’ve seen, [Hudson] used iambic paddles, a telegraph key with one lever for dits and another for dahs. Because the dits and dahs are separate electrical connections, it’s extremely easy for the microcontroller – a Teensy – to parse the Morse code and send the correct letter to the computer.

[Hudson] also added some audio feedback for the dits and dahs, and designed a laser-cut enclosure for the Teensy and speaker. Check out the video of the iambic keyer keyboard in action after the break.
Continue reading “Doing It Right With A Morse Code Keyboard”

An Iambic Keyer In 5 Minutes

When most people think about a telegraph key, a piece of 1890s tech with a lever that moves up and down comes to mind. These ‘straight keys’ were terrible for telegraphers and led to repetitive stress injuries like carpel tunnel syndrome..Iambic keys came along and move the contacts to a horizontal position. If you ever see a HAM playing with his CW rig, chances are they’re using an iambic key. It’s great, then, that you can build your own iambic key in five minutes using parts you have lying around.

The build [Dimitris] put up is dead simple – just two metal contacts with a pair of 470K pullup resistors. All this connects to three pins on an Arduino. All the micocontroller needs to do is measure the rise time a touch sensor pin when a voltage is applied. If there’s a finger on the pin, the capacitance increases and the rise time is longer. After that, just assign one sensor as ‘dit’ and the other as ‘dah’ and you’ve got an iambic key.

[Dimitris] put all the code for his project up on his blog. His iambic key seems like the perfect project after a tiny Morse trainer. Check out the video of the key in action after the break

Continue reading “An Iambic Keyer In 5 Minutes”

A Second Life For Dead Hard Drives

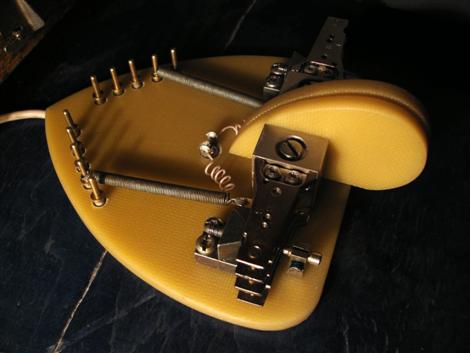
[AndyUU1CC] has put together directions on how he built an Iambic Paddle out of some old hard drives. The iambic paddle is a device for telegraphy. More specifically, it is that piece that you always see people clicking with their finger when they send a telegraph. We hadn’t seen an iambic or “dual lever” style before, but we now know that this is not an uncommon design. While it is ultimately just a fancy set of switches, we can’t help but be impressed with the looks of it.

[via instructables]