How Much Bandwidth Does CW Really Occupy?

Amateur radio license exams typically have a question about the bandwidths taken up by various modulation types. The concept behind the question is pretty obvious — as guardians of the spectrum, operators really should know how much space each emission type occupies. As a result, the budding ham is left knowing that continuous wave (CW) signals take up a mere 150 Hertz of precious bandwidth.

But is that really the case? And what does the bandwidth of a CW signal even mean, anyway? To understand that, we turn to [Alan (W2AEW)] and his in-depth look at CW bandwidth. But first, one needs to see that CW signals are a bit special. To send Morse code, the transmitter is not generating a tone for the dits and dahs and modulating a carrier wave, rather, the “naked” carrier is just being turned on and off by the operator using the transmitter’s keyer. The audio tone you hear results from mixing the carrier wave with the output of a separate oscillator in the receiver to create a beat frequency in the audio range.

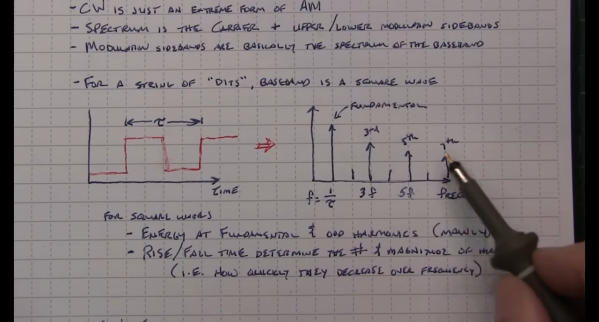
That seems to suggest that CW signals occupy zero bandwidth since no information is modulated onto the carrier. But as [Alan] explains, the action of keying the transmitter imposes a low-frequency square wave on the carrier, so the occupied bandwidth of the signal depends on how fast the operator is sending, as well as the RF rise and fall time. His demonstration starts with a signal generator modulating a 14 MHz RF signal with a simple square wave at a 50% duty cycle. By controlling the keying frequency, he mimics different code speeds from 15 to 40 words per minute, and his fancy scope measures the occupied bandwidth at each speed. He’s also able to change the rise and fall time of the square wave, which turns out to have a huge effect on bandwidth; the faster the rise-fall, the larger the bandwidth.

It’s a surprising result given the stock “150 Hertz” answer on the license exam; in fact, none of the scenarios [Allen] tested came close to that canonical figure. It’s another great example of the subtle but important details of radio that [Alan] specializes in explaining.

Continue reading “How Much Bandwidth Does CW Really Occupy?”

Pico-Sized Ham Radio

There are plenty of hobbies around with huge price tags, and ham radio can certainly be one of them. Experienced hams might have radios that cost thousands of dollars, with huge, steerable antennas on masts that can be similarly priced. But there’s also a side to the hobby that throws all of this out of the window in favor of the simplest, lowest-cost radios and antennas that still can get the job done. Software-defined radio (SDR) turned this practice up to 11 as well, and this radio module uses almost nothing more than a microcontroller to get on the air.

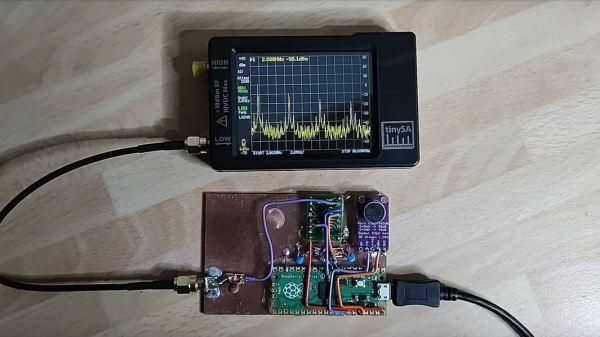
The design uses the capabilities of the Raspberry Pi Pico to handle almost all of the radio’s capabilities. The RF oscillator is driven by one of the Pico’s programmable I/O (PIO) pins, which takes some load off of the processor. For AM and SSB, where amplitude needs to be controlled as well, a PWM signal is generated on another PIO which is then mixed with the RF oscillator using an analog multiplexer. The design also includes a microphone with a preamplifier which can be fed into a third PIO; alternatively it can receive audio from a computer via the USB interface. More processor resources are needed when generating phase-modulated signals like RF, but the Pico is still quite capable of doing all of these tasks without jitter larger than a clock cycle.

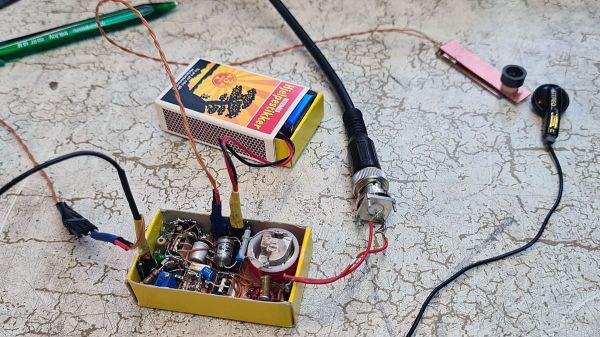
Of course this only outputs a signal with a few milliwatts of power, so for making any useful radio contacts with this circuit an amplifier is almost certainly needed. With the heavy lifting done by the Pico, though, the amplifier doesn’t need to be complicated or expensive. While the design is simple and low-cost, it’s not the simplest radio possible. This transmitter sends out radio waves using only a single transistor but you will be limited to Morse code only.

Continue reading “Pico-Sized Ham Radio”

Spy Transceiver Makes Two Tubes Do The Work Of Five

Here at Hackaday, we love following along with projects as they progress. That’s especially true when a project makes a considerable leap in terms of functionality from one version to another, or when the original design gets more elegant. And when you get both improved function and decreased complexity at the same time? That’s the good stuff.

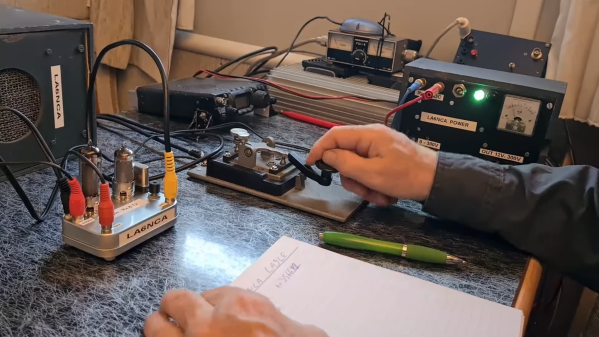
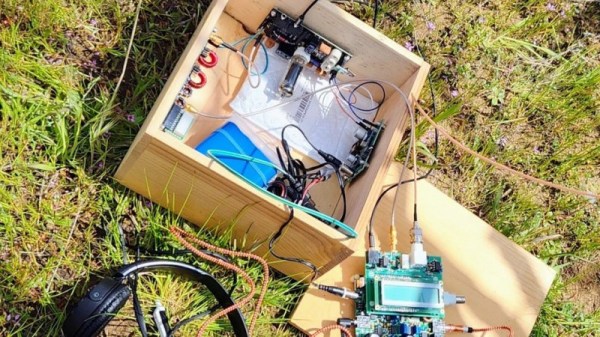
Take the recent improvements to a vacuum tube “spy radio” as an example. Previously, [Helge (LA6NCA)] built both a two-tube transmitter and a three-tube receiver, either of which would fit in the palm of your hand. A little higher math seems to indicate that combining these two circuits into a transceiver would require five tubes, but that’s not how hams like [Helge] roll. His 80-m CW-only transceiver design uses only two tubes and a lot of tricks, which we admit we’re still wrapping our heads around. On the receive side, one tube serves as a mixer/oscillator, combining the received signal with a slightly offset crystal-controlled signal to provide the needed beat frequency. The second tube serves as the amplifier, both for the RF signal when transmitting, and for audio when receiving.

The really clever part of this build is that [Helge] somehow stuffed four separate relays into the tiny Altoids tin chassis. Three of them are used to switch between receive and transmit, while the fourth is set up as a simple electromagnetic buzzer. This provides the sidetone needed to effectively transmit Morse code, and is about the simplest way we’ve ever seen to address that need. Also impressive is how [Helge] went from a relatively expansive breadboard prototype to a much more compact final design, and how the solder was barely cooled before he managed to make a contact over 200 km. The video below has all the details.

Continue reading “Spy Transceiver Makes Two Tubes Do The Work Of Five”

The Peak Of Vacuum Tube Radio Design

One of the more popular trends in the ham radio community right now is operating away from the shack. Parks on the Air (POTA) is an excellent way to take a mobile radio off-grid and operate in the beauty of nature, but for those who want to take their rig to more extreme locations there’s another operating award program called Summits on the Air (SOTA) that requires the radio operator to set up a station on a mountaintop instead. This often requires lightweight, low-power radios to keep weight down for the hike, and [Dan] aka [AI6XG] has created a radio from scratch to do just that.

[Dan] is also a vacuum tube and CW (continuous wave/Morse code) operator on top of his interest in summiting various mountains, so this build incorporates all of his interests. Most vacuum tubes take a lot of energy to operate, but he dug up a circuit from 1967 that uses a single tube which can operate from a 12 volt battery instead of needing mains power, thanks to some help from a more modern switch-mode power supply (SMPS). The SMPS took a bit of research, though, in order to find one that wouldn’t interfere with the radio’s operation. That plus a few other modern tweaks like a QCX interface and a switch to toggle between receive to transmit easily allows this radio to be quite versatile when operating while maintaining its portability and durability when summiting.

For those looking to replicate a tube-based radio like this one, [Dan] has made all of the schematics available on his GitHub page. The only other limitation to keep in mind with a build like this is that it tends to only work on a very narrow range of frequencies without adding further complexity to the design, in this case within the CW portion of the 40-meter band. But that’s not really a bad thing as most radios with these design principles tend to work this way. For some other examples, take a look at these antique QRP radios for operating using an absolute minimum of power.

Two-Tube Spy Transmitter Fits In The Palm Of Your Hand

It’s been a long time since vacuum tubes were cutting-edge technology, but that doesn’t mean they don’t show up around here once in a while. And when they do, we like to feature them, because there’s still something charming, nay, romantic about a circuit built around hot glass and metal. To wit, we present this compact two-tube “spy radio” transmitter.

From the look around his shack — which we love, by the way — [Helge Fykse (LA6NCA)] really has a thing for old technology. The typewriter, the rotary phones, the boat-anchor receiver — they all contribute to the retro feel of the space, as well as the circuit he’s working on. The transmitter’s design is about as simple as can be: one tube serves as a crystal-controlled oscillator, while the other tube acts as a power amplifier to boost the output. The tiny transmitter is built into a small metal box, which is stuffed with the resistors, capacitors, and homebrew inductors needed to complete the circuit. Almost every component used has a vintage look; we especially love those color-coded mica caps. Aside from PCB backplane, the only real nod to modernity in the build is the use of 3D printed forms for the coils.

But does it work? Of course it does! The video below shows [Helge] making a contact on the 80-meter band over a distance of 200 or so kilometers with just over a watt of power. The whole project is an excellent demonstration of just how simple radio communications can be, as well as how continuous wave (CW) modulation really optimizes QRP setups like this.

Continue reading “Two-Tube Spy Transmitter Fits In The Palm Of Your Hand”

Translating And Broadcasting Spoken Morse Code

When the first radios and telegraph lines were put into service, essentially the only way to communicate was to use Morse code. The first transmitters had extremely inefficient designs by today’s standards, so this was more a practical limitation than a choice. As the technology evolved there became less and less reason to use Morse to communicate, but plenty of amateur radio operators still use this mode including [Kevin] aka [KB9RLW] who has built a circuit which can translate spoken Morse code into a broadcasted Morse radio signal.

The circuit works by feeding the signal from a microphone into an Arduino. The Arduino listens for a certain threshold and keys the radio when it detects a word being spoken. Radio operators use the words “dit” and “dah” for dots and dashes respectively, and the Arduino isn’t really translating the words so much as it is sending a signal for the duration of however long each word takes to say. The software for the Arduino is provided on the project’s GitHub page as well, and uses a number of approaches to make sure the keyed signal is as clean as possible.

[Kevin] mentions that this device could be used by anyone who wishes to operate a radio in this mode who might have difficulty using a traditional Morse key and who doesn’t want to retrain their brain to use other available equipment like a puff straw or a foot key. The circuit is remarkably straightforward for what it does, and in the video below it seems [Kevin] is having a blast using it. If you’re still looking to learn to “speak” Morse code, though, take a look at this guide which goes into detail about it.

Thanks to [Dragan] for the tip!

Continue reading “Translating And Broadcasting Spoken Morse Code”

Odd Inputs And Peculiar Peripherals: The Morse Keyboard

When it comes to rendering text input into an electronic form,the newest keyboards use USB for wired interfacing, while the oldest Morse keys use a single conductor. Shall the two ever meet? For [Matthew Sparks] the answer is yes, with his “The Gadget” Morse-to-USB HID interface which presents a Morse key to a computer as though it were a USB keyboard.

At its heart is a Seeduino Arduino clone, upon which the Morse key waggles a pin, and which through the extensive magic of software recognizes the keyed characters and converts them into USB key presses for the computer. It’s thus a surprisingly simple project, and the write-up spends far more time proselytizing the art of the carrier wave than it does on Arduino code.

Morse is simultaneously a manual art form, an efficient means of communicating through congested radio bands, and an anachronism, which probably explains its continued appeal in the radio amateur fraternity. We’re not sure how many keyboard warriors will switch to the single key with this project, but we can see that it might be a useful aid to learning as well as a pretty quick input method for the owner of an experienced fist.

Morse has featured in many projects here before, not least in this assistive Morse keyboard.