
Despite my atrociously short attention span, I’ve always loved pinball. Maybe it is something about all the flashing lights and clunking solenoids. Maybe it is just the simple physics at the center of it all. I’m not really sure. My kids, however, don’t share my enthusiasm. I suspect part of it is that they never wandered through a fog filled arcade in the middle of the night, hopped up on Reese’s Pieces with a shrinking pile of quarters in their pocket. The other part might be the fact that they have gotten used to the Nintendo Wii and the Xbox Kinect (we just got one last week).
Watching them jump up and down playing an extremely simple and repetitive game with the Kinect gave me an idea. I envisioned pinball projected on the side of my house, the kids jumping up and down in front of it to move the paddles. Keep reading to see how I plan to build it and what I’ve done so far. There’s a full video, but also text of the entire thing.
Thanks to that deficiency in the attention span department I mentioned earlier, one of the main requirements of this project were that it be fast and fairly easy. Not only do I simply not want to spend weeks building this, I doubt it will hold anyones attention for more than an evening or two. It is also worth noting that I’m not an engineer. I’m not as smart as the writers I tend to hire, and I’m certainly not as smart as most of the readers of hackaday. What I do is usually rough, dirty, and barely works. The easiest possible way I could think to do this, was to make a couple rugged stomp sensors and just wire them into a keyboard. This should be really easy to do and will work perfectly with Virtual Pinball.
In Part 1, I build the breakout box from an old keyboard. I decided to go ahead and make this part fairly reusable, in case I wanted to do other projects that needed external input in the future. I used what I had lying around to reduce the cost.
Parts:
- old keyboard (I chose a USB one so I could use it with laptops)
- project enclosure
- Some kind of external connectors for your sensors
Step 1. Tear stuff apart.
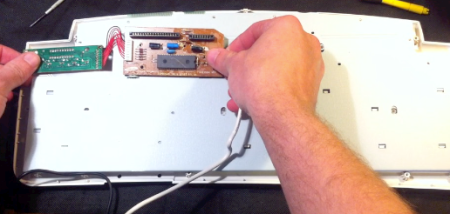
Rip that keyboard apart. Save the screws. As you can see in the video, you need the board that actually sends the data to the computer. The rest is not needed for this project. However, you could just as easily leave the board in place and use the functional keyboard itself as the enclosure. I don’t really see a downfall to this plan… maybe I should have done that!
Step 2. plan your inputs.
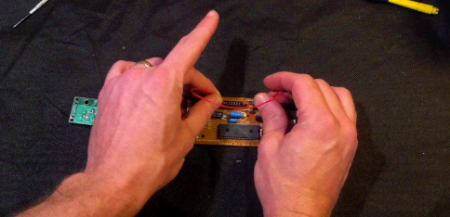
For Pinball Stomp, we only need an input for Left flipper, Right flipper, add coin, begin game, and pull plunger. The easiest way to get these was to use a program called keyhook to poll the keyboard while I bridged some of the connections. You can download it here, about halfway down the page. Once I saw what was available, I soldered some lines on to extend them out of the box and labelled them. All that was left at this point was to mount everything in a container.
Step 3. mount stuff.
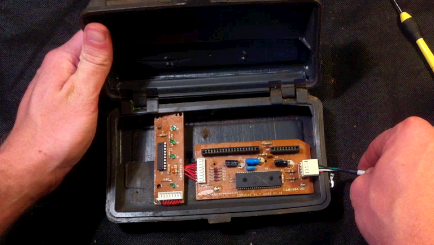
Remember those screws from the keyboard you kept earlier? You can use those to screw stuff into soft plastic. This makes everything much easier. Of course if you went with the idea of keeping the keyboard fully functional, all you would need to do is drill a hole in the keyboard for the extensions to come out and re-assemble. Put your easy connectors on the outside of your enclosure and connect your wires to it. You’re done!
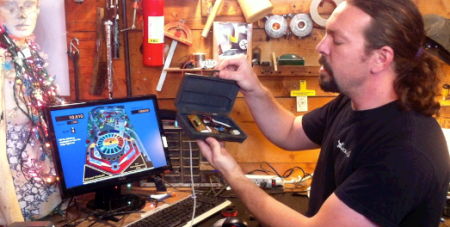
That’s it really. At this point I have a re-usable external controller box. Next, I have to build the stomp pads to connect to it.
Part 2 is now completed, go see how it turned out!


execellent hack, old school, simple, and USEFUL, bonus.
PS: i’d have used parallel port connector for ALL pins, then take “yet another” free parallel printer cable and hardwire one cable up to each project! :) cutting all the other wires… or is 24 not enough for keyboard? enough for gaming me thinks.
even add jumper connections inside
==reconfigure-in-field :)
It’s been a long while since I’ve last seen a computer with a printer connector. It was indeed great for hacks, but it’s good as dead to me now.
My laptops don’t have parallel connectors.
As I understood [NewCommentor1283], he meant put a DB-25 connector on the side of your project box going to the keyboard inputs. Then you can make different controllers that can do any key press. That way you could make stomp pads for this, and in the future make a controller out of, say, ultrasonic sensors then do other keypresses all with the same keyboard hardware.
I see. While that does sound possible, the effort to wire two sides of a db-25 would be more effort than it would be to just use a new keyboard for every project.
Yes it does. It comes in the form of a USB plug and a USB-> parallel port adapter.
[Nate] was correct, i meant to say use matching db25 for the proj.box and cable/connector only
i was not clear.
and with (a) laptop(s) without the actual port(s),
your db25 cables and connectors should ALL be FREE,
now shouldnt they ;)
just remember that DIY stomp sensors and
DIY band-aid’s go together ;) have fun!
and for the record(s), if it doesnt have a parallel(s),
i can always do it on my desktop(s).
your parallel-port-less laptop doesnt interest me,
no matter if its worth 5000$ or more,
UNLESS i can tap into the secondary IDE/PATA and make a parallel port(adapter)
PPS:
http://hackaday.com/2011/02/03/stk200-pocket-change-programmer/
just add 5$ (74LS173,4094,74LS244,ECT)
– anti USB flame self-removed –
extra 1.37819 seconds lolz
M162 L:DF,H:D8,E:F9,U:3F,L:0F
M32 L:1F,H:D9, ,U:3F,L:2F
Hello.
You are creating a similar pinball too.
Software was created in flash(AS3).
Although not yet complete
The site is Japanese only.
http://blogs.yahoo.co.jp/kai_yamamoto/folder/1500625.html
You should use the kinect to track their location rather than stomp panels. thatd be awesome!
considered it, but the time involved for a one or two day amusement would have been too much.
Sparkfun made a stomp Nibble game that was at one or two Maker Faires a couple years ago. I really liked their design: they use accelerometers inside the stomp pads. That way, you don’t have to come up with any moving parts or switch contacts, and can seal the sensors inside whatever is strong enough to hold up to the abuse.
Here are the details for Sparkfun’s stomp pads: http://www.sparkfun.com/tutorials/196
cool idea. More complex than this project needs, but really cool!
i wonder if any of the console pinball games let you remap the buttons so you could use a DDR pad.
Not sure about console ones. I’m using VirtualPinball for pc. You can remap however you want, but it is purely keyboard. There is a program out there called joy2key that translates game pad input to key presses, but I had some minor difficulty getting it to work.
Cool project! And and wonderful goal to get your kids interesting in pinball.
You have me wondering if stomp pads might be fun for a real pinball machine. With the high coil voltage going through the flipper buttons, I suspect would need to use relays so the foam doesn’t catch on fire. :-)
P.S. For your next project you should buy a real pinball machine. With your skills and the guides on pinwiki.com you can fix any problems you encounter. Search on Craigslist. ;)