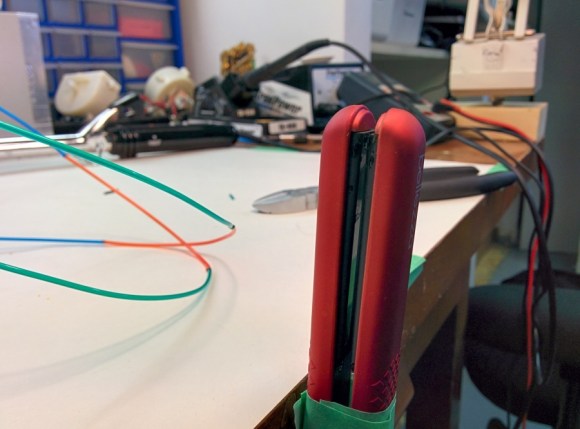
[Malcolm] was having a grand time with his new 3D printer. He was getting tired of monochromatic prints, though. Not having a machine with multiple extruders, he went looking for a way to join pieces of filament. There were a few designs on Thingiverse, but they required milled parts that he didn’t have the tools to recreate. Rather than invest in a mill, [Malcolm] decided to build his own filament joiner. He started by raiding his wife’s hair care tools. His first test was a curling iron. It had the heat, but lacked a good surface to join the filament. [Malcolm’s] next test was a ceramic hair straightener, which he found to be the perfect tool.
The splicing process is simple. Start with a hot iron, then lay two pieces of filament on top of the short end of the iron. They soften quickly and melt together. [Malcolm’s] real trick is to slightly pull the joint once the two pieces have joined. Pulling causes the filament to stretch, slightly reducing the diameter of the joint. A thinner joint helps prevent extruder jams as the joint passes through. This method works great for PLA. We’d love to see if it works for ABS as well.
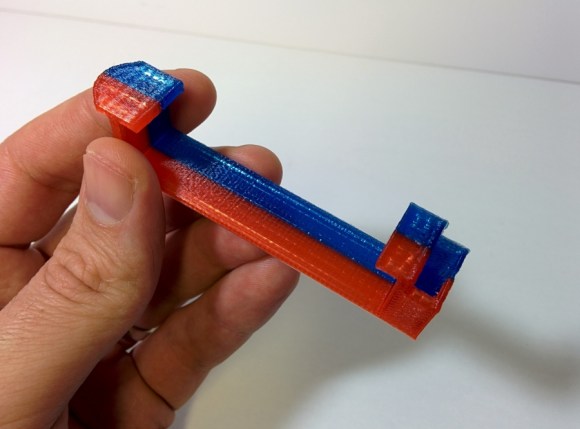
Click past the break for an example piece and for [Malcom’s] instructional video.


Very clever. It’s a shame my wife would kill me and leave my body in a ditch if I ever tried this with her flat iron. :)
“honey, i got you a new fancy hair-iron, so i will just take your old one to the… ahem… dumpster”.
You might consider getting a new one.
Yes, a new wife.
Jesus, have you any idea how expensive that is?
i’m sure there’s a penny auction with free shipping somewhere…
I hope your wife doesn’t read that comment.
If she does, your buying more than just a new flat iron.
So buy another flat iron than destroy your partner’s. This mythical piece of technology can be sourced very cheaply from your local drugstore/department store and probably also chain grocery stores. Of course, you’ll have to walk into the isle with girly stuff in it for like a whole minute. You might get cooties.
Just buy an iron for this project
The easier method is to use the the pause feature in the FW and swap the filament during the pause session. I should do a write up on an alignment pin method i have used in the past.
How would you do this if you were printing from an SD card without the computer attached?
I think it is a bit unfair to bring up a use-case he never even said his solution solved.
but maybe i am reading a valid question as a complaint?
(Though he mentions “FW”, i read that as firmware, so perhaps a micro and a button to interface the firmware pause feature would do the trick – though that is ofcourse technically also using a computer, the pedant could argue :-)
Insert pause in g-code, when it pauses, back filament out of extruder, insert new filament, prime extruder, home any axis you screwed up and in-pause.
The pausing method is definitely the way to go if you are trying to change colors at a specific spot (say, for raised lettering). If you don’t care where the transition occurs, (like with striped rainbow vases) then it’s much easier to make 10 splices than to have to come back and change the filament 10 times. Anyone interested in multi-color printing should check out RichRap if you haven’t already:
http://richrap.blogspot.com/
yeah def the pause method is pretty easy, and has been pretty precise for me as well, if i want it to blend i just swap filaments, if i want it to change colors at an exact layer i just pause on that layer, swap and extrude until the next color comes out, then resume.
Cool. And probably this is one more way to make compact filament extruder – to make injection molded short pieces of filaments by mean of mini injection molding machine and then connect them togever with high temperature (like in this video), or with help of stackable form, like here – http://www.stickfilament.com/
Probably it is possible to combine automatically different types of filament in one extruder and print with it something that needs different materials. Not very precisely, but with acceptible accuracy.
Next, on Divorce Court….
+1 :-)
Did you know you can just *buy* a flat iron? *shock*. Get a cheap one to experiment with. Pay all of 20 bucks for it.
i find it easier to just pause the print, raise the Z axis a few mm, retract the current filament, and stick another filament in, and then hit resume. I actually like to not let it fullt retract and let the colors blend a bit together.
heres an example : http://instagram.com/p/crvVGDtZjw/
Really nice information It’s useful sharing….
You are all a hoot about the wife’s tools. Here is a practical hint.
Hold the filament ends together using a couple of inches of often. Capricorn bowden tubing preferred.
That way the diameter is held to the id of the tubing.
PFTE
sorry, Apple does not understand what PFTE is.
PTFE :-P